

How to Increase Tomato Yield in Containers
Most pot-grown tomatoes underperform for one reason. Learn how to increase tomato yield in containers with 5 proven fixes that change everything. Try them today!
Alright, let’s be real for a second. Most container tomato advice out there is painfully vague — stuff like “use a big pot and water regularly.” Cool, thanks, that’s about as helpful as telling someone to “just cook better.” If you actually want to learn how to increase tomato yield in containers, you need a real game plan, not recycled fluff.
I’ve spent years growing tomatoes on balconies, rooftops, and patios — making every mistake in the book so you don’t have to. And here’s what I’ve figured out: killer harvests from pots aren’t magic. They come down to five things you can totally control. Let’s get into it.
Table of Contents
Quick Summary: The 5 Things That Actually Control Your Tomato Yield
| Yield Variable | What It Does | The Standard You’re Aiming For |
|---|---|---|
| 1. Pot Volume | Root mass → canopy size → fruit load | 15–25 gallons for indeterminates |
| 2. Substrate | Oxygen + nutrient buffering | 2:2:1 high-drainage mix, pH 6.2–6.8 |
| 3. Genetics | Sets your yield ceiling | Compact hybrids or dwarf project varieties |
| 4. Hydration | Calcium transport + fruit quality | Deep, consistent watering (no drama swings) |
| 5. Nutrition | Vegetative vs. fruiting energy | Phase-based feeding protocol |
Nail all five and you’ll genuinely wonder why you ever thought you needed a backyard. Now let’s break each one down so you can increase tomato yield in containers this season.
1. Pick the Right Variety — Because Genetics Set Your Yield Ceiling
Here’s something nobody tells beginners: you can do everything else perfectly, but if you planted the wrong variety, you’ve already capped your harvest. Choosing the best tomatoes for pots is step one, and honestly, it’s the most fun part.
Determinate vs. Indeterminate (Quick Refresher)
Determinate (bush) types grow to a set size, pump out a big flush of fruit, and call it a day. They’re great in 10–15 gallon pots if you want a concentrated harvest — think sauce-making weekend vibes.
Indeterminate (vine) types just keep going until frost shuts them down. They’re the marathon runners. But they’re hungry, and they need 15–25 gallons of root space to really perform. If you want to know how to increase tomato yield in containers with these guys, pot size is everything (more on that in a sec).
Dwarf Tomato Project Varieties Are Seriously Underrated
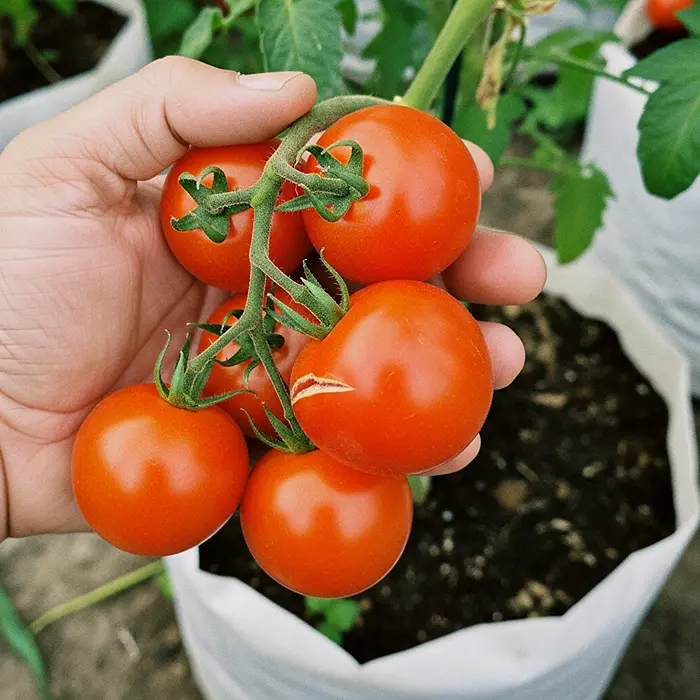
Okay, if you haven’t looked into Dwarf Tomato Project varieties yet, you’re sleeping on one of the best things to happen to container gardening. These compact plants were specifically bred to produce near-beefsteak-sized fruit in just 5–10 gallon pots. Their thick, stocky stems mean way less staking headaches too.
If you’re working with a small balcony or patio, these are your best friends.
What Can You Actually Expect? (Honest Numbers)
| Variety | Plant Type | Avg. Pot Size | Expected Yield |
|---|---|---|---|
| ‘Red Racer’ (AAS Winner) | Compact Hybrid | 10 gal | 15–20 lbs |
| ‘Brandywine’ | Indeterminate Heirloom | 20 gal | 10–15 lbs |
| Dwarf Project Varieties | Dwarf Indeterminate | 7–10 gal | 12–18 lbs |
| ‘Patio Choice’ | Determinate Cherry | 5–7 gal | 8–12 lbs |
These numbers assume you’re following the rest of this guide. Just plopping a ‘Brandywine’ in a random bucket won’t cut it — sorry!
If you’re just getting started with container growing in general, check out our complete guide on how to grow tomatoes in containers for the full beginner-friendly rundown.
2. How to Increase Tomato Yield in Containers With the Right Pot Size
This is the hill I will die on. Your tomato pot size guide starts and ends with one rule: bigger is almost always better.
The 5-Gallon Bucket Myth (Let’s Bust It)
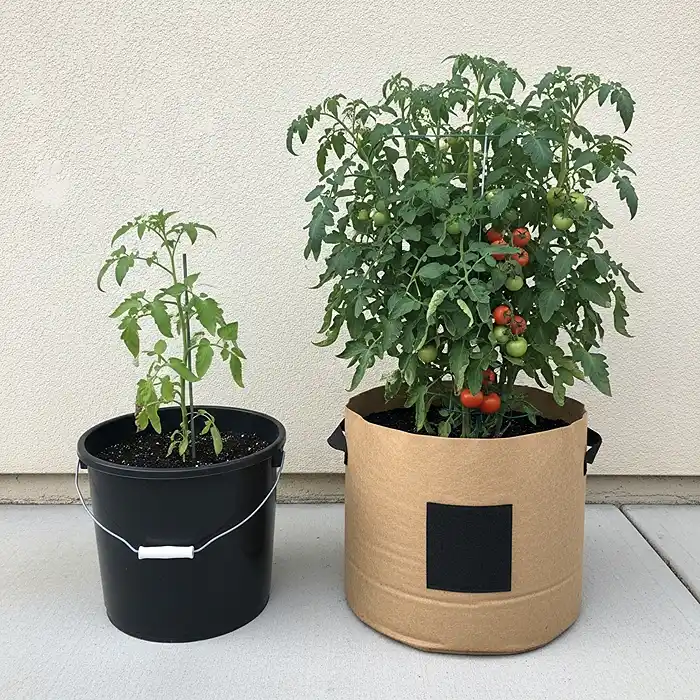
Can you grow a tomato in a 5-gallon bucket? Sure. Will it thrive? Nah, not really.
You’ll be watering that thing 1–2 times a day in summer, and the restricted root space means a smaller canopy and fewer fruit clusters. It’s like trying to run a marathon in shoes two sizes too small — technically possible, deeply unpleasant.
Fabric Grow Bags Are the Move
Seriously, if you haven’t tried fabric grow bags yet, you’re missing out. Here’s why I’m obsessed:
- They prevent root circling — that annoying thing where roots just spin around the pot walls getting nowhere.
- Air pruning creates dense, fibrous root systems that are way more efficient at grabbing nutrients.
- Oxygen exchange is significantly better than rigid plastic containers.
For indeterminate tomatoes, a 20-gallon fabric bag is my go-to recommendation. It’s the sweet spot for learning how to increase tomato yield in containers without going overboard.
Don’t Let Your Roots Cook
Here’s a sneaky yield killer: root zone temperatures above 85°F (29°C) trigger blossom drop and terrible fruit set. If your pots sit on concrete in full sun, you’ve basically got a slow cooker situation going on. Fix it with:
- Light-colored grow bags (tan or white — black bags in full sun are a crime against tomatoes)
- A 2–3 inch mulch layer of straw or wood chips on top of the soil
- Pot feet or a wooden pallet to get containers off scorching surfaces
3. Substrate Engineering — a.k.a. “Don’t Just Use Dirt From Your Yard”
The stuff your tomato roots live in matters way more than most people think. In a container, your substrate is doing the job of cubic feet of garden soil in a fraction of the space. Let’s get it right.
The 2:2:1 Mix That Actually Works
This is the blend I keep coming back to every single season:
- 2 parts quality potting soil (peat or coco coir based)
- 2 parts finished compost (the good stuff, not half-decomposed kitchen scraps)
- 1 part perlite (those little white bits that look like tiny styrofoam balls — they’re for drainage)
- Optional but awesome: 1 cup worm castings per 5 gallons for a gentle nutrient boost
It drains well, holds moisture without getting soggy, and your roots will absolutely love it.
The pH–Calcium Connection (This One’s Important)
Keep your soil pH between 6.2 and 6.8. That’s the sweet spot where calcium actually becomes available to your plant.
Here’s the thing most people don’t realize about Blossom End Rot — it’s usually not because there’s no calcium in your soil. It’s because the pH is off and the plant literally can’t absorb what’s already there.
According to Cornell University’s vegetable growing guides, maintaining proper soil pH is one of the most critical factors in preventing nutrient lockout in container-grown vegetables.
Sub-Irrigation Systems Are a Game-Changer
If you’re serious about learning how to increase tomato yield in containers, consistent moisture is half the battle. Two options I love:
EarthBox-style sub-irrigation uses a reservoir beneath the soil so your plant drinks from the bottom up. It basically eliminates the dry/wet roller coaster that causes cracking and BER.
Ollas (unglazed clay pots buried in the substrate) slowly seep water through their walls. They’re ancient technology and they work beautifully.
4. The Deep Burial Trick — More Roots, More Fruit
This is one of my favorite techniques and it’s embarrassingly simple.
Bury That Stem (Yes, Really)
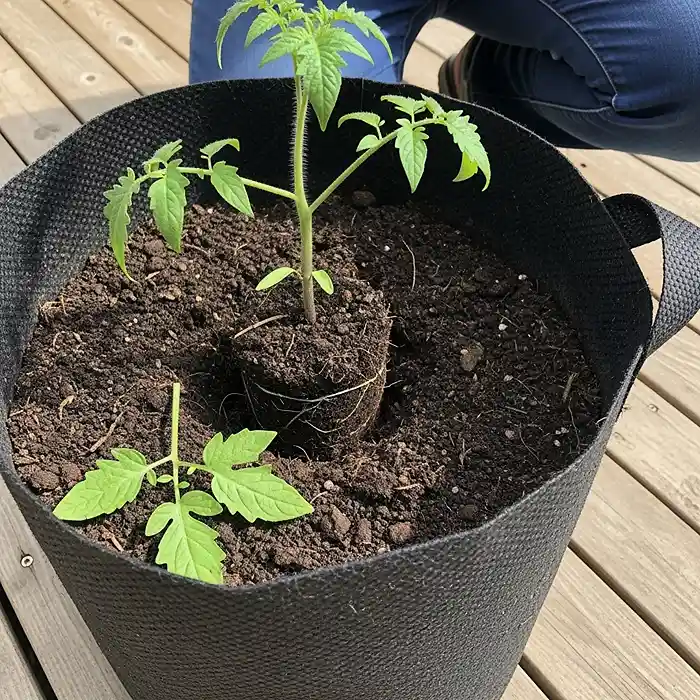
Tomatoes are weirdly cool plants — they can sprout roots from any part of their buried stem. So at transplanting time, strip off the lower leaves and bury up to two-thirds of the stem. All that buried stem tissue will develop adventitious roots, essentially multiplying your root system.
More roots = bigger plant = more fruit. Simple math, huge payoff for increasing tomato yield in containers.
Trench Planting for Wider Pots
Got a wide but shallow container? Lay the transplant on its side in a trench, cover the stem, and leave just the growing tip poking out. The entire buried stem will root along its length. It’s a clever workaround for containers that aren’t super deep.
5. Your Container Tomato Fertilizer Schedule (Phase by Phase)
Using the same fertilizer the same way all season? That’s like eating the same meal for breakfast, lunch, and dinner — technically it works, but you’re not optimizing anything. A smart container tomato fertilizer schedule shifts with your plant’s needs.
Vegetative Phase (Weeks 1–4)
Right now you’re building the leaf canopy — basically your plant’s solar panel array. Use a higher nitrogen fertilizer (something like 5-3-3) every 7–10 days. But don’t go crazy — too much nitrogen makes leggy, floppy plants that fruit poorly later. Ask me how I know.
Flowering & Fruiting Phase
Once you see flowers, it’s time to pivot. Switch to higher potassium and phosphorus (something like 9-15-30), reduce the nitrogen, and feed weekly during peak production. Your container tomato fertilizer schedule during this phase is what really drives those big harvests.
Micronutrient Boosters Worth Adding
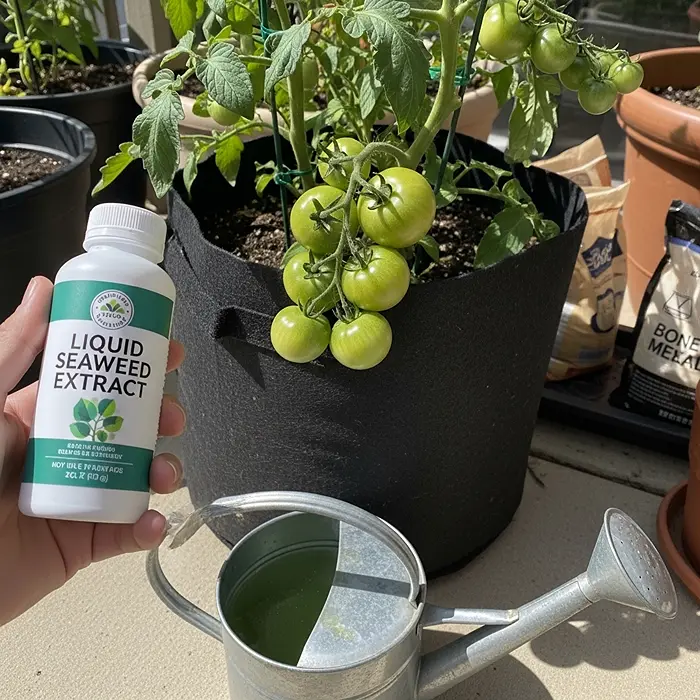
- Seaweed extract — stimulates cytokinin production (fancy way of saying it helps your plant make more and bigger fruit)
- Bone meal — slow-release calcium and phosphorus all season long
- Epsom salt foliar spray (1 tbsp per gallon of water) — only if you see yellowing between leaf veins, which signals magnesium deficiency
6. Pruning & Training — How to Increase Tomato Yield in Containers Through Canopy Management
Sucker Pruning (Indeterminates Only, Please)
See those little shoots growing in the “armpit” between the main stem and a branch? Those are suckers. Pinch off the ones below your first flower cluster to focus the plant’s energy into 1–2 main stems. Better airflow, bigger fruit, less disease. Win-win-win.
Strategic Topping Before Frost
About 6 weeks before your expected first frost, snip off the main growing tip. This tells the plant, “Hey, stop making new flowers and ripen what you’ve got.” It’s a simple cut that can save you pounds of green tomatoes that would’ve never ripened anyway.
Don’t Skimp on Support
A 20-gallon pot loaded with fruit is HEAVY. Use heavy-duty cages or hog panels, and anchor your stakes outside the container. Nobody wants to walk outside one morning to find their prized tomato plant face-down on the patio. Trust me, it’s heartbreaking.
7. Troubleshooting the Biggest Yield Killers
Septoria & Early Blight (The Fun Stealers)
These fungal diseases wreck more container tomato harvests than anything else in humid climates. Keep them at bay by:
- Removing the bottom 6–12 inches of foliage to prevent soil splash
- Watering at the base only — overhead watering is basically rolling out a welcome mat for fungal spores
The Pollination Shake (Sounds Silly, Works Great)
Growing on a high-rise balcony or indoors? Low bee activity? Just gently shake each flower cluster for about 5 seconds daily. Tomatoes are self-pollinating, but they need vibration to release pollen. No bees? Be the bee. It’s weirdly satisfying once you get into it.
Tomato Pot Size Guide: Optimal Sizes for Maximum Yield
| Tomato Type | Minimum Pot Size | Recommended for Max Yield |
|---|---|---|
| Micro-Dwarf | 1 Gallon | 2–3 Gallons |
| Determinate / Bush | 5 Gallons | 10–15 Gallons |
| Indeterminate / Vine | 7–10 Gallons | 20–25 Gallons |
When in doubt? Size up. You’ll never regret giving your tomatoes extra room. It’s one of the easiest ways to increase tomato yield in containers without changing anything else.
Watering & Feeding Schedule (The Quick Cheat Sheet)
Early Season: Water deeply every 2–3 days. Feed with vegetative fertilizer every 7–10 days.
Peak Heat: Check moisture daily — no exceptions. Pots under 10 gallons may need watering every single day. Keep up your weekly fruiting fertilizer.
Late Season: Dial nitrogen way back. Keep watering consistent to prevent cracking on ripening fruit. Follow this container tomato fertilizer schedule and you’ll avoid most late-season headaches.
Frequently Asked Questions About How to Increase Tomato Yield in Containers
Can I reuse potting soil from last year?
Yep! Just pull out old roots, mix in about 3 inches of fresh compost, and don’t plant the same family (tomatoes, peppers, eggplant) in the same soil back-to-back. Rotation matters even in pots.
Why are my tomato blossoms falling off?
Almost always temperature stress. Flowers drop when it’s above 90°F (32°C) during the day or below 55°F (13°C) at night. Shade cloth during heat waves and water jugs near pots for thermal mass can help moderate things.
Are eggshells enough to prevent Blossom End Rot?
Nope, sorry. Eggshells decompose way too slowly to help within a single growing season. The real fix is consistent watering — calcium is usually already in your soil, but it only reaches the fruit through steady, uninterrupted water uptake.
Do I need to prune cherry tomatoes?
Depends on the type! Determinate cherries honestly do better left alone since their growth is naturally self-limiting. Indeterminate cherries benefit from light sucker pruning to keep things manageable and improve airflow.
What are the best tomatoes for pots if I’m a beginner?
Start with compact determinates like ‘Patio Choice’ or Dwarf Tomato Project varieties. They’re forgiving, don’t need as much staking, and still produce impressive harvests in smaller containers.
The Bottom Line: You Engineer Yield, You Don’t Just Hope for It
Look, learning how to increase tomato yield in containers isn’t about having a “green thumb” or getting lucky. It’s about dialing in five things: adequate root volume, the right genetics, consistent moisture, phase-based nutrition, and smart canopy management.
Optimize those variables and your container tomatoes can genuinely rival — sometimes even beat — what most people grow in the ground. Start with one or two upgrades this season, see the difference for yourself, and keep tweaking from there.
That’s how real harvests are built. Now go get your hands dirty — your tomatoes are counting on you!