

Winter Small-Space Gardening
Most winter plant deaths are caused by overwatering, not cold. Learn the exact insulation, light, and watering fixes for balconies and indoor setups. Read now →
Here’s a truth nobody warns you about: more houseplants die between December and February than any other time of year. Not from neglect, exactly — from the wrong kind of care. You keep watering on your summer schedule, the roots sit in cold mush, and by March you’re staring at a pot of sadness.
Winter small-space gardening isn’t about doing more. It’s about doing different. Whether you’ve got a windswept balcony or a cozy indoor garden setup on a windowsill, the rules change the moment temperatures drop. Less water, less food, more protection — and a few clever tricks most people never think of.
This guide breaks down exactly what your plants need from you right now. No fluff, just the winter gardening maintenance moves that actually keep things alive.
Table of Contents
Key Takeaways
- Insulate container roots with layered bubble wrap, fleece, and coir — and get pots off the concrete.
- Clean your windows and leaves before you even think about buying a grow light — you might be blocking 40% of your available sunlight.
- Ditch the misting bottle. It does almost nothing. A humidifier targeting 50% RH is what your plants actually need.
- Water only when the soil tells you to — use the finger test and stop watering after 5 PM.
- Protect your balcony surfaces too — wrong de-icing salt will wreck both your concrete and your plants.
Mastering Balcony Thermodynamics in Winter Small-Space Gardening
Let’s be honest — a potted plant on a balcony in January is basically a popsicle waiting to happen. Unlike plants in the ground, container roots have no earth mass buffering them. They’re exposed on every side, and when that cold wind hits, temperatures in the pot can drop way faster than in any garden bed.
According to Penn State Extension’s guide to overwintering container plants, roots in above-ground containers can reach the same temperature as the winter air itself — which is why they recommend selecting plants rated two hardiness zones colder than your area when growing in pots.
So yeah, your balcony plants need some serious winter gardening maintenance. Here’s how to give it to them.
Multi-Layered Insulation Strategies
Think of this like dressing your pots for a blizzard. One layer won’t cut it — you need the layered approach:
- Inner layer — bubble wrap directly around the pot. Those little air pockets are surprisingly effective thermal insulators.
- Middle layer — garden fleece (horticultural fabric). It’s breathable, so moisture doesn’t get trapped and cause mold.
- Outer layer — coconut coir matting. Weather-resistant, looks clean, and adds one more thermal buffer.
Here’s a trick I don’t see many people mention: wrap aluminum foil around sapling trunks. It sounds weird, I know. But it reflects radiant heat loss and prevents that frustrating bark splitting that happens when temperatures yo-yo between freezing nights and sunny afternoons. It’s cheap, it works, and your neighbors will think you’re a genius (or a little eccentric — either way, you win).
For larger plants, just slip an overwintering sack — those breathable polypropylene covers — over the entire plant and pot. Done in 30 seconds.
Breaking the Conduction Path
This one’s huge, and almost everyone gets it wrong. If your pots are sitting directly on concrete, tile, or stone, the cold is traveling straight up through the bottom and freezing the root zone from below. Concrete is basically a highway for cold. Balcony gardening rule number one: break that contact.
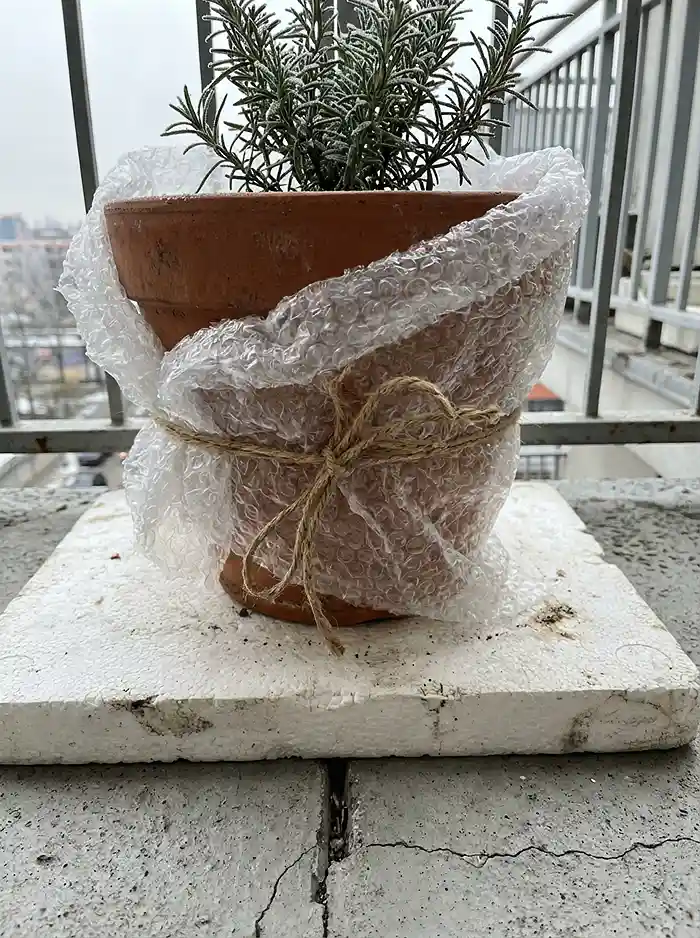
Elevate every pot at least 2–3 cm off the surface. Here’s what works, ranked from best to good enough:
- Pot feet (ceramic or plastic) — stable, purpose-built, easy.
- Wooden boards — natural insulator with decent weather tolerance.
- Polystyrene sheets — fantastic thermal break, costs almost nothing.
- Rubber mats — decent insulation plus grip on windy balconies.
This single change can honestly be the difference between a living plant and a dead one by spring.
Wind Mitigation and Microclimate Grouping
Wind is the sneaky one. You can insulate beautifully, but if a cold wind is ripping across your balcony, it strips heat and moisture from your containers faster than you can replace them.
Push your pots against the building wall. That wall absorbs solar heat during the day and slowly releases it at night — free heating for your plants. And when you cluster pots together, their combined transpiration creates a tiny shared humidity bubble. It’s like plant teamwork.
On exposed edges, install a windbreak screen — bamboo, burlap, or woven reed all work well. They cut wind speed without causing the turbulence that solid barriers create (a solid wall can actually make things worse by creating vortexes — weird but true).
If you’re in the northern hemisphere, a south-facing wall is prime real estate. Most direct winter sun, most retained heat. Put your most cold-sensitive plants there. Everything else can tough it out further away.
Indoor Winter Small-Space Gardening: Light and Humidity Fixes
Bringing plants inside solves the freezing problem. Great. But now you’ve handed them two new enemies: barely any light and air drier than the Sahara. Your indoor garden setup needs adjustments for both, or you’ll watch your plants slowly yellow and crisp.
Light Hygiene — Clean Before You Spend
Before you rush out and buy a fancy grow light, do this first: clean your windows. Seriously. Dust, grime, and water spots on glass can block up to 40% of available light. That’s nearly half your plant’s energy supply, gone before a single photon reaches a leaf.
Wipe both sides — inside and out. You’ll be amazed at the difference.
Then turn your attention to the plants themselves. Dust your leaves. Grab a damp cloth and gently wipe each leaf, top and bottom. That thin layer of household dust is physically sitting on top of the chloroplasts and blocking photosynthesis. It takes five minutes, and it’s one of the highest-impact things you can do for indoor winter plant care.
After that, reposition plants closer to south-facing windows. If you’re short on window space, use reflective surfaces — white poster board, a mirror propped behind the plants, even aluminum foil panels — to bounce light deeper into the room.
Photoperiod Augmentation with LED Grow Lights
If window light still isn’t cutting it (and for herbs, greens, or anything you want actively producing, it probably won’t be), it’s LED time.
- Target a total of 10–14 hours of light per day — natural plus supplemental combined.
- Position LEDs 12 inches (30 cm) above the canopy. Raise them as the plants grow.
- Go with full-spectrum LEDs that include red and blue wavelengths. These cover both leafy growth and flowering needs.
- Use a timer. Just do it. Manual consistency never lasts more than a week before you forget at 6 AM.
One important note: grow lights are only for plants that are actively growing — herbs, winter greens, fruiting crops. Your dormant fiddle leaf fig or resting succulent? Leave it alone. It doesn’t want extra light right now; it wants a nap.
Combating Atmospheric Desiccation
Here’s where things get spicy. Central heating absolutely destroys indoor humidity. The relative humidity in a heated home can plunge below 20% — and most houseplants need 40–60% RH to function. Below that, stomata close, gas exchange halts, and you get those dreaded brown, crispy leaf tips.
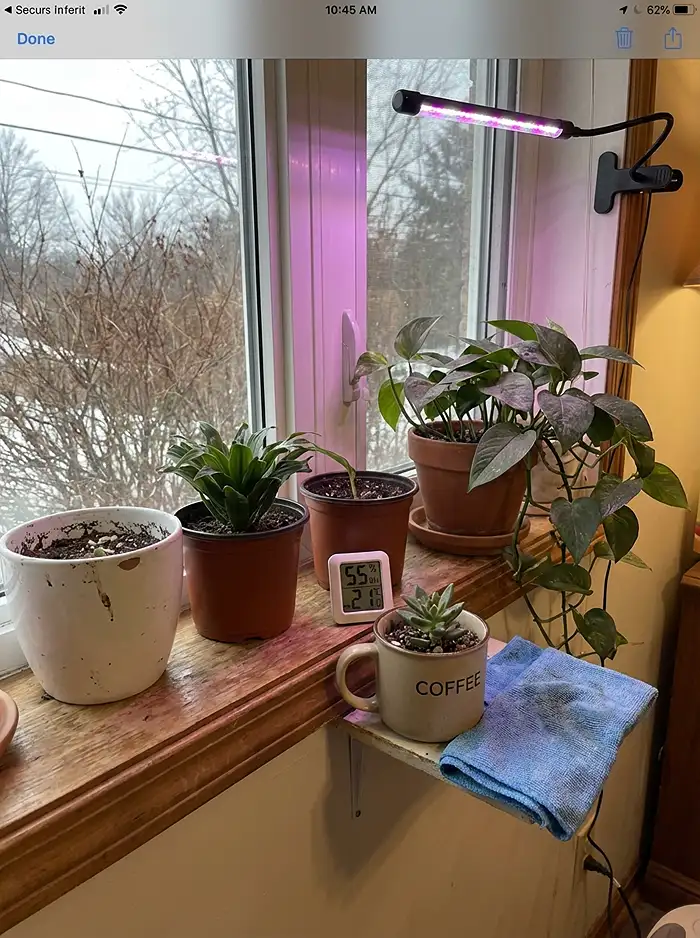
Step one: stop guessing. Get a digital hygrometer (they’re inexpensive) and place it at plant level. Aim for 50% RH.
Step two: put down the misting bottle. I know, I know — everyone on social media loves misting their plants. But here’s the reality: the moisture from misting evaporates in minutes. It provides virtually zero sustained humidity benefit. Worse, wet leaves in stagnant winter air are an open invitation for fungal problems.
Here’s what actually moves the needle:
- A cool-mist humidifier — the only tool that delivers consistent, measurable results.
- Pebble trays with water beneath pots — passive but helpful as a supplement.
- Grouping plants together — their shared transpiration creates a localized humid zone.
And one more thing: keep every plant away from radiators, heating vents, and fireplaces. I’ve seen people position their favorite fern right next to a baseboard heater and then wonder why it’s dying. That blast of hot, dry air desiccates foliage faster than any humidifier can compensate.
Winter Small-Space Gardening Substrate Management: Watering and Feeding
Root rot. That’s the number-one killer of container plants in winter. The math is simple: less light → less growth → less water uptake. If you’re still watering on your summer schedule, the soil stays waterlogged, oxygen disappears, and roots suffocate. By the time you notice, it’s usually too late.
For a month-by-month breakdown of what your plants need and when, check out our Small-Space Gardening Monthly Maintenance Calendar for Beginners — it takes the guesswork out of seasonal transitions.
The Needs-Based Hydration Protocol
Throw away your watering schedule. In winter, you water on demand, not on a calendar.
Use the index finger rule: push your finger into the soil to the first knuckle (about 2.5 cm / 1 inch). Dry? Water thoroughly. Still moist? Walk away and check again in a few days.
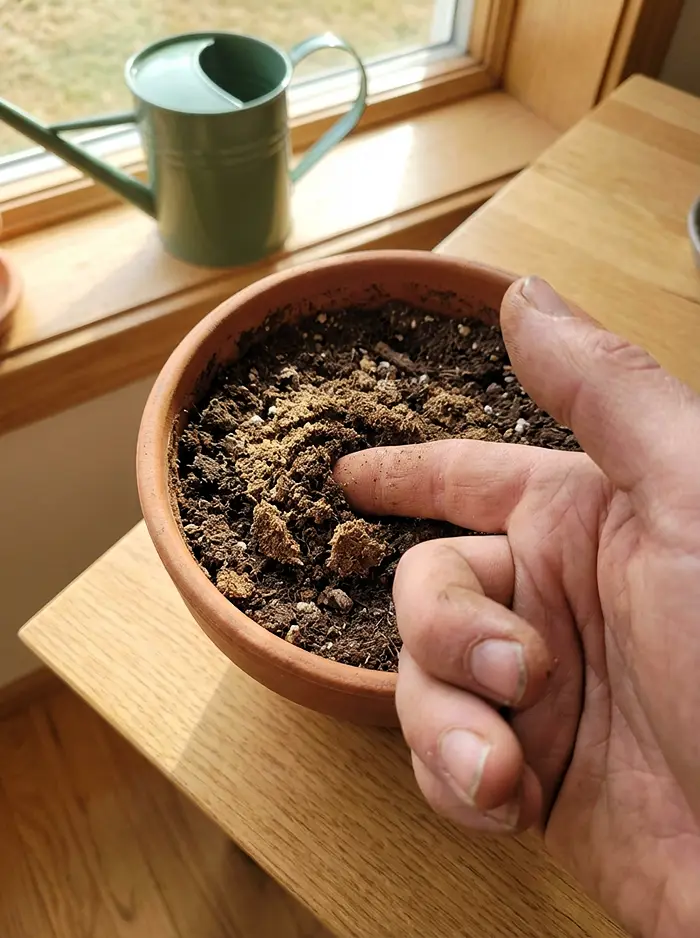
Plants that needed water every week in July might only need it every two to three weeks now. Let the plant tell you — not your phone reminder.
For indoor crops specifically, follow the 5 PM Watering Rule: always water before 5 PM. This gives the soil surface time to dry slightly before nighttime temperatures drop, preventing the nocturnal waterlogging that fungal pathogens love.
A couple more non-negotiables:
- Always use room-temperature water. Ice-cold tap water shocks root cells and slows nutrient absorption. Just fill your watering can and let it sit for an hour.
- Every pot needs functioning drainage holes. And never — never — let a pot sit in a saucer full of standing water. That’s a root rot invitation with a red carpet.
Soil Flushing and Nutrient Regulation
Here’s something most people don’t think about: mineral salts from tap water and leftover fertilizer quietly accumulate in container soil all season. In winter, when plants are barely absorbing anything, those salt levels can reach toxic concentrations and burn roots.
Once a month, flush each pot. Run water slowly through the container at roughly four times the pot’s volume and let it drain completely. This dissolves and washes out the buildup. Think of it as a detox for your soil.
For feeding, the rules are refreshingly simple:
- Dormant plants get zero fertilizer. None. Nada. They’re sleeping; don’t feed a sleeping plant.
- Active crops under grow lights can handle liquid fertilizer at ¼ strength, every 4–6 weeks max.
Why so strict? Reduced light means reduced photosynthesis, which means the plant physically cannot process nutrients. Any fertilizer it can’t absorb just sits in the soil and chemically burns the root system. Less is genuinely more here.
Winter Small-Space Gardening Infrastructure: Hardscape and Tool Care
Your plants aren’t the only things that need winter gardening maintenance. The balcony itself — surfaces, pots, tools — can take a beating if you’re not careful.
Plant-Safe Snow and Ice Removal
Grab the wrong shovel and you’ll crack your balcony tiles before breakfast. Only use plastic or rubber-edged shovels. Metal blades crack tiles, gouge decking, and can puncture waterproof membranes underneath.
De-icing is where people really mess up. Here’s the hierarchy:
- Safe to use: Magnesium chloride or calcium magnesium acetate (CMA). Effective, low corrosion, won’t murder your plants.
- Never use: Sodium chloride (rock salt). It corrodes concrete, destroys grout, and is absolutely lethal to containerized plant roots if it leaches into soil through drainage. Just don’t.
Also, sweep snow off plant covers and cold frame tops before it piles up. Wet snow is shockingly heavy, and lightweight covers can collapse under it.
Preventative Tool and Container Hygiene
Fungal spores, bacteria, and pest eggs love overwintering on dirty pots and tools. A proper end-of-season cleaning breaks that cycle before spring rolls around.
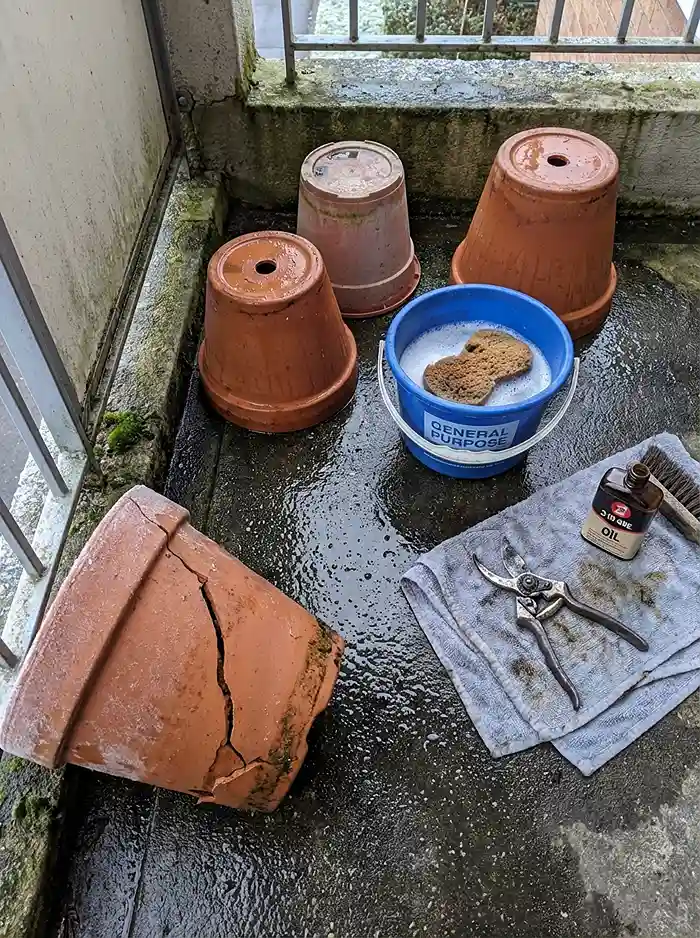
- Scrub all pots with warm soapy water, then rinse with a 10% bleach solution. Let them dry completely.
- Clean and oil your pruning tools. Sharpen the blades — dull cuts create ragged wounds that invite infection into plant tissue.
- Inspect every drainage hole and clear any blockages from compacted soil or creeping roots.
- Store terracotta pots indoors if possible. Terracotta is porous — it absorbs water, and when that water freezes, it expands and cracks the pot from the inside out. If you can’t bring them in, wrap them in bubble wrap.
Frequently Asked Questions
When should I bring my balcony plants indoors?
Move cold-tender species inside once nighttime temperatures consistently drop below 12°C (53.6°F). Hardy perennials and cold-tolerant shrubs can stay out with proper insulation, but tropical and subtropical species have zero frost tolerance — they need to come in early, before that first surprise cold snap catches you off guard.
Why are my indoor plants developing brown leaf tips in winter?
Nine times out of ten, it’s low humidity. Heated homes can drop below 20% relative humidity, which forces plants to close their stomata. Gas exchange stops, leaf edges dry out, and you get those papery brown tips. The fix isn’t misting — it’s a humidifier targeting 50% RH.
Can I use regular salt to de-ice my balcony?
Please don’t. Sodium chloride corrodes concrete, damages grout, and is lethal to containerized plant roots when dissolved salt water drains into the soil. Magnesium chloride or calcium magnesium acetate are effective alternatives that won’t destroy your balcony or your garden.
How often should I fertilize indoor plants in winter?
Most houseplants need zero fertilizer during winter dormancy — their metabolism is too slow to process it, and the excess will burn roots. The only exception is actively growing crops under grow lights, which can handle ¼-strength liquid feed every 4–6 weeks.