

How to Revive Heat Stressed Container Plants
Found your favorite balcony plant collapsed after a brutal heatwave? Here’s exactly how to revive heat stressed container plants before you lose them for good, plus why container plants in pots fail faster than garden beds ever will.
Table of Contents
Understanding Heat Stress in Container Plants
I grow containers on a west-facing patio in Raleigh, zone 7b, and by 2 PM in July the black nursery pots hit root temperatures that would cook an egg. That’s not an exaggeration.
Ground-planted roots sit in soil that stays cool several inches down, insulated by the earth around it. Container roots have no such buffer. A thin plastic or terra cotta wall separates living tissue from direct sun, so the whole root ball can spike 20 to 30°F above ambient air temperature in under an hour.
That’s why a plant that looked fine at breakfast can be a crispy, drooping mess by dinner. It’s not you failing at container gardening. It’s basic physics working against small soil volumes.
Identifying the Signs of Heat Damage vs. Other Issues
Before you treat anything, confirm it’s actually heat stress. Pests, root rot, and disease mimic the same droopy, sad-looking foliage, and treating the wrong problem wastes precious time.
Wilting, Drooping, and Leaf Scorch
Quick Answer: Midday wilt that perks back up by evening is normal self-defense. Crispy, white or brown margins that stay crunchy after watering mean permanent leaf scorch.
Plants curl and droop leaves at peak heat to reduce surface area and slow water loss through transpiration [the process of water evaporating from leaf surfaces]. That’s temporary and reversible.
Scorch is different. Once cell walls rupture from heat and dehydration, that tissue is dead. My potted Japanese maple lost half its canopy to scorch during a 104°F stretch in 2023, and no amount of watering brought those specific leaves back.
Dropping Blossoms and Stunted Growth
Quick Answer: Plants abort flowers and tiny fruits during extreme heat to redirect limited water toward roots and stems, which is a survival move, not a disaster.
Tomatoes are the classic example. My container-grown ‘Patio Choice Yellow’ dropped nearly every blossom during a five-day heat dome last August. The plant itself survived fine and resumed setting fruit two weeks later once temps dropped.
Heat Stress vs. Overwatering Symptoms
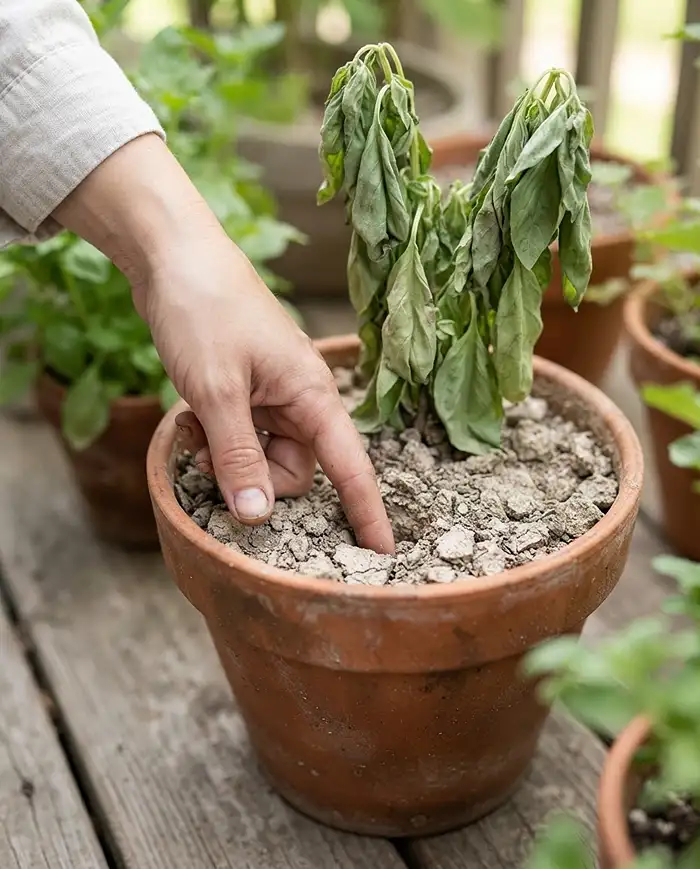
Quick Answer: Both look like severe wilting, but the fix is opposite. Push a finger 2 inches into the soil first, always, before you water anything.
| Symptom | Heat Stress | Overwatering |
|---|---|---|
| Soil feel (2 in. down) | Bone dry, pulling from pot walls | Wet, soggy, smells sour |
| Leaf texture | Crispy edges, thin and papery | Yellow, soft, sometimes mushy |
| Recovery time | Hours to days after deep watering | Days to weeks, may need repotting |
Watering an already-drowning plant guarantees root rot. That finger test takes five seconds and saves plants every single time.
Immediate Triage: First Aid for Sun-Baked Pots
The first 30 to 60 minutes after you spot a heat-shocked plant matter most. Move fast, but don’t skip the order below.
Step 1: Relocating to a Shaded Microclimate
Quick Answer: Carry the pot to full shade immediately, ideally indoors near a cool window or under a covered porch, to stop transpiration and thermal shock.
Don’t just move it a few feet under a nearby tree if the tree canopy is thin. Dappled light still lets soil temperatures climb. I keep an empty spot in my garage for exactly this emergency during small space gardening summers when I can’t add permanent shade structures.
Skip fans blowing directly on the plant too. Moving air increases water loss right when the plant needs to conserve it.
Step 2: The Deep Bottom-Watering Recovery Method
Quick Answer: Submerge the bottom third of the pot in a basin of lukewarm water for 30 to 60 minutes so the dried-out root ball rehydrates from below.
- Fill a bucket, sink, or kiddie pool with room-temperature water, never cold straight from a hose
- Set the pot in so water reaches about a third of the way up the container
- Let it sit 30 to 60 minutes, checking that the soil surface darkens as moisture wicks upward
- Remove and let excess drain fully before returning the pot to shade
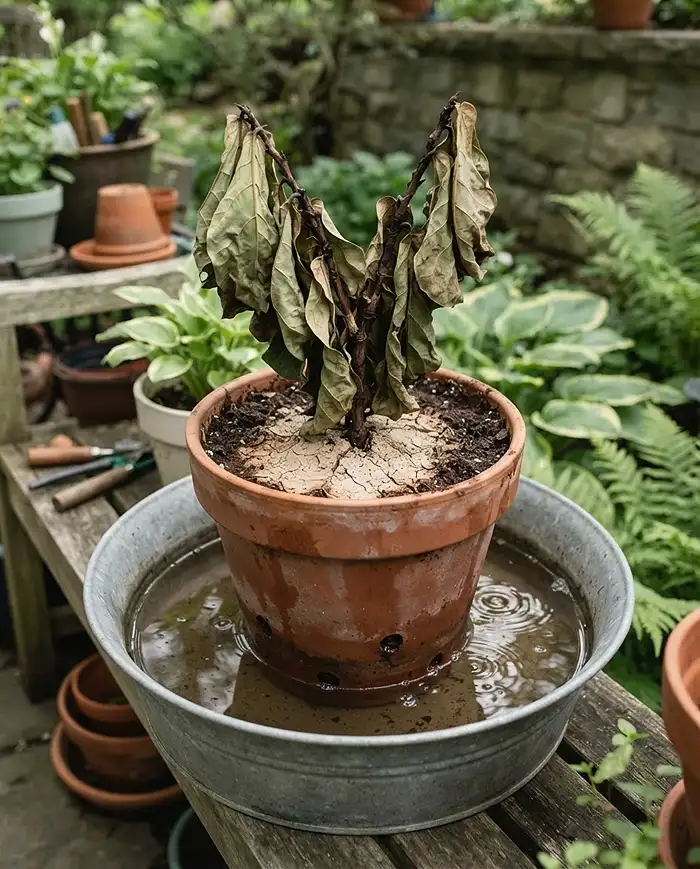
Top-watering a severely dried-out pot mostly just runs down the gap between shrunken soil and the container wall. It looks like you watered, but the root ball stayed dry underneath. I learned this the hard way with a 10-inch pot of rosemary that I top-watered for three straight days before realizing none of it was reaching the roots.
Step 3: Why You Must Pause All Fertilization
Quick Answer: Never fertilize a heat-damaged plant during recovery. Nitrogen salts burn already-stressed roots and can finish off a plant that would otherwise have pulled through.
Wait a minimum of three to four weeks after full recovery before resuming any feeding schedule. Let the plant rebuild root function first.
Long-Term Rehabilitation for Potted Plants
Surviving the first 24 hours is just step one. Real recovery takes weeks of steady, gentle care.
Pruning Scorched Foliage Correctly
Quick Answer: Wait 48 hours after rehydration, then use sterilized bypass pruners to snip only fully brown, crunchy leaves. Leave anything with green tissue intact.
Partially green leaves still photosynthesize, and the plant needs every bit of energy production it can get. Cutting too aggressively right after a heat event pushes an already-traumatized plant into deeper shock.
Rehydrating Hydrophobic Potting Mix
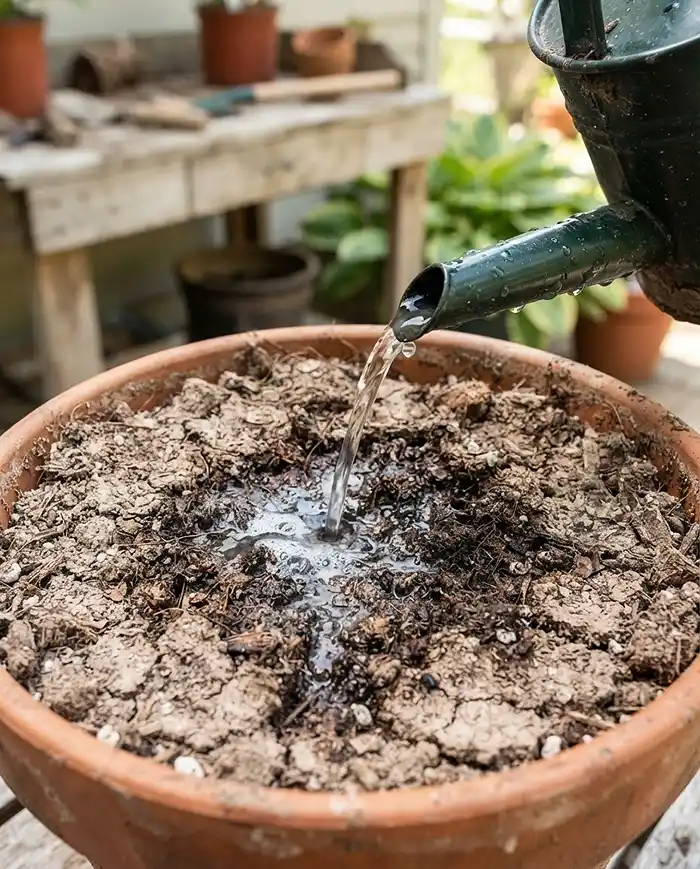
Quick Answer: Peat-based potting mixes that bake bone dry become water-repellent. A few drops of mild dish soap in your watering can act as a surfactant to break that surface tension.
Mix roughly 2 to 3 drops of unscented dish soap per gallon of water and drench slowly. You’ll see the water start soaking in evenly instead of beading up or channeling straight down the pot’s inner wall.
Future-Proofing Containers Against Heat Waves
Once your plant is stable, spend an afternoon heat-proofing the setup so you’re not doing emergency triage every time a heat dome rolls through. This is where urban gardening really pays off in prevention over crisis management.
Utilizing Mulch and Insulated Pots
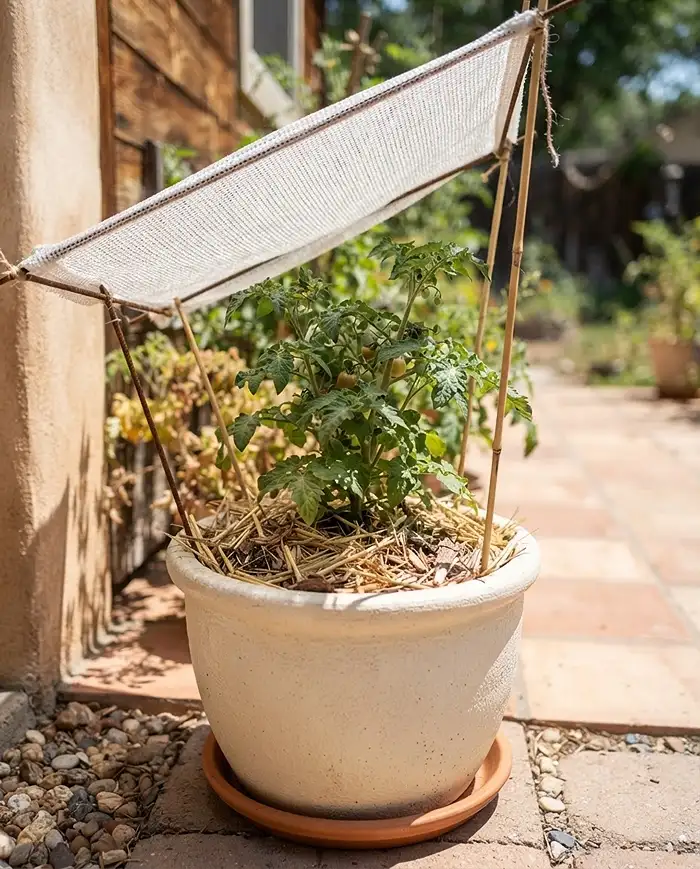
Quick Answer: Switch to light-colored, thick-walled resin or double-walled containers, and add a 2-inch layer of straw or bark mulch over the soil surface.
- Light colors reflect UV rays instead of absorbing them like dark plastic or metal pots do
- Double-walled resin pots add an insulating air gap around the root zone
- A 2-inch mulch layer can cut soil moisture evaporation dramatically during peak heat
If you’re working with a tight patio or fire escape, our guide on space-saving small garden ideas covers container upgrades that don’t eat up extra floor space.
Erecting Temporary Shade Structures
Quick Answer: Deploy 30% to 40% UV-blocking shade cloth, or angle a patio umbrella, over vulnerable south-facing pots between noon and 4 PM.
That four-hour window does the most damage. According to Oregon State University Extension’s heat stress guidance, moving containers into shade and adding temporary cover during the hottest stretch meaningfully reduces heat stress symptoms.
New to growing on a balcony or small rental patio? Our apartment gardening for beginners guide walks through shade placement basics too.
Common Problems & Solutions
A heat-shocked plant’s weakened state invites a second wave of trouble right when it’s least equipped to fight back.
Crispy Edges Despite Wet Soil
Quick Answer: Crispy margins on soil that’s clearly moist usually point to wind burn or fertilizer salt buildup, not heat stress. Flush the pot with a slow stream of distilled water to leach out trapped minerals.
Run water through the container for several minutes until it drains freely from the bottom, then let it dry slightly before your next normal watering.
Spider Mite Infestations on Weakened Plants
Quick Answer: Spider mites target hot, dry, stressed plants aggressively. Check the undersides of leaves for fine webbing, then blast with a strong hose stream followed by organic neem oil.
My container hibiscus picked up mites within a week of a heat event two summers ago. Two hose blasts three days apart, plus a neem oil application, cleared it without harsher chemical miticides.
revive heat stressed container plants FAQs
Should I cut off all the burnt leaves immediately?
No. Removing too much foliage right after heat damage sends the plant into deeper shock. The plant often reabsorbs nutrients from dying leaves before they naturally drop, so wait 48 hours and only trim fully brown, crunchy tissue.
How long does a potted plant take to recover from heat shock?
Turgor pressure and stem firmness often return within 12 to 24 hours of deep watering. True recovery and new vegetative growth typically take two to three weeks of stable, moderate conditions.
Is watering plants during the hottest part of the day dangerous?
No, the idea that water droplets magnify sunlight and burn leaves isn’t supported by horticultural research. If a container plant is actively wilting and dying at 2 PM, water it immediately rather than waiting for evening.
Can I use ice cubes to slowly water a stressed container plant?
It’s better to avoid it. Ice cubes chill the root zone unevenly and add cold shock on top of heat stress. Use lukewarm water and the bottom-soak method instead.
Will a heat-stressed plant ever look fully normal again?
Often yes, once new growth replaces scorched foliage over several weeks. Severely damaged stems or a badly compromised root system may leave some permanent dieback, but most container plants rebound with consistent care.
Key Takeaways
- Knowing how to revive heat-stressed container plants starts with the right diagnosis: check soil moisture before assuming the worst
- Move the pot to shade, then deep-soak the root ball from the bottom for 30 to 60 minutes before doing anything else
- Skip fertilizer during recovery and only prune fully dead, crunchy foliage after 48 hours
- Upgrade to light-colored, insulated pots and mulch before the next heatwave hits, especially if you’re working with tiny garden ideas on a small balcony
- If you’re arranging several pots at once, our container garden layout with 5 pots guide helps you group plants by sun exposure to prevent this next time