

How to Prevent Root Bound Vegetables in Small Pots
If you want to prevent root bound vegetables, start with the right pot size and never skip repotting. Root binding is the #1 silent killer of container crops — and it’s almost entirely avoidable.
I grow vegetables on a 60-square-foot rooftop terrace in zone 6b. I’ve killed more tomatoes than I care to admit by ignoring the warning signs until it was too late. This guide covers everything I’ve learned the hard way.
Table of Contents
Understanding Root Bound Vegetables in Container Gardens
Every vegetable plant has one job underground: expand its root system to feed itself. In the ground, roots spread outward freely. In a container, they hit a wall — literally — and have nowhere to go.
When roots reach the pot’s edge, they don’t stop growing. They circle, spiral, and stack until the rootball becomes a tangled, airless mass. That’s when your plant starts suffering, even if the leaves still look okay above soil.
What Does It Mean When a Plant is Root Bound?
A root bound plant has more root mass than its pot can reasonably support. The roots have wrapped around themselves so tightly they form a dense mat.
That mat blocks water from penetrating evenly. It crowds out the soil pores roots need for oxygen. Nutrient uptake slows to a crawl because the fine root hairs — which do most of the absorbing — are crushed or suffocated.
The plant goes into survival mode. Growth stalls. Fruit production drops. In severe cases, the plant declines fast even when you’re watering and fertilizing consistently.
Signs Your Vegetables Are Outgrowing Their Pots
Catch these early and you can still save your crop:
- Roots poking out of drainage holes — the most obvious sign. If you see white roots dangling out the bottom, repot this week, not next month.
- Soil drying out within 24 hours — dense roots displace soil volume, so there’s less growing medium to hold moisture.
- Top-heavy plant that tips easily — the root-to-soil ratio is off. The plant is too large for its base.
- Stunted new growth despite regular feeding — roots can’t uptake what you’re giving them.
- Yellowing lower leaves with green upper growth — classic sign of nutrient lockout from compacted roots.
- Pot sides bowing outward — in plastic containers, severe root binding physically deforms the pot.
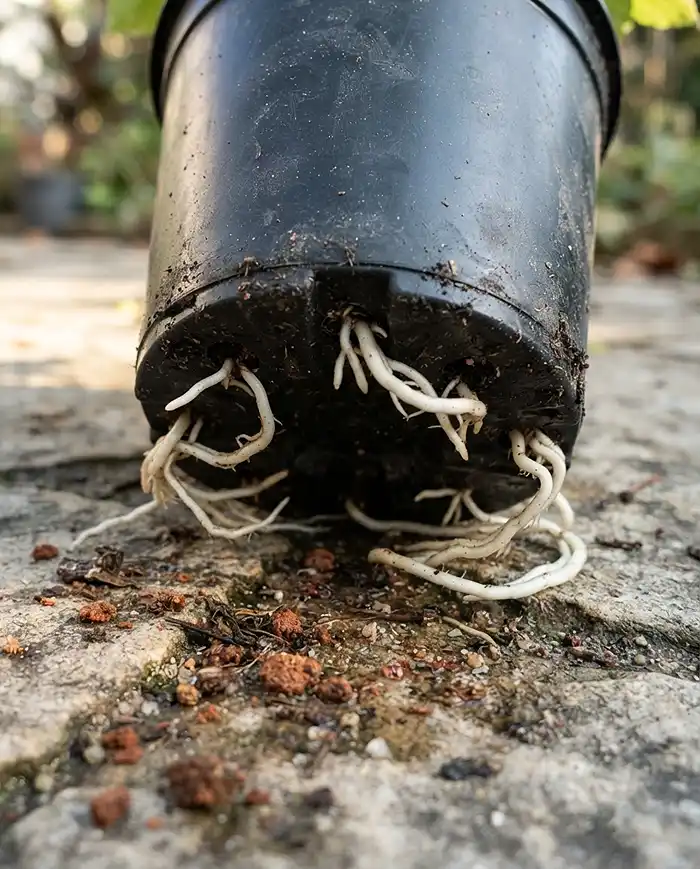
In spring 2023, my ‘Patio’ bush tomato suddenly dropped half its flowers despite looking lush. I pulled it out and found a completely spiraled rootball. Two weeks of good weather wasted because I ignored the drainage-hole signal.
Choosing the Right Container Size for Different Vegetables
The general rule: match pot depth to the plant’s mature root depth, and add at least 2 inches of buffer. Most gardeners go too small — using the wrong pot size is the fastest path to a root bound plant.
For vegetables suited to container gardening, always check the mature root depth before buying your pot, not after.
Shallow Root vs. Deep Root Vegetables
Shallow-rooted crops only need 6–8 inches of depth. Deep-rooted crops need 12–18 inches or more. Putting a deep-rooted crop in a shallow pot is the single fastest way to create a root bound problem.
| Vegetable | Root Depth | Minimum Pot Depth | Minimum Volume |
|---|---|---|---|
| Lettuce | Shallow | 6 inches | 1–2 gallons |
| Radishes | Shallow | 6–8 inches | 1–2 gallons |
| Spinach | Shallow | 6 inches | 1–2 gallons |
| Bush beans | Medium | 8–10 inches | 3–5 gallons |
| Peppers | Medium-deep | 10–12 inches | 5 gallons |
| Tomatoes (bush) | Deep | 12–14 inches | 7–10 gallons |
| Tomatoes (indeterminate) | Deep | 18+ inches | 15–20 gallons |
| Carrots | Deep | 12–18 inches | 5+ gallons |
Explore the full list of root vegetables that thrive in containers to plan your layout before you buy pots.
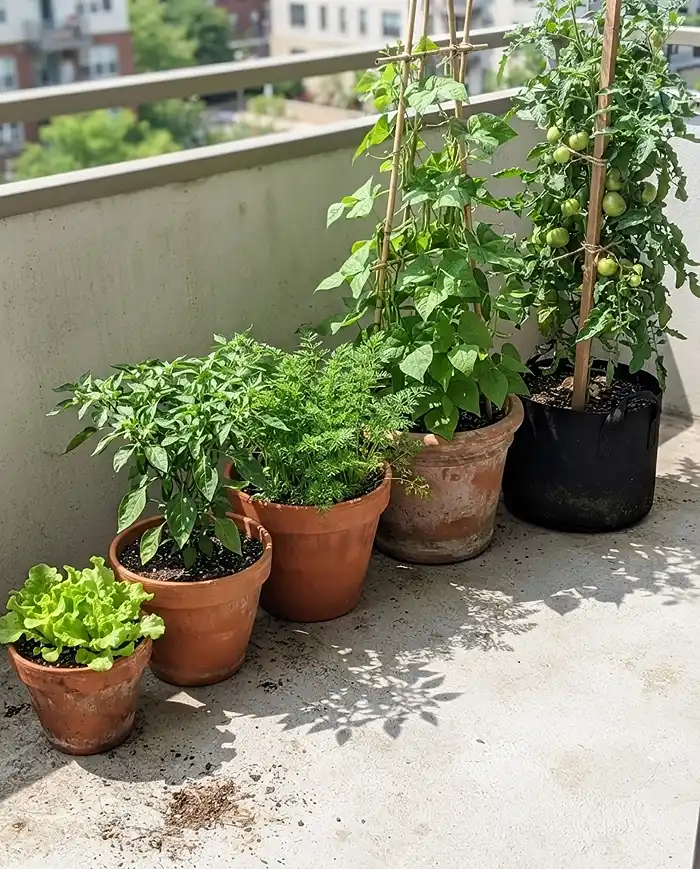
Essential Soil and Watering Strategies for Small Pots
A small pot has no margin for error. The wrong soil compacts fast, cuts off oxygen, and crams roots together before they’ve even had a chance to establish. Good soil and smart watering buy you weeks of extra growing time before roots hit the wall.
The Best Potting Mix to Encourage Healthy Root Growth
Never use garden soil in containers. It’s too dense, compacts under watering, and smothers roots in small pots.
My go-to mix for container vegetable gardening in tight spaces:
- 50% quality potting mix — look for bark fines and perlite already blended in
- 25% extra perlite — improves drainage and keeps air pockets open as roots grow
- 15% coconut coir — holds moisture without compacting, unlike peat
- 10% compost — slow-release nutrients that reduce how hard roots have to work
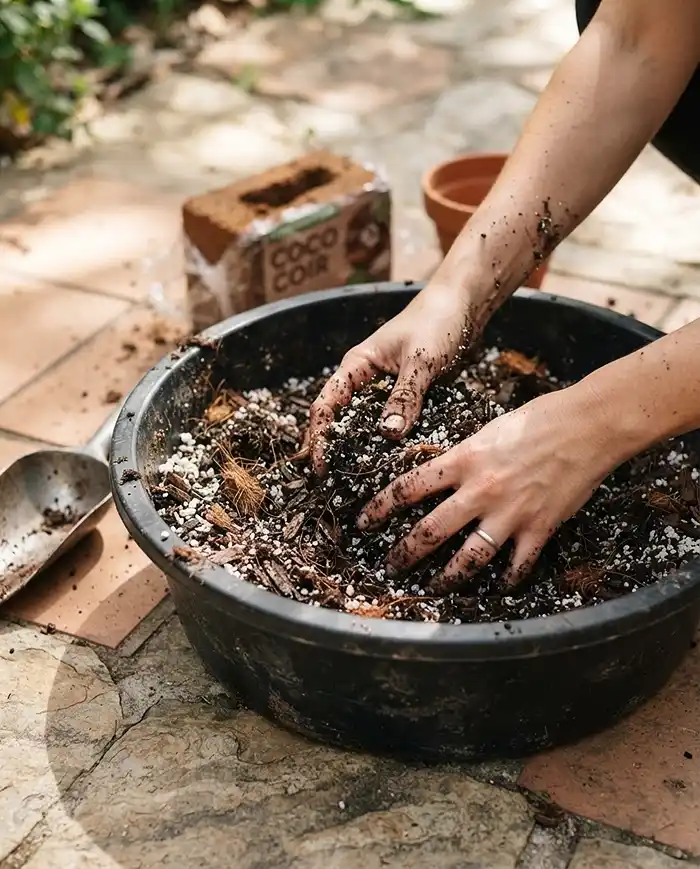
This blend stays loose even after months of watering. Roots push through it easily rather than spiraling around compacted clumps.
For deeper guidance on getting the mix right, the best soil for root vegetables in containers breaks down specific amendments by crop type.
The University of Florida IFAS Extension confirms that container media should drain freely and maintain adequate aeration for healthy root development — standard garden soil fails both criteria.
Watering Techniques to Prevent Compacted Roots
Top-down watering, done hard and fast, is one of the most underrated causes of soil compaction in small pots. Each heavy pour presses soil particles together and narrows the air channels roots depend on.
Bottom watering is the fix. Set your pot in a tray of water for 20–30 minutes. The soil wicks moisture upward, roots follow the water downward (instead of crowding the surface), and no compaction occurs at the top layer.
If bottom watering isn’t practical, use a watering wand with a gentle rose head and water slowly in a circular motion. Never dump water from a height.
A simple drip irrigation setup — even a DIY bottle dripper — keeps moisture consistent without compression. Consistent moisture also means roots don’t panic-grow toward wet zones, which is one trigger for circular root patterns.
Step-by-Step Guide: How to Prevent Root Bound Vegetables
To prevent root bound vegetables, the work starts at planting time, not when you notice something is wrong. These steps keep roots growing outward from day one.
Proper Potting and Root Pruning Techniques
When transplanting a nursery seedling, don’t just drop it into a new pot. Take 60 seconds to prep the rootball — it makes a real difference.
Step 1: Gently squeeze the nursery pot to loosen the rootball. Tip the plant out carefully.
Step 2: Look at the roots. If they’re already circling the outside of the ball, that pattern will continue in the new pot if you don’t break it now.
Step 3: Use your fingers to tease apart the outer roots, pulling them outward and downward. For severely tangled roots, use clean scissors to make 3–4 vertical cuts, 1 inch deep, around the sides of the rootball. This sounds brutal but triggers new outward growth.
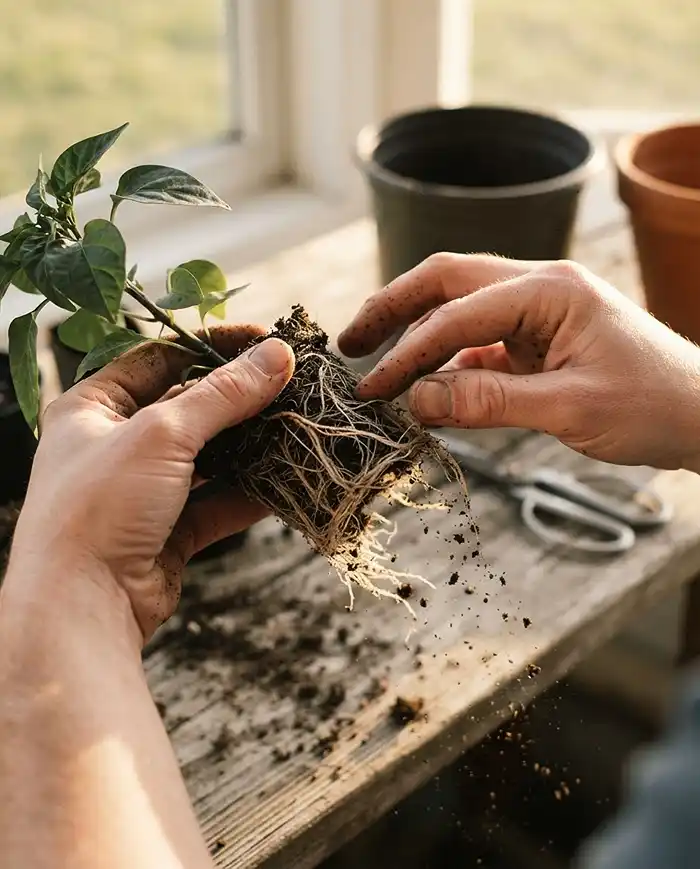
Step 4: Place the plant in the center of the new pot. Roots should point outward and slightly downward — not coiled against the pot wall.
Step 5: Fill in with your prepared soil mix, pressing gently (not firmly) around the roots. Water immediately using the bottom-watering method.
I did this with a ‘California Wonder’ pepper transplant in May 2024 that had been sitting in a 4-inch nursery pot too long. After teasing and trimming the roots, it pushed out new growth within 10 days and produced heavily all summer.
Strategic Transplanting and Potting Up
The key to container vegetable gardening is staying one step ahead of root growth. Don’t wait for symptoms — pot up on a schedule.
Fast-growing crops like tomatoes and cucumbers may need potting up every 3–4 weeks in early season, moving from a 4-inch nursery pot to a 1-gallon, then a 3-gallon, then their final container.
Jump no more than one container size at a time. Going from a 4-inch pot to a 10-gallon all at once leaves too much empty soil around the roots. That unused soil stays wet, gets cold, and invites root rot.
The right moment to pot up: when you see the first root tips at the drainage hole, or when the plant doubles in size from when you last repotted. Don’t wait for full root binding — that’s already a setback.
Common Problems and Solutions
Sometimes you miss the window. Here’s how to handle vegetables that are already showing root stress.
Stunted Growth and Yellowing Leaves
Yellowing lower leaves paired with stunted growth usually means nutrient lockout — the roots are too congested to absorb fertilizer even when you’re applying it correctly.
Immediate fix: Apply a diluted liquid fertilizer as a foliar spray directly onto the leaves. The plant absorbs nutrients through its leaf tissue, bypassing the root problem temporarily.
Use a balanced liquid feed (10-10-10) at half strength. Spray in early morning so leaves dry before the sun is strong.
Then repot the plant within the week. Foliar feeding buys you time — it doesn’t fix the underlying issue. Get the roots into fresh soil and a larger container as soon as possible.
Water Running Straight Through the Pot
When water runs out the bottom instantly without absorbing, the rootball has gone hydrophobic. Dense, dry roots repel water rather than absorbing it.
Don’t keep watering from the top — you’re just running water around the rootball, not into it.
The fix: Fill a tub or bucket with room-temperature water. Submerge the entire pot until it stops bubbling — usually 20–40 minutes. The bubbles are trapped air escaping as water forces its way back into the soil pores.
After soaking, let the pot drain fully, then repot into a larger container with fresh mix. A hydrophobic rootball that bad won’t recover well in the same pot.
Frequently Asked Questions
Can a root bound vegetable plant be saved?
Yes, most root bound vegetables can be saved if you act quickly. Remove the plant from its pot, score the sides and bottom of the rootball with a clean knife in 3-4 vertical cuts, then repot into a container one size up with fresh potting mix. Water thoroughly and move to light shade for a few days while the plant recovers. Severely root bound plants may take 2 weeks to bounce back, but most will.
How often should I repot my container vegetables?
Fast-growing crops like tomatoes and peppers may need potting up every 3-4 weeks in early season. Most vegetables in their final fruiting container should stay put for the growing season — repotting a flowering or fruiting plant causes stress. The signal to repot is roots at the drainage holes or soil drying out within 24 hours of watering, not a fixed calendar date.
Which vegetables do best in very small pots?
Microgreens, spinach, lettuce, bush beans, baby radishes, and green onions are the best options for very small containers (1-2 gallons or less). They have naturally shallow root systems and short lifecycles, so they rarely become root bound before harvest. Avoid deep-rooted crops like tomatoes, carrots, or peppers in pots under 5 gallons.
Does pot material affect root binding?
Yes. Dark plastic pots heat up and can stress roots near the edges in summer, accelerating circular root growth. Fabric grow bags are excellent because roots air-prune at the edge — when a root tip reaches the fabric wall, it dries out and stops circling. This makes fabric bags one of the best passive tools to prevent root bound vegetables.
Can I add fertilizer to a root bound plant instead of repotting?
Fertilizer alone won’t fix a root bound plant. When roots are too compacted to absorb water and nutrients properly, adding more fertilizer can cause salt buildup and make things worse. Foliar feeding can give temporary relief, but repotting into a larger container is the only real solution. Fertilize after repotting, not instead of it.
Key Takeaways
- To prevent root bound vegetables, match pot size to mature root depth from the start — using the wrong pot size is the most common and avoidable mistake in container vegetable gardening.
- Tease apart or lightly score nursery rootballs at planting time to stop circular root patterns before they start.
- Use a loose, perlite-heavy soil mix and bottom-water when possible to avoid compaction that speeds up root binding.
- Watch for early warning signs — roots at drainage holes and fast-drying soil — and pot up before symptoms get serious.
- Fabric grow bags passively air-prune roots and are one of the best investments for vegetables in pots on a tight space.