

How to Grow Salad Greens in Small Planters
Let me tell you something that changed how I think about groceries forever: that $5 bag of “triple-washed” spring mix in your fridge? It started losing vitamins the second it was harvested — possibly days before you even picked it up. By the time you dress it with olive oil and lemon, up to 30% of its vitamin C is already gone.
Now here’s the good news. Learning how to grow salad greens in small planters is embarrassingly easy, and you don’t need a backyard, a green thumb, or any prior experience. A sunny balcony corner and about 20 minutes of setup will do it.
This whole guide runs on what I call the Systemic Container Approach — four variables that determine everything: your vessel, your substrate, your cultivar, and your irrigation. Nail those four, and you’ll be cutting fresh salad from your own planter in under 45 days. Let’s get into it.
Table of Contents
Why Containerized Salad Greens Are the Ultimate Urban “Profit” Crop
I’m not talking about profit in dollars (though you’ll save plenty). I’m talking about nutritional ROI — the sheer amount of vitamins and minerals you get per square foot of living space.
Think about it this way: a single $3 seed packet of loose-leaf lettuce produces enough greens to replace weeks of those pre-packaged clamshells. You cut a leaf, you eat it. The nutrients haven’t had time to degrade because they didn’t spend three days in a refrigerated truck crossing the country.
And honestly? It’s not just about you. Growing your own greens quietly solves a bunch of environmental problems too:
- Zero plastic packaging — no clamshells, no shrink wrap, no bags headed for landfill.
- Zero food miles — your seed-to-plate distance is measured in feet, not interstate highways.
- Closed waste loop — kitchen scraps compost right back into the same planter they came from.
- Less water waste — container irrigation is precise and targeted, unlike the broadcast sprinklers of industrial farms.
If you’re curious about growing more than just lettuce in containers, our full guide on container gardening for food: vegetables & herbs covers everything from tomatoes to basil.
The Physics of the Planter: Beyond Aesthetics
Here’s where most beginners go wrong — they grab whatever cute pot is on sale at the hardware store and hope for the best. But your container isn’t decoration. It’s infrastructure. Before a single seed goes in, the planter itself decides whether you’re harvesting salad or disappointment.
Depth and the “Thermal Mass” Principle
Shoot for 10 to 12 inches of depth. That’s the sweet spot — deep enough for roots to stretch out, and heavy enough with soil to act as a thermal buffer against those wild temperature swings your concrete balcony throws at your plants every afternoon.
Shallow pots under 6 inches? They’re basically frying pans by 2 PM. They overheat fast and dry out even faster. The logic is simple: more soil volume means slower temperature change, and slower temperature change means your roots aren’t constantly stressed out.
Material Science — Terra Cotta vs. Steel vs. Fabric
Not all planters are created equal, and the material matters more than you’d think:
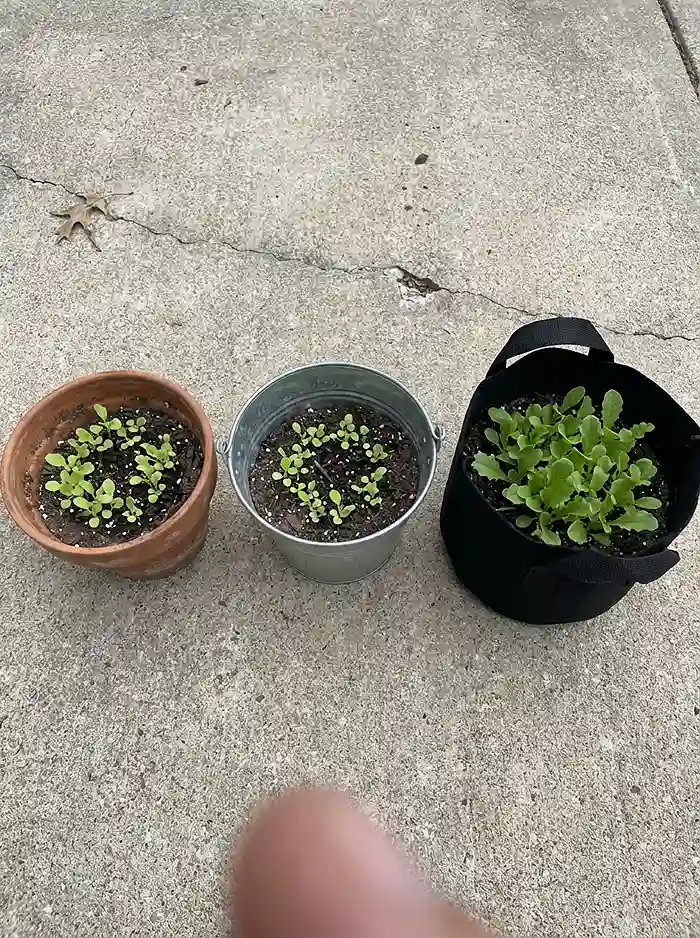
| Material | Durability | Moisture Retention | Aeration | Best For |
|---|---|---|---|---|
| Terra Cotta | High (but breakable) | Low — porous, dries fast | Excellent | Dry climates; people who tend to overwater |
| Galvanized Steel | Very High | High — non-porous | Poor | Aesthetic rooftop setups; needs drainage mods |
| Fabric Grow Bags | Moderate (2–3 seasons) | Moderate | Excellent (air-prunes roots) | Balconies; weight-conscious setups; beginners |
My honest recommendation? Go with fabric grow bags. They’re cheap, lightweight, breathable, and practically foolproof for anyone figuring out how to grow salad greens in small planters for the first time.
Engineering Drainage Excellence
This is non-negotiable: you need at least one drainage hole per square foot of planter base. No drainage, no oxygen exchange, and your greens will rot from the bottom up.
Pro move: elevate your planters on pot feet or a couple of spare bricks. This stops the drainage holes from sealing flat against whatever surface they’re sitting on.
And here’s a trick I wish someone had told me earlier — line the bottom of your planter with a single coffee filter or a strip of burlap. Water drains right through, but your expensive potting mix stays put instead of slowly washing away every time you water.
Substrate Optimization — The “3:1 Matrix” for Rapid Growth
Why Garden Soil Fails in Containers
I know it’s tempting. You’ve got a yard full of dirt — why buy soil? Here’s why: garden soil compacts like concrete inside a container. In the ground, earthworms and seasonal freeze-thaw cycles keep things loose. Inside a pot, neither of those exists.
Compacted soil creates anaerobic dead zones where roots suffocate and fungal pathogens throw a party. The rule is simple and absolute: if it came from your backyard, it doesn’t belong in your planter.
The Ultimate Potting Mix Recipe
Here’s the formula I use every single time:
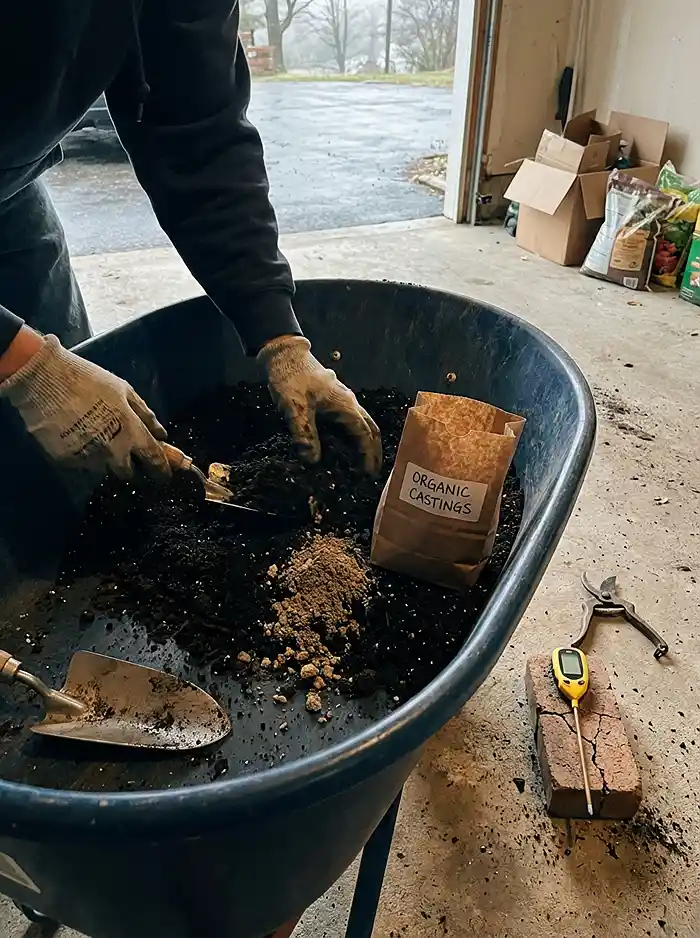
3 parts organic potting soil + 1 part earthworm castings (vermicompost)
Why this works so well is that earthworm castings deliver slow-release nitrogen — exactly what leafy greens are hungriest for — without the root-burn risk you get from synthetic fertilizer or raw manure. It’s gentle, effective, and basically impossible to mess up.
If you live somewhere humid, toss in a handful of perlite per gallon of mix. It opens up the substrate for better drainage and keeps things from getting waterlogged.
Managing pH for Nutrient Access
Your target pH range is 6.0 to 7.0. Stay inside that window.
Outside it, essential nutrients like iron, phosphorus, and calcium get chemically “locked” in the soil. They’re physically there, but your plants can’t access them — it’s like having a full fridge with a padlock on the door.
A basic pH soil probe or litmus strip kit costs under $10 and takes the guesswork out entirely. If you need to adjust, dolomite lime raises pH and elemental sulfur lowers it. Go slow — small corrections only.
According to the University of Minnesota Extension, regular soil testing is one of the most overlooked steps in successful container growing, and it makes a measurable difference in plant health.
Strategic Cultivar Selection — High-Yield Varieties for Small Spaces
The “Cut-and-Come-Again” Hierarchy
If there’s one technique in this entire guide that delivers the most payoff for the least effort, it’s the cut-and-come-again method.
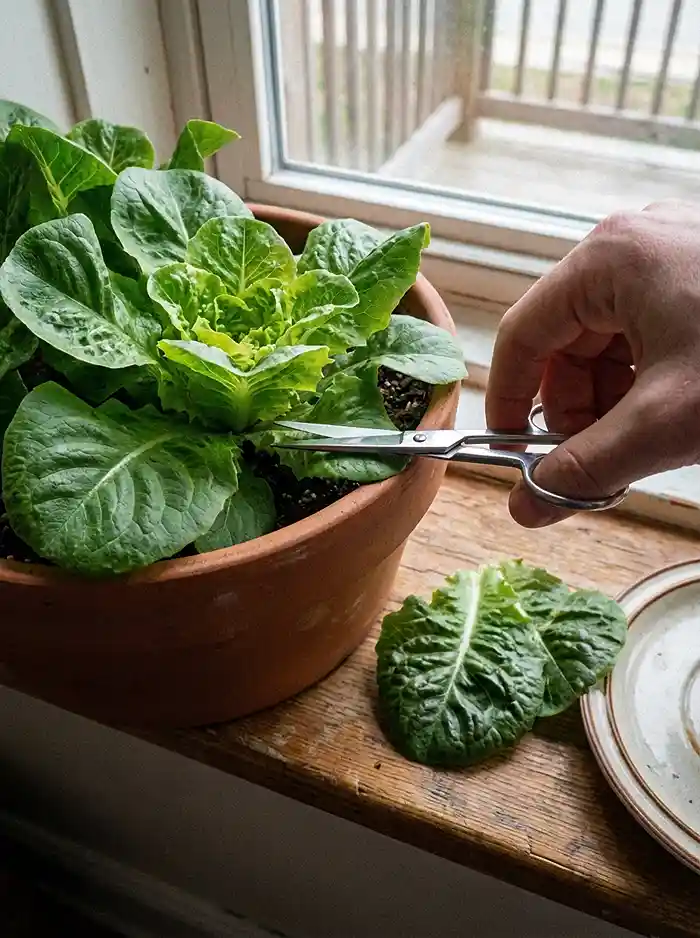
Instead of pulling the whole plant when it looks ready, you snip only the outer, mature leaves with clean scissors. The growing center — the crown — stays intact and keeps pushing out new leaves. One planting, multiple harvests, for weeks on end.
Seriously, this single method can stretch a planting’s productive life by 3 to 5 times. It’s the reason a tiny balcony planter can keep pace with your salad habit all season long.
Top 5 Best Lettuce Varieties for Pots
Here are my go-to picks, ranked by how quickly they’ll land on your plate:
| Variety | Days to First Harvest | Why I Love It |
|---|---|---|
| Black-Seeded Simpson | ~45 | Fastest turnover; incredibly forgiving — the perfect starter green |
| Arugula (Rocket) | ~30–40 | Heat and pest tolerant; that peppery kick needs no dressing |
| Buttercrunch | ~55 | Compact bibb-type with buttery-soft texture; fits tiny pots |
| Tuscan Kale (Lacinato) | ~60 | Grows up, not out — highest nutrient density on the list |
| Red Salad Bowl | ~50 | Gorgeous red lobed leaves; easy to pick and stunning in a planter |
If you’re brand new to this, just start with Black-Seeded Simpson. It’s fast, forgiving, and practically wants to succeed. You can get fancy with the kale later.
Operational Management — Keeping the Garden Alive
The “Top Inch” Rule for Irrigation
Watering sounds simple until you realize it’s where most container gardens fail. Here’s the only rule you need:
Stick your finger one inch into the soil. Dry? Water thoroughly until it runs out the bottom. Still moist? Leave it alone.
What matters here is consistency, not volume. Drenching your planter one day and forgetting it for three creates a stress cycle that turns leaves bitter and roots cranky. Steady moisture wins every time.
A note on self-watering systems: Planters like the EarthBox use a built-in reservoir that wicks water upward through capillary action — the same physics that pulls liquid into a paper towel. The soil takes exactly what it needs from below. If you travel a lot or just don’t trust yourself to remember daily watering (no judgment), these systems are a game-changer.
Preventing the “Bolting” Mechanism
Bolting is every salad grower’s nemesis. It’s when your plant decides it’s done making leaves and shifts all its energy into producing seeds. The leaves go tough and bitter overnight. Game over.
The main trigger? Sustained heat above 75°F (24°C) plus long daylight hours. But you can fight back:
- Slide planters into afternoon shade after 2 PM — this alone buys you weeks of extra harvesting.
- Rig up a shade cloth or small umbrella greenhouse to cut direct sun intensity by 30–50%.
- Stick with bolt-resistant varieties — Buttercrunch and Black-Seeded Simpson hold out the longest.
Advanced Urban Tactics — Pests and Microclimates
Hard-Surface Defense
Here’s a perk of balcony gardening nobody talks about: your concrete floor is a natural pest moat. Slugs, snails, and soil-borne grubs almost never make the climb to an elevated planter on a paved surface.
The only real threats left are aphids and whiteflies, and both are manageable with a strong blast of water from a spray bottle or a quick application of diluted neem oil. That’s it. Urban container growers deal with a fraction of the pest problems ground-level gardeners face.
Intensive “Underplanting” — One Pot, Multiple Species
Want to squeeze even more out of a single container? Try companion planting.
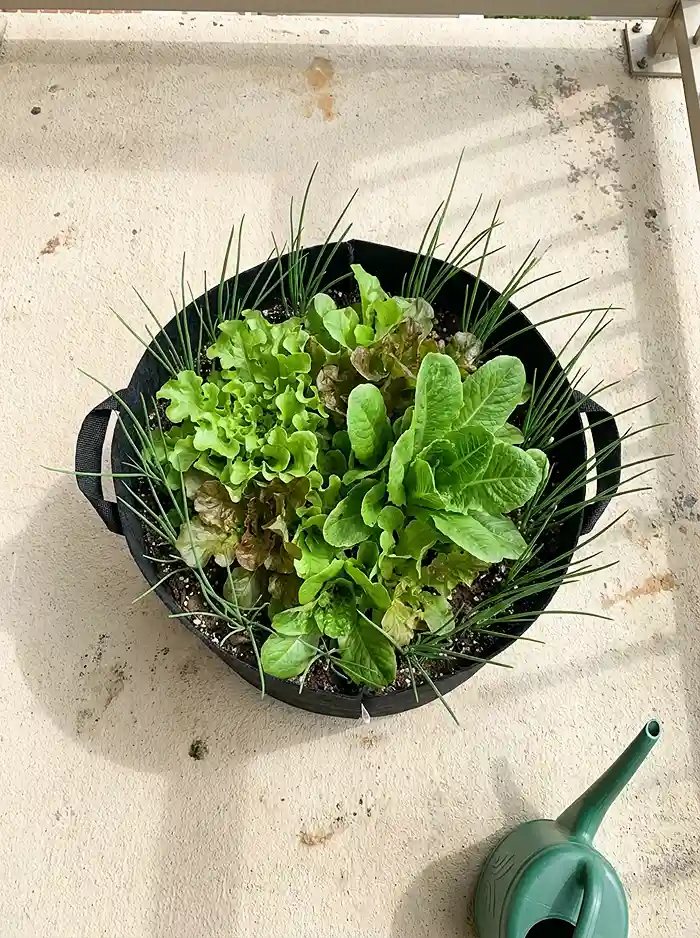
Tuck chives or green onions around the edges of your lettuce planter. Their natural sulfur compounds repel aphids without any sprays. You can also pair shallow-rooted lettuce with deeper-rooted Tuscan kale in the same 12-inch pot — they exploit different soil layers and don’t compete with each other at all.
This “guild” approach is one of the smartest urban gardening tips I know: maximum diversity and yield from one small footprint.
The “Integrated Urban Harvest” Checklist
Alright, here’s the whole system boiled down to ten steps you can tape to your fridge:
- Pick your vessel — 10–12 inch deep fabric grow bag or planter, one drainage hole per square foot minimum.
- Line the base — Coffee filter or burlap over drainage holes to keep soil in.
- Mix your substrate — 3 parts organic potting soil + 1 part earthworm castings. Check that pH sits between 6.0–7.0.
- Choose your seeds — Black-Seeded Simpson or Arugula for the fastest first harvest.
- Sow — Scatter seeds on the surface, press gently, cover with ¼ inch of mix, mist lightly.
- Position for light — Minimum 4 hours direct sun; shade after 2 PM in hot climates.
- Water by the Top Inch Rule — Finger-test daily, water deeply when the top inch is dry.
- Harvest using the cut-and-come-again method — Outer leaves only, crown stays, clean scissors always.
- Feed monthly — Top-dress with a thin layer of earthworm castings to replace spent nutrients.
- Rotate and replant — Sow a new round every 3–4 weeks so you never hit a gap in supply.
Frequently Asked Questions
Can I grow lettuce in 1.5-liter pots?
You can, but I won’t sugarcoat it — it’s high-maintenance. A pot that small dries out fast, so you’re looking at watering at least twice a day when it’s warm. Stick to one compact variety like Buttercrunch and keep a close eye on moisture. It works, but it’s not the relaxed experience a bigger planter gives you.
How much sun do salad greens actually need?
At least 4 hours of direct sunlight daily. More light means faster growth, but if you’re in a hot climate above 80°F, too much afternoon sun triggers bolting and bitterness. The ideal arrangement? Morning sun, afternoon shade. Your greens will thank you.
What’s the best way to wash and store my harvest?
Dunk the leaves in cold water, swish them around gently, then spin them dry in a salad spinner — residual moisture is the enemy of crisp storage. Pop them loosely into a container lined with a dry paper towel and refrigerate at 35°F–40°F (1.5°C–4.5°C).
That’s the whole system. Four variables — vessel, substrate, cultivar, water — and a little bit of patience. Your balcony is about to become the most productive square footage in your entire home. Now go get some seeds.