

How to Grow Root Crops in Pots and Containers
Learn how to grow root crops in pots and containers with the exact depths, soil recipe, and feeding trick most guides skip. No yard needed. Start growing →
Let’s be honest — most people hear “root crops” and picture a sprawling country garden with rows of carrots disappearing into the distance. But here’s the thing: you absolutely don’t need any of that. A balcony, a patio, even a sunny doorstep with a few buckets will do.
If you’ve been curious about container gardening for food but thought root vegetables were off-limits in small spaces, this guide is going to change your mind. Learning how to grow root crops in pots and containers is genuinely one of the most rewarding things you can do as an urban gardener — and it’s simpler than you think once you understand a few key rules.
Everything below comes from real growing experience, horticultural research, and the kind of hard-won lessons you only learn after pulling a forked, mutant-looking carrot out of the wrong soil mix. Let’s dig in. (Pun absolutely intended.)
Why Growing Root Crops in Pots and Containers Is a Different Game
Here’s something most beginner guides skip over: growing roots in a pot is fundamentally different from growing them in the ground.
In open soil, a plant’s rhizosphere — that’s the thin zone around the roots where all the nutrient exchange, water absorption, and microbial action happens — can stretch out in every direction. In a container? It hits a wall. Literally.
That means your pot is now a closed ecosystem. The depth, the diameter, the material it’s made from, even what it’s sitting on — all of it shapes whether you’re pulling out gorgeous, sweet roots or sad, stunted nubs. Understanding these constraints isn’t optional; it’s the whole game.
Container Depth and Size: The Non-Negotiable Chart for Root Crops in Pots
I cannot stress this enough: the pot decides how big your root can grow. An undersized container physically caps root length. The result? Forked carrots, cramped beets, and potatoes the size of marbles.
Before you plant a single seed, match your crop to the right container using this chart:
| Root Crop | Minimum Pot Depth | Recommended Spacing | Days to Harvest |
|---|---|---|---|
| Radishes | 6–10″ | 2–3″ apart | 25–35 |
| Beets | 10–12″ | 4″ apart | 50–65 |
| Carrots (short varieties) | 10–12″ | 2–3″ apart | 55–70 |
| Carrots (standard) | 12–18″ | 2–3″ apart | 65–80 |
| Turnips / Rutabagas | 12–14″ | 4–6″ apart | 45–60 |
| Potatoes | 12–24″ | 8–12″ apart | 70–120 |
| Onions / Garlic | 10–12″ | 4–6″ apart | 90–150 |
Bookmark that. Print it out. Tape it to your fridge. It’ll save you from the single most common container root crop mistake.
Picking the Right Pot Material for Root Vegetables in Containers
Not all pots are created equal, and the material you choose creates real trade-offs between moisture, heat, and root health.
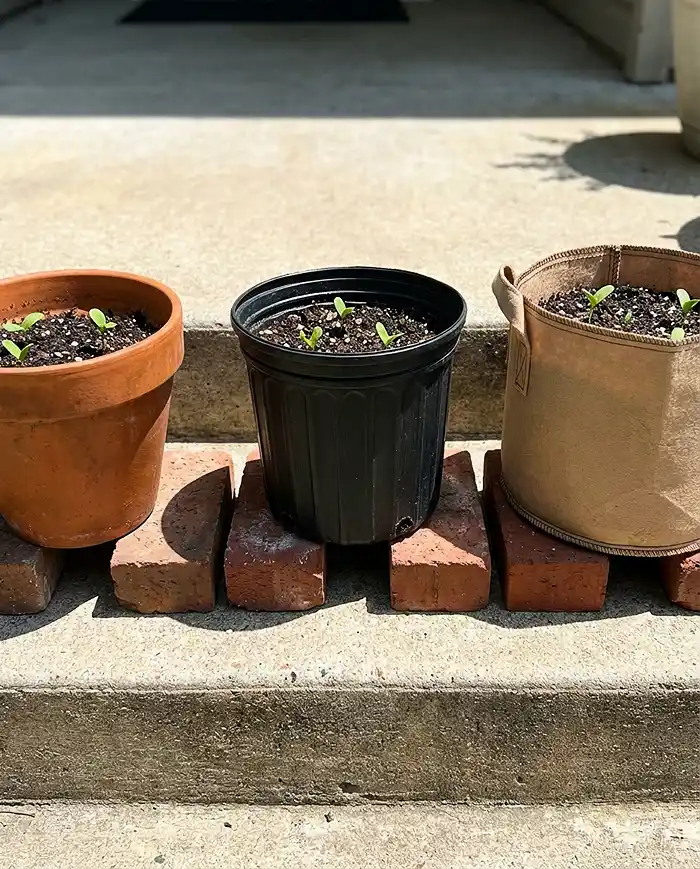
Terra cotta looks gorgeous on a patio and breathes beautifully — but it wicks moisture through its walls like a sponge. If you’re in a hot or windy spot and can’t water daily, your roots will suffer.
Plastic and metal pots hold moisture longer, which is great if you’re busy. But dark-coloured plastic and metal absorb heat like nobody’s business. On a sunny day, they basically become slow cookers for your root zone.
Fabric grow bags are honestly my favorite for root crops. They promote something called “air pruning” — when roots hit the breathable fabric, they stop circling and instead develop a dense, fibrous root system that’s much better at absorbing nutrients.
They’re lightweight, foldable, and increasingly recommended by experts like The Old Farmer’s Almanac for container vegetable growing. The only downside? They dry out faster in wind and heat, so you’ll need to stay on top of watering.
One thing nobody tells you — the “Concrete Radiator Effect.” If your pots are sitting directly on sun-baked concrete, pavers, or stone, the surface radiates heat upward into the container from below, essentially cooking your roots from the bottom.
The fix takes thirty seconds: elevate your pots on bricks, pot feet, or a couple of wooden slats. That little air gap underneath can drop root-zone temperatures by up to 10°F. Seriously — this one tip alone has saved more container gardens than people realize.
Building the Best Soil for Root Crops in Pots and Containers
Why You Need a Loose, Rock-Free Growing Medium
Here’s how a taproot grows: it pushes its tip downward through the soil, millimeter by millimeter. Every rock, bark chunk, clay clump, or hard spot it runs into forces it to detour — and that detour shows up as a forked, twisted, or gnarled root at harvest time.
The ideal container substrate should feel loose, friable, and uniform. Think of running your hand through coarse sand — that’s the texture you’re aiming for.
And please, please don’t use garden soil straight from your yard. It compacts into a brick under repeated watering, it may be carrying pathogens, and it doesn’t have the porosity container roots desperately need.
If you’re reusing old pots (which is totally fine and encouraged), sanitise them first with a 10% bleach solution — that’s 1 part household bleach to 9 parts water, soaked for 10 minutes and rinsed clean. This is a standard protocol recommended by university extension programs for eliminating disease organisms between plantings.
The Phil Dudman “Super Soil” Recipe
Australian gardening expert Phil Dudman developed an organic potting mix recipe that’s become something of a legend among container vegetable growers. It’s biologically active, holds moisture without staying soggy, and gives root crops exactly the nutrient environment they crave:
- 2 × 9-litre buckets of quality potting mix
- 1 × 9-litre bucket of aged compost
- A handful of coir (coconut fibre) for moisture retention
- Pelletised chicken manure for slow-release nitrogen
- Blood and bone for phosphorus and calcium
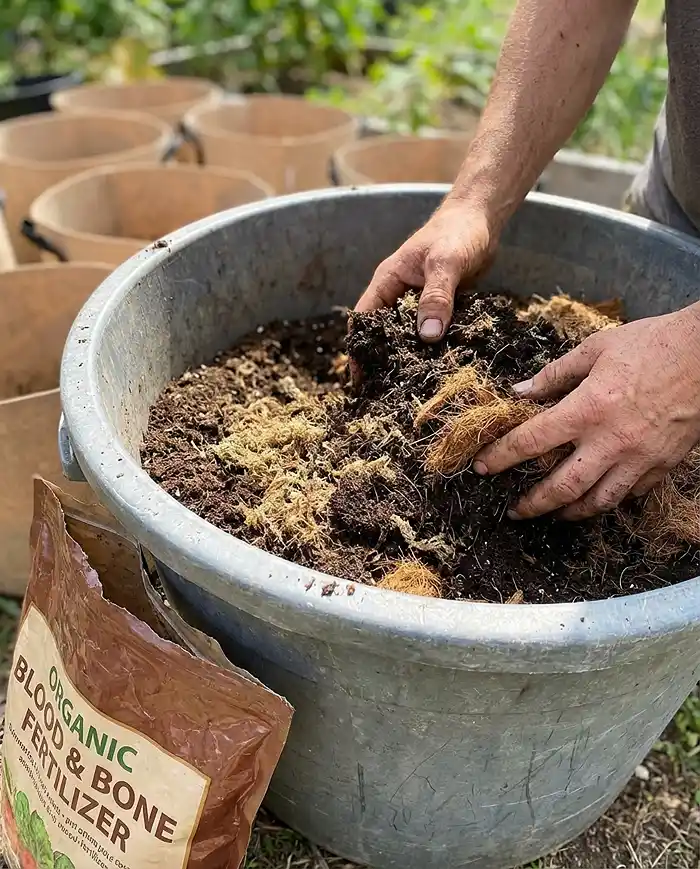
Mix it all together thoroughly before filling your containers. I’ve used variations of this for years and can tell you it consistently outperforms anything you’ll buy pre-bagged at the hardware store.
The N-P-K Rule: The Biggest Mistake New Root Crop Growers Make
If you only remember one thing from this entire article, make it this.
Every fertiliser bag shows three numbers — N-P-K — standing for Nitrogen, Phosphorus, and Potassium. Most people grab whatever’s cheapest without thinking about those numbers. For root crops in containers, that’s a recipe for failure.
High Nitrogen (the first number) pushes leafy, green top growth. Sounds good, right? It’s not. All that energy going to the tops means barely anything going to the roots. Too much nitrogen gives you beautiful foliage and carrots the size of your pinky.
High Phosphorus (the middle number) is what actually drives root cell division and elongation. This is the engine of root size. Bone meal is an excellent organic source.
High Potassium (the last number) strengthens cell walls, boosts disease resistance, and enhances flavour and natural sugars.
The takeaway: Grab a fertiliser with a low first number and high second and third numbers — something like 4-10-10 or 5-10-10. Feed every two weeks with a diluted liquid application. Your roots will thank you.
Crop-by-Crop Playbooks for Growing Root Crops in Containers
Carrots in Pots: The Precision Crop
Carrots are the divas of the container root crop world. They demand attention — but when everything clicks, pulling a perfectly straight, sweet carrot from a pot is deeply satisfying.
Pick the right varieties. Forget long imperator types — they need more depth than most containers offer. Go with short and round varieties like Chantenay, Oxheart, Little Finger, or Parisian. They’ll reach full size within the depth limits of a standard pot.
Direct-sow only. Carrots hate being transplanted. Sprinkle seeds on moist soil, cover with about ¼″ of mix, and tamp gently. Then… wait. Carrot seeds can take up to 21 days to germinate, and you need to keep the surface moist the entire time. A sheet of damp newspaper laid across the soil prevents crust formation and holds in moisture.
Thinning is not optional. Once true leaves appear, snip the weakest seedlings at soil level (don’t pull them — you’ll disturb the neighbours) until you’ve got 2–3″ spacing between plants. Overcrowded carrots produce roots that look like they’re wrestling each other underground.
Keep the moisture steady. This is the single biggest make-or-break factor. Irregular watering is the #1 cause of cracked and split carrots — the root swells too rapidly when re-watered after dry stress, and the skin literally bursts.
Harvest when the tops of roots peek above the soil line and shoulder diameter reaches about ¾–1″. Twist and pull from loosened, slightly moist soil.
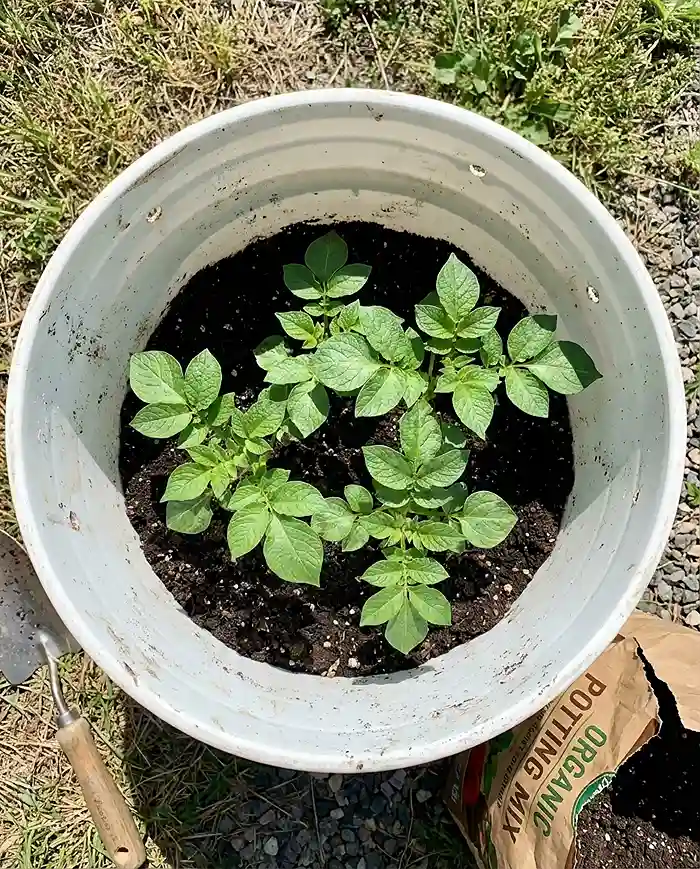
Growing Potatoes in 5-Gallon Buckets: The Vertical Advantage
This is container gardening at its most clever. The hilling method lets you stack tuber production vertically, squeezing a surprising amount of potatoes out of a single bucket.
- Prep the bucket. Drill 8–10 drainage holes in the bottom. Use food-grade buckets only — non-food-grade plastic can leach chemicals into your soil.
- Add your base layer. Pour in 4–6″ of potting mix.
- Plant seed potatoes. Place 2–3 seed potato pieces with eyes facing up, spaced evenly across the surface.
- Cover and water. Add 3–4″ of soil mix over the potatoes. Water thoroughly.
- Hill as they grow. When green shoots reach 6–8″ above the soil line, add more soil/compost mix until only the top 2–3″ of foliage peeks out. Repeat this 2–3 times. Each buried section of stem produces new tubers — that’s where your yield multiplies.
- Harvest day. When the foliage yellows and dies back (70–120 days depending on variety), stop watering for 2 weeks to let the skins toughen. Then tip the bucket over and treasure-hunt through the soil. It’s genuinely one of the most fun moments in gardening.
Radishes and Beets: The Fast-Track Root Crops for Containers
Radishes are instant gratification in vegetable form — 25 to 35 days from seed to plate. Shallow 6–10″ containers are all you need. They’re perfect for succession planting: sow a new batch every 2 weeks and you’ll have fresh radishes rolling in all season.
Beets come with a fun surprise for first-timers. Each beet “seed” is actually a multigerm cluster containing 2–4 embryos. So instead of one tidy seedling per spot, you’ll get a little crowd — and aggressive thinning becomes essential. Soak seed clusters in warm water for 2–3 hours before sowing to soften the shell and speed things up. Thin to 4″ apart once true leaves show.
Here’s a bonus: beets tolerate partial shade (4–6 hours of sun), which makes them ideal for those semi-shaded balconies where other root crops would sulk.
Succession planting tip for both: Sow every 14 days from early spring through to 4 weeks before your first expected frost. This eliminates the “feast or famine” harvest cycle and keeps fresh roots coming to your kitchen nonstop.
Keeping Your Container Root Crops Healthy: Maintenance That Actually Matters
The Perched Water Table Myth — Stop Putting Rocks in the Bottom of Your Pots
I need you to hear this clearly: putting rocks or gravel at the bottom of your pots does not improve drainage. It actually makes things worse. And I say this knowing that roughly half the internet and probably your grandmother will disagree with me.
Here’s the science. Water moves through soil via capillary action. When it reaches the interface between fine-textured potting mix and coarse gravel, it can’t cross into the gravel until the soil layer above is completely saturated. This creates what’s called a perched water table — a waterlogged zone sitting directly above the rocks. Your roots end up drowning in soggy soil while the gravel below stays dry and serves no purpose whatsoever.
What to do instead: Fill the entire container with a continuous, uniform column of potting mix from the drainage holes to the surface. If your holes are large, lay a single piece of mesh or landscape fabric over them to hold back soil while letting water exit freely. That’s it. Simple and effective.
Watering Root Crops in Pots: How to Maintain Consistent Moisture
Container soil dries out much faster than ground soil — especially in fabric grow bags and terra cotta. Getting your watering rhythm right is the difference between sweet, crisp roots and woody, bitter ones.
- The finger test: Stick your finger about 1″ into the soil daily. Dry at that depth? Water thoroughly until it runs out the drainage holes.
- Deep soaking beats light misting. Shallow watering trains roots to cluster near the surface. You want them diving deep, and thorough watering pulls them in that direction.
- Mulch the surface. A 1–2″ layer of straw, shredded leaves, or coir on top of the soil reduces evaporation by up to 50%. It’s free insurance.
- Water in the morning. Foliage that stays wet overnight is basically rolling out a welcome mat for fungal disease.
Simple Organic Pest Control for Container Root Vegetables
Good news: growing root crops in pots and containers means you’ll deal with far fewer pests than in-ground gardeners. No soil-dwelling grubs, minimal carrot rust fly pressure, and a much cleaner starting environment. But above-ground visitors still show up.
Aphids and flea beetles can usually be knocked off with a strong blast of water from a hose. For stubborn infestations, mix up this neem oil spray recipe (originally shared by Blissful Growing): 1 tablespoon pure neem oil + 1 teaspoon castile soap + 1 gallon of water. Shake well and spray in the evening to prevent leaf burn.
Powdery mildew sneaks in when airflow between plants is poor — which circles right back to why thinning matters so much. If you spot white powdery residue on leaves, remove the affected foliage immediately.
Between crops, always clean your pots. A 10% bleach solution (1:9 bleach to water, 10-minute soak, thorough rinse) kills pathogens like Pythium and Fusarium that cause damping-off and root rot. University extension programs across the country recommend this as standard practice for container sanitation.
Harvesting Root Crops from Containers: When and How to Pick
Reading the Signals: Crop-by-Crop Harvest Cues
Stephen Albert — a horticulturist with over 25 years of teaching experience at the University of California and the voice behind Harvest to Table — always recommends checking your seed packet for the variety’s specific days to maturity. Beyond that, here’s what to look for in the pot:
- Radishes: Shoulders poking above the soil line, firm when you squeeze. Pull them right away — overripe radishes go pithy and hollow shockingly fast.
- Carrots: Root tops visible at the surface, shoulder diameter around ¾–1″.
- Beets: Root top showing, shoulder reaching 1½–3″ depending on variety.
- Potatoes: Top foliage goes yellow and collapses. Stop watering 2 weeks before you dig to let the skins set.
- Onions / Garlic: Foliage tips over and browns. That’s the plant telling you the bulb is done growing.
Curing vs. Eating Right Away
Not everything that comes out of your pot is ready for the dinner plate — at least not if you want it to last.
Eat-now crops — radishes, carrots, beets, turnips — just wash, dry, and refrigerate. They’re at peak flavour and crunch within the first week or two.
Crops that need curing include onions, garlic, shallots, and potatoes. Curing is essentially a controlled drying process that toughens the outer skin, seals in moisture, and extends storage life from days to months.
For onions and garlic, spread them in a single layer somewhere warm (75–85°F), dry, and well-ventilated — but out of direct sun. Let them sit for 2–4 weeks until the necks feel papery and stems are bone dry. Trim, then store in mesh bags or braids in a cool, dark spot.
For potatoes, you want the opposite vibe — dark and slightly humid (85–90% relative humidity) at 50–60°F for 1–2 weeks. This heals any harvest nicks and toughens the peel beautifully.
Getting Your Harvest to the Table
Honestly, this is the fun part. Well-grown root crops develop concentrated natural sugars that even simple cooking methods turn into something special.
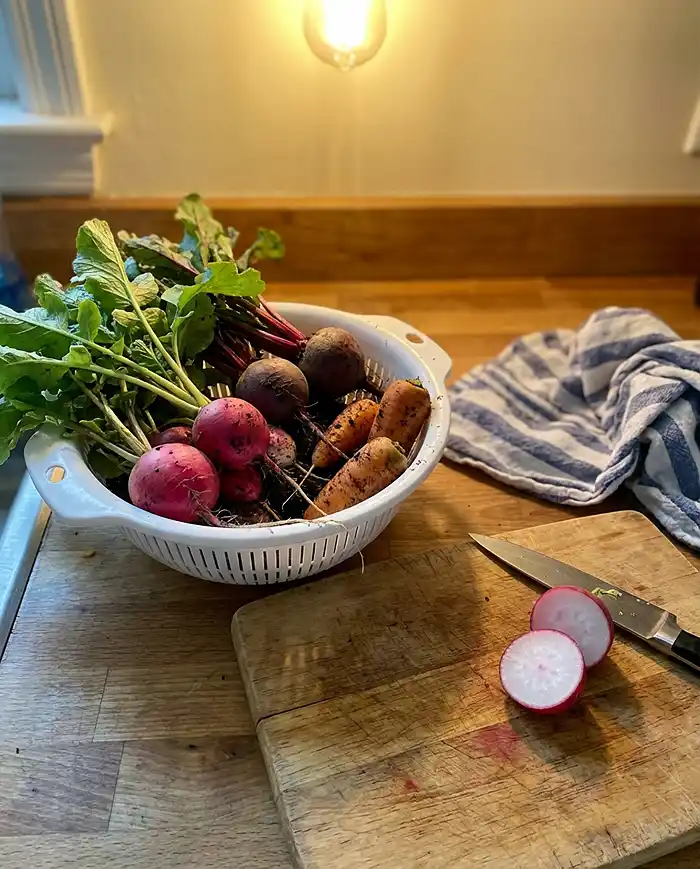
Roast them at 400°F for 25–30 minutes with olive oil, salt, and fresh herbs. The caramelisation is incredible. Steam beets and baby carrots for 10–15 minutes to preserve colour and nutrients. Mash creative combinations — parsnip and potato, or carrot and sweet potato — with butter for a silky, complex side dish. Or just eat them raw: radishes in salads, grated beets in slaws, fermented turnips for gut-health benefits.
How to Grow Root Crops in Pots and Containers FAQs
Can I use regular garden soil in pots?
No — and this is a hill I’ll die on. Garden soil compacts in containers, blocks drainage, and may carry pathogens like Pythium and Fusarium. Always use a sterile, soil-less potting mix made for container gardening.
Why are my container carrots woody and bitter?
Almost certainly moisture stress. When soil dries out completely, carrot roots develop lignified (hardened) tissue as a defence mechanism. Keep moisture consistent and even throughout the growing cycle.
How much sun do root crops need in containers?
Most need 6–8 hours of direct sunlight. Beets and turnips are the exceptions — they tolerate partial shade (4–6 hours), which makes them great for balconies that don’t get all-day sun.
How often should I fertilise root crops in containers?
Every 2 weeks with a diluted liquid fertiliser that’s low in nitrogen and high in phosphorus and potassium (look for something like 4-10-10 or 5-10-10). Too much nitrogen means gorgeous leaves and pathetic roots.
Do I need rocks or gravel at the bottom of my pot for drainage?
Nope. That’s a myth. Gravel creates a perched water table that actually traps water above the rocks and drowns roots. Just use a continuous column of quality potting mix with open drainage holes.
What size container do I need for potatoes?
A 5-gallon bucket (at least 12″ deep) works for 2–3 seed potatoes. Go deeper (18–24″) if you can — more depth means more hilling space, which means more tubers. Always drill drainage holes, and use food-grade buckets only.