

DIY Pallet Garden for a Balcony
A DIY pallet garden turns a bare balcony into a lush, productive growing space — without sacrificing floor room. If you’ve been eyeing small balcony garden ideas but can’t fit another pot, this vertical gardening hack is your answer.
Table of Contents
Why a Pallet Garden Is Perfect for Balconies
Most balconies are tight. You’ve got maybe 40–60 square feet, and floor space disappears fast once you add a chair. A vertical pallet garden solves that by going up instead of out.
One standard pallet gives you 4–6 planting rows across roughly 40 inches wide — without using a single square foot of floor space. That’s serious growing room for a small space garden.
You can grow herbs, salad greens, flowers, or succulents in the same structure. It also adds a natural privacy screen and a serious visual upgrade to a plain concrete wall.
The build itself takes about 2–3 hours. You don’t need special skills — just a staple gun, some landscape fabric, and the right pallet. Here’s exactly how to do it right.
Planning Your Pallet Garden Before You Build
Don’t skip this part. Rushing into a build without planning is how you end up with a soil-soaked balcony and an angry landlord. Think through three things first: sun, placement, and weight.
Track your balcony’s sun exposure for a day. South- and west-facing balconies get the most light — great for herbs and vegetables. North-facing spots suit ferns, lettuce, and shade-tolerant plants better.
Decide early whether you’re leaning the pallet against a wall or mounting it. Leaning is easier and renter-friendly. Mounting is more secure but requires wall anchors.
Check out these small balcony garden ideas for more layout inspiration before you finalize your plan.
Choosing the Right Pallet (Heat-Treated, Not Chemical-Treated)
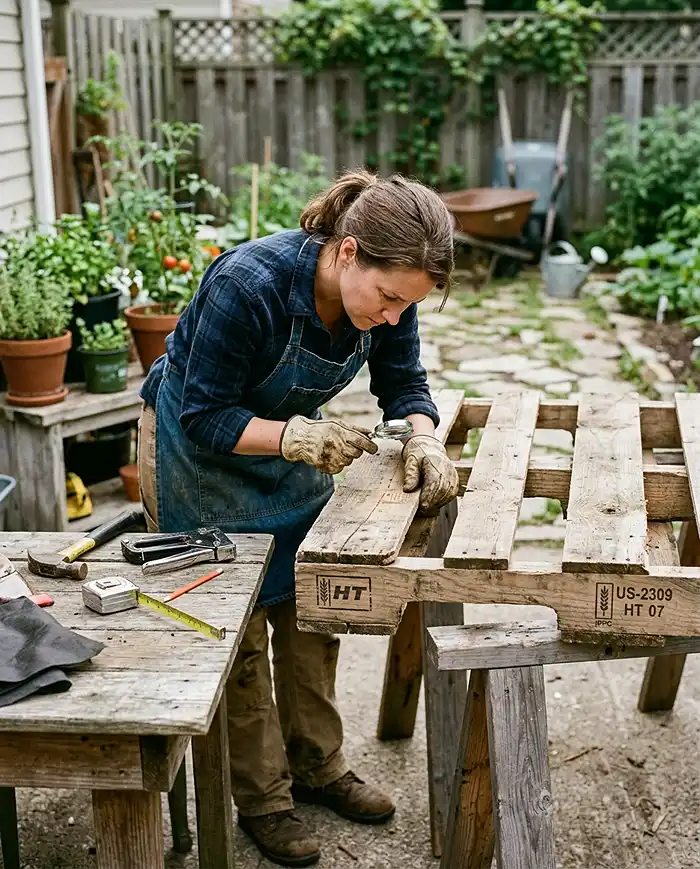
This step is non-negotiable if you’re growing edibles. Look for a stamp on the pallet’s end board. You want HT — that means heat-treated. It’s safe for food gardens.
Avoid any pallet stamped MB (methyl bromide). That’s a toxic pesticide treatment you do not want near food.
| Stamp | Meaning | Safe for Edibles? |
|---|---|---|
| HT | Heat-treated | Yes |
| MB | Methyl bromide (chemical) | No — avoid |
| DB | Debarked only | Yes, with caution |
| No stamp | Unknown treatment | Skip it |
Assessing Balcony Weight Limits and Wall Support
A soil-filled pallet can weigh 80–120 lbs when fully planted and watered. Most apartment balconies handle 40–60 lbs per square foot, so weight usually isn’t a problem — but check your lease or building specs if you’re unsure.
If you’re leaning it against a wall, add rubber feet at the base to protect the floor and prevent sliding. For wall mounting, use heavy-duty anchor bolts rated for at least 150 lbs.
Never hang a filled pallet from a railing. Rails aren’t engineered for that outward load.
Tools and Materials You’ll Need
Gather everything before you start. Mid-build supply runs kill momentum and let your soil dry out mid-fill.
- 1 heat-treated (HT) wood pallet — standard 40″ x 48″ size
- Heavy-duty landscape fabric — at least 3 yards
- Staple gun with 1/2″ or 9/16″ staples (500+ count)
- Potting mix — lightweight, container-grade (not garden soil)
- Sandpaper — 80-grit and 120-grit sheets
- Exterior wood sealant or non-toxic wood stain (optional)
- Small trowel and gardening gloves
- Plants or seeds suited to shallow roots
- Zip ties or L-brackets if wall-mounting
For soil, use a quality mix designed for containers. Our guide to the best soil mix for container vegetables will help you pick the right blend.
Preparing the Pallet for Planting
Most pallets come from warehouses, loading docks, or hardware stores. They’ve been dragged, stacked, and rained on. A little prep goes a long way toward safety and longevity.
Start by checking the pallet structurally. Push on the slats — any that flex too much or feel spongy need to go. A damaged board can split under soil weight and dump everything.
Use a hammer to tap in any protruding nails. Run your hands across all surfaces wearing gloves to feel for sharp splinters before sanding.
Lay it flat on a tarp or outside on pavement before you start. Never sand in an enclosed space — old wood dust can carry mold spores.
Sanding, Cleaning, and Optional Sealing
Sand all surfaces you’ll touch with 80-grit paper first, then follow up with 120-grit for a smooth finish. Pay extra attention to the top and side edges where hands will grab.
Scrub the whole pallet with a stiff brush and diluted white vinegar (1:1 with water). Let it dry completely — at least 24 hours in the sun.
Sealing is optional but smart. Use a non-toxic exterior wood sealant on the outer faces only. Never seal the inside surfaces where roots will contact wood.
Step-by-Step: Building Your Pallet Garden
This is the fun part. Work on a flat surface and keep the pallet horizontal until you’re done planting — standing it up too early causes soil to fall out before roots can anchor.
Here’s the full build sequence:
- Lay the pallet face-down on a flat surface
- Cut landscape fabric into sections to cover the back and both sides
- Staple fabric tight to the back, folding corners like wrapping a gift
- Flip the pallet face-up — the front slats stay open for planting
- Fill each row with potting mix, tamping gently as you go
- Plant into each row starting at the bottom
- Let roots establish flat for 2–3 weeks before standing upright
I built my first one in spring using this exact method and had a full wall of basil and lettuce by early summer. The wait time is the hardest part — but it’s worth it.
Lining the Back and Sides With Landscape Fabric
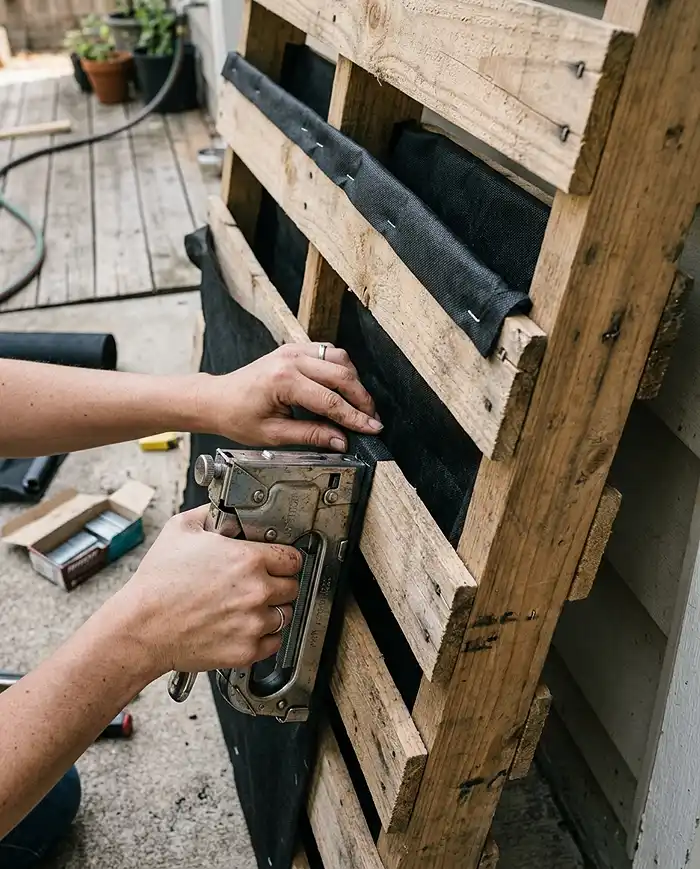
The fabric is what holds your soil in place once the pallet goes vertical. Don’t skimp here — single-layer fabric will sag under soil weight and eventually tear.
Use two overlapping layers on the back panel. Staple every 3–4 inches along every edge. Pull the fabric taut before stapling — loose fabric creates pockets where water pools and wood rots.
Fold the corners neatly and staple them flat. Think of it like lining a box — any gap is a future mess.
Filling With Soil and Planting
Fill the bottom row first, pushing mix firmly into the pocket between the slats. Work your way up row by row, stopping to plant as you go.
Tuck plant root balls snugly between the slats. Roots need contact with soil on all sides — don’t leave air gaps. A small trowel helps press mix around roots without damaging them.
Water lightly after planting each row. You want the mix moist but not saturated before you stand the pallet up.
Best Plants for a Balcony Pallet Garden
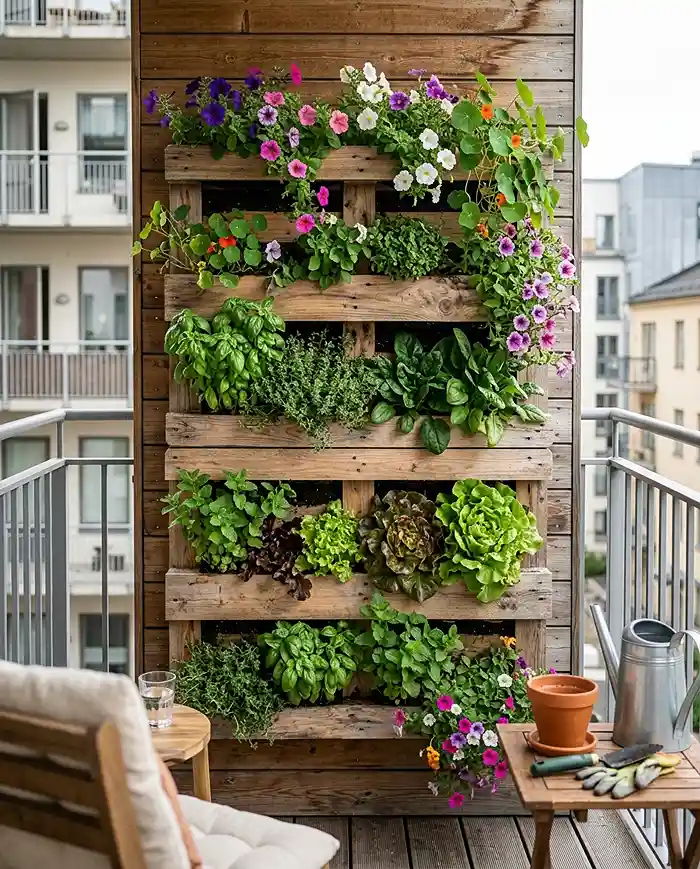
Not every plant survives in a shallow pallet pocket. The key is shallow roots — anything that doesn’t need more than 4–6 inches of depth. Luckily, that covers a lot of delicious and beautiful options.
Avoid root vegetables, tall tomatoes, or anything with deep taproots. They’ll struggle and likely tip the pallet with their weight as they grow.
| Plant Type | Best Picks | Root Depth Needed |
|---|---|---|
| Herbs | Basil, thyme, mint, chives | 3–4 inches |
| Leafy greens | Lettuce, spinach, arugula | 4–6 inches |
| Flowers | Pansies, petunias, nasturtiums | 4–5 inches |
| Succulents | Sedum, echeveria, hens-and-chicks | 2–3 inches |
| Strawberries | Alpine or day-neutral varieties | 4–5 inches |
Herbs and Leafy Greens
Herbs are the workhorses of a small balcony garden. They’re shallow-rooted, useful in the kitchen, and they regrow after cutting. Basil, thyme, parsley, chives, and mint all do well in pallet pockets.
Leafy greens like lettuce, spinach, and arugula are perfect for small space gardening. They mature in 30–45 days, so you can harvest and replant multiple times per season.
Pro tip: Plant mint in its own pocket or it’ll crowd out everything nearby.
Flowers and Succulents for Color
Want a decorative balcony vertical garden instead of (or alongside) edibles? Trailing petunias, pansies, and nasturtiums spill beautifully from pallet slats and add serious color with minimal effort.
Succulents are the ultimate low-maintenance option. They need almost no watering once established and hold their form all season. Hens-and-chicks (Sempervivum) are especially hardy down to USDA Zone 3.
Mix trailing flowers in the top rows and compact succulents toward the bottom for a balanced, layered look.
Mounting and Positioning on Your Balcony
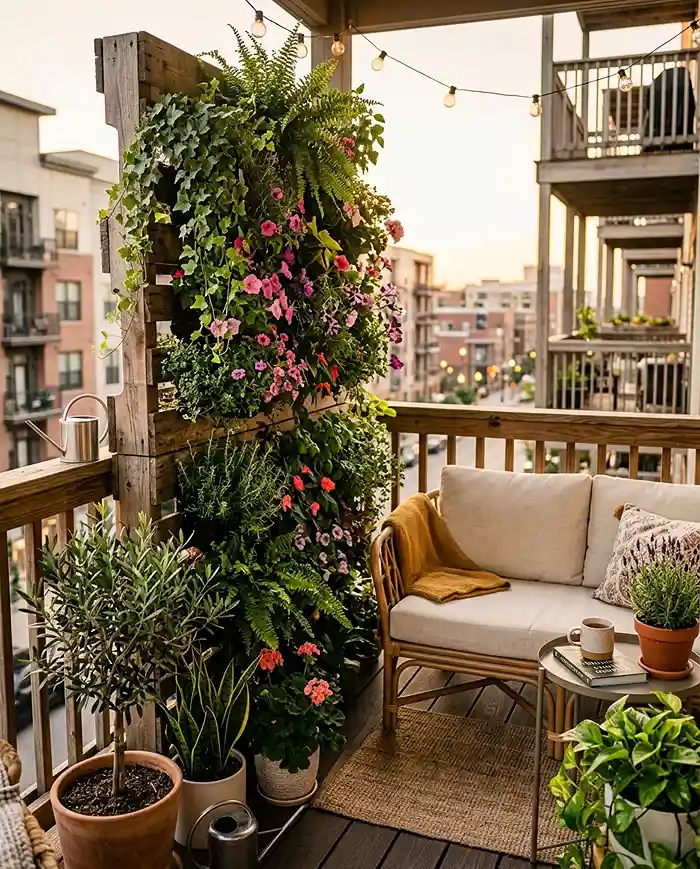
Once your plants have been growing flat for 2–3 weeks, roots will have knit through the soil enough to hold everything when you go vertical. Don’t rush this step.
The two main mounting options:
- Leaning: Prop the pallet against a wall at a 10–15 degree angle. Add rubber furniture pads under the base to protect floors and prevent slipping.
- Wall-mounting: Use two heavy-duty L-brackets with anchor bolts drilled into studs or masonry. Add a third bracket at the base if the pallet exceeds 100 lbs when planted.
Position it where it gets your best light. Rotate it 180 degrees halfway through the season if one side gets more sun than the other.
For more ideas on arranging your outdoor space, see our guide on how to arrange pots on a small balcony.
Watering and Ongoing Maintenance
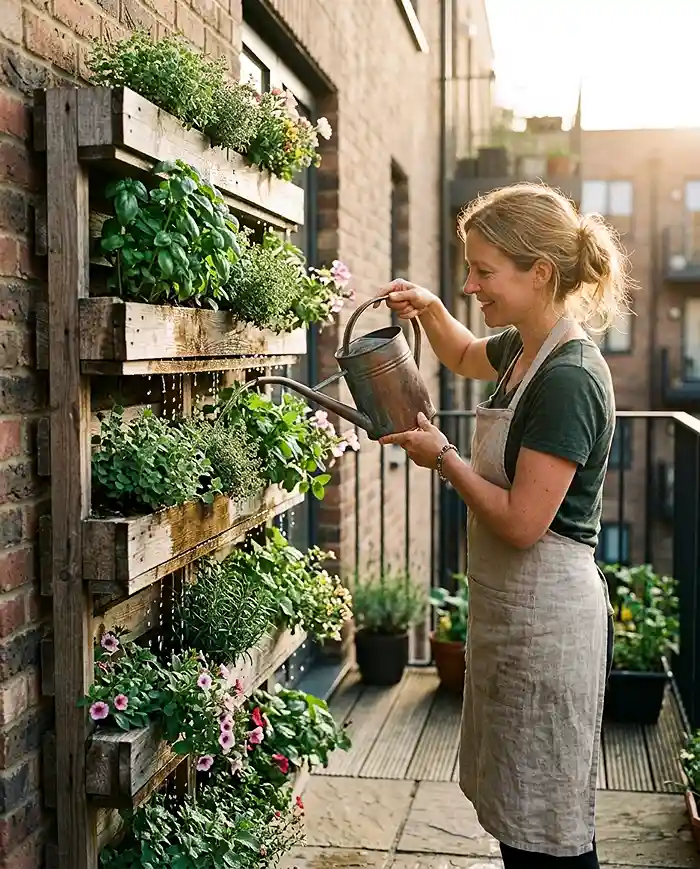
Vertical gardens dry out faster than floor containers — especially the top rows. Plan on watering every 1–2 days in summer, more during heat waves.
Water slowly from the top and let it soak through each row. A watering can with a narrow spout gives you more control than a hose. Aim for moist soil, not soggy — overwatering causes root rot and speeds up wood decay.
Fertilize every 2 weeks with a balanced liquid feed (10-10-10 or similar) once plants are established. Container plants exhaust nutrients faster than in-ground gardens.
Deadheading [removing spent flowers] keeps flowering plants producing all season. For edibles, harvest regularly to encourage new growth.
Check out our tips on watering container plants in hot weather to keep your pallet garden alive during summer heat.
Seasonal Care and Replanting
At the end of each season, lay the pallet flat and remove spent plants. Refresh the top 2 inches of potting mix with fresh compost before replanting — old mix compacts and loses nutrients over time.
In USDA Zones 6 and below, bring the pallet indoors or into a covered area before the first hard frost. The shallow soil pockets freeze faster than deep containers.
Spring is the ideal time to swap in cool-season crops like lettuce and spinach. Switch to heat-tolerant herbs and flowers once temps stay above 60°F consistently.
Common Problems and Solutions
Soil Falling Out or Washing Away
Quick Answer: The fix is almost always the fabric lining. Either it wasn’t stapled tightly enough, or it tore under the soil weight.
Re-lay the pallet flat and check every staple. Add a second layer of fabric if needed, then re-staple every 2–3 inches. Use a heavier-grade landscape fabric — at least 3 oz per sq yard.
If soil washes out during watering, you’re applying water too fast. Use a slow, gentle pour rather than a direct blast from a hose.
Top Rows Drying Out Faster Than Bottom
Quick Answer: Gravity pulls water down. Top pockets always drain first. Counter this with slower watering and a moisture-retentive mix.
Add perlite and a little coconut coir to your potting mix to slow drainage. Water in two passes — one pass to wet the surface, a second pass 10 minutes later to let it soak deeper.
You can also push drought-tolerant succulents into the top rows where drying is worst.
Pallet Rotting or Tipping Over
Quick Answer: Moisture is the main culprit for rot. Sealing helps, but so does lifting the base off the ground.
Place rubber feet or small wooden risers under the pallet base to improve air circulation. Reapply exterior sealant once a year in early spring.
If the pallet tips in wind, add a bottom bracket or run a bungee cord from the top two corners to wall anchors until a permanent fix is in place.
Frequently Asked Questions
What kind of pallet is safe for a garden?
Always choose a pallet stamped HT (heat-treated). These are safe for food and ornamental gardens. Avoid any pallet stamped MB (methyl bromide) — that chemical treatment is toxic and not safe near edibles. Unstamped pallets are unknown and best avoided.
How do I keep soil from falling out of a pallet garden?
Line the back and both sides with two overlapping layers of heavy landscape fabric, stapled every 3 inches. The key extra step: let your plants grow flat for 2–3 weeks before standing the pallet upright. Established roots hold the mix in place far better than fabric alone.
What plants grow best in a vertical pallet garden?
Stick to shallow-rooted plants: herbs like basil, thyme, and chives; leafy greens like lettuce, spinach, and arugula; trailing flowers like petunias and nasturtiums; and compact succulents. Avoid deep-rooted plants like carrots, large tomatoes, or anything that needs more than 6 inches of soil depth.
Can I lay the pallet flat to plant before standing it up?
Yes — and you should. Plant with the pallet horizontal and leave it flat for 2–3 weeks. This lets roots grow through the soil and create a natural web that holds everything in place when you go vertical. Skipping this step is the number one reason pallet gardens fall apart on their first day upright.
Can I use a DIY pallet garden on a rented balcony?
Yes, with the leaning method. Prop the pallet against the wall at a slight angle with rubber pads underneath — no drilling required. Avoid hanging it from railings, which aren’t designed for that load. Always check your lease for restrictions on balcony structures before you build.
Key Takeaways
- A DIY pallet garden is one of the most space-efficient ways to grow vertically on a small balcony — one pallet adds 4–6 planting rows without touching your floor space.
- Always use HT-stamped pallets for edibles — MB-treated pallets are toxic and should never be used in a food garden.
- Double-layer landscape fabric stapled tightly every 3 inches is the difference between a pallet garden that holds and one that dumps soil on day one.
- Let plants establish flat for 2–3 weeks before going vertical — roots anchor the soil far better than fabric alone.
- For small space gardening success, choose shallow-rooted plants: herbs, lettuce, trailing flowers, and succulents all thrive in balcony vertical garden conditions.