

Cut and Come Again Greens
One sowing. Up to 5 harvests. Learn the 3 pro methods that turn a single bed of cut and come again greens into months of free salad. Start your first cut today.
Look, if you’ve ever yanked a whole head of lettuce out of the ground and then stared at a sad, empty patch for three weeks wondering what to do next — you’ve been working way too hard. There’s a better way, and it’s called cut and come again greens.
Professional kitchen gardeners have been using this trick for literally centuries to keep fresh salad coming from tiny beds without constantly replanting. And the beautiful part? It’s not complicated. This guide covers the actual science behind why it works, which varieties crush it, and the exact harvesting techniques that’ll turn even a modest raised bed into your own personal salad factory. Let’s get into it.
What Is the Cut-and-Come-Again Method?
Here’s the short version: instead of ripping out the whole plant when it looks ready, you just cut the leaves and let it grow back. Then you cut again. And again. Most plants will give you 3 to 5 harvests from a single sowing before they call it quits.
The Science Behind It (It’s Not Magic)
This works because of something called the basal meristem — a cluster of undifferentiated stem cells sitting right at the plant’s crown, at soil level. When you cut above this point, those cells kick into gear and push out brand-new leaves. Cut below it, and the plant’s done. Toast. Game over.
Understanding this one concept is honestly the difference between a garden that keeps producing and one that keeps needing replanting.
Whole-Head Harvesting vs. Cut and Come Again
Here’s the quick breakdown:
- Whole-Head Harvesting: You pull or cut the entire plant at the soil line. One harvest. The bed sits empty until you replant it.
- Cut-and-Come-Again: You only take the outer or upper leaves, keeping the crown intact. The plant bounces back with fresh foliage — and you get 3–5+ harvests from that single sowing.
Three plant families are basically built for this: the Aster family (lettuces), the Brassica family (kales and mustards), and the Amaranth family (chard and spinach). More on those in a sec.
Why Your Garden Needs Perpetual Harvesting
It Saves Real Money
Let’s do some quick napkin math. A 30-square-foot raised bed planted with succession-sown cut and come again greens can save you roughly $300 a year on grocery store salad. A 5 oz clamshell of organic mesclun runs $5–$6. If your household goes through four of those a week, that’s over a grand a year. Seeds for an entire season? Maybe $20. Soil amendments? Another $30–$50. The math is kind of absurd.
Store-Bought Greens Are Basically Old News
Here’s a fun (depressing?) fact: the bagged salad greens at your grocery store are typically 7 to 10 days old by the time you eat them. And Vitamin C starts degrading within hours of harvest. A leaf you cut at 7 AM and toss into your lunch bowl at noon is in a completely different nutritional league than anything sealed in a plastic clamshell.
It’s the Ultimate Small-Space Hack
If you’re working with a tiny backyard, a balcony, or just a few containers, cut and come again greens are the single highest-yield approach you can use. Because you’re harvesting the same planting repeatedly, a compact 4×8 bed produces the output of a plot three times its size. If you’re growing in pots, check out our guide on how to grow salad greens in small planters — it pairs perfectly with the CCAA method.
Best Varieties for Continuous Production
Not every green is cut out for repeated harvesting (pun intended). Here are the families and varieties that genuinely thrive with the CCAA approach.
Loose-Leaf Lettuces (Aster Family — Lactuca sativa)
Go-to picks: Black Seeded Simpson, Red Sails, Salad Bowl.
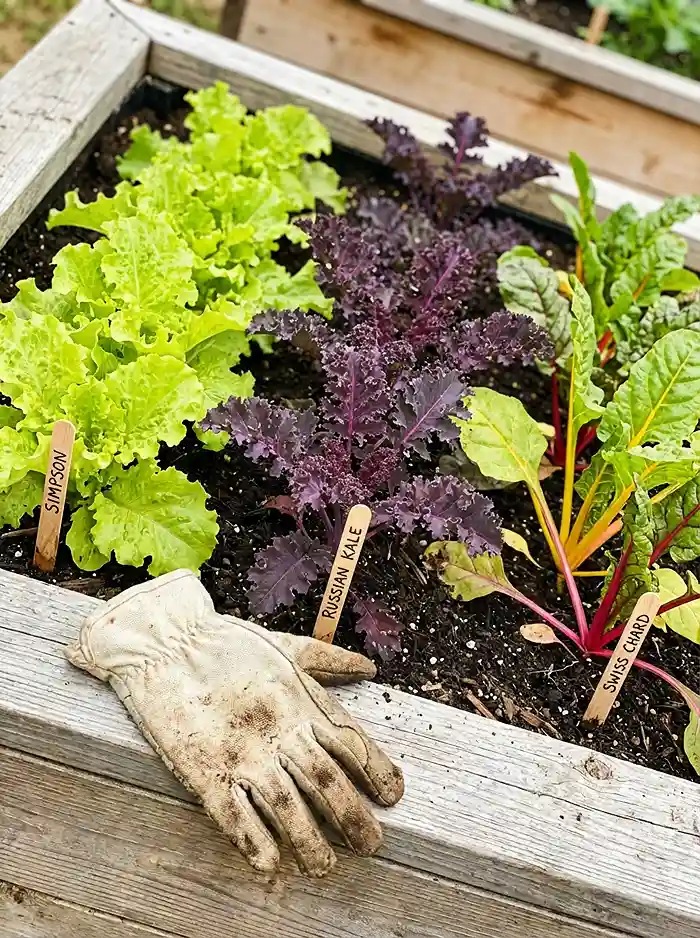
Loose-leaf lettuces are purpose-built for this because they don’t form a tight central head — there’s no single harvest point to destroy. Black Seeded Simpson is fast and heat-tolerant (basically the golden retriever of lettuces — eager to please). Red Sails adds gorgeous color and holds off bolting longer than most. Expect your first cut in about 21–28 days.
Mustards & Kales (Brassica Family)
Go-to picks: Red Russian Kale, Mizuna, Tatsoi, Green Wave Mustard.
These are your cold-weather heroes. When lettuce throws in the towel come autumn, Brassicas are just getting started. And here’s a fun flavor bonus: frost actually converts starches to sugars in the leaf tissue, making kale and mustard greens sweeter after a cold snap. Nature’s candy, sort of.
Spinach & Chard (Amaranth Family)
Go-to picks: Bright Lights Swiss Chard, Fordhook Giant Chard, Bloomsdale Long Standing Spinach.
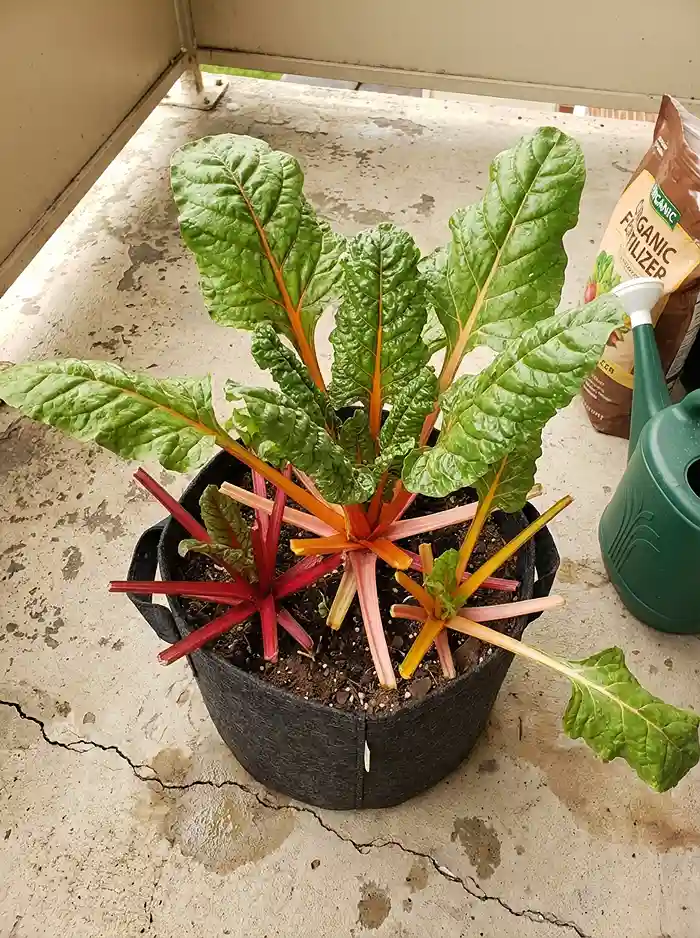
Swiss Chard is the undisputed MVP of cut and come again greens. Thick stems, massive regrowth, tolerates heat and light frost — it just keeps going. Spinach, on the other hand, is a bit of a diva. It bolts fast once the days get long and warm. Treat it as a cool-season-only crop and sow on tight succession planting intervals to stay ahead of its dramatic tendencies.
3 Pro Harvesting Methods for Maximum Regrowth
Different plants need different approaches. Here are the three methods that cover pretty much everything.
Method 1: The Outer Leaf Extraction
Best for: Big individual plants — Kale, Chard, Collards.
Snap or cut the oldest outer leaves at the base of the stem, working from outside in. Always leave the central rosette and at least 4–5 inner leaves alone. Those young inner leaves are the plant’s solar panels — they’re photosynthesizing the energy that fuels new growth.
Method 2: The Clear Cut (Scissor Method)
Best for: Dense baby-leaf salad mixes — Lettuce, Mesclun, Arugula, Mizuna.
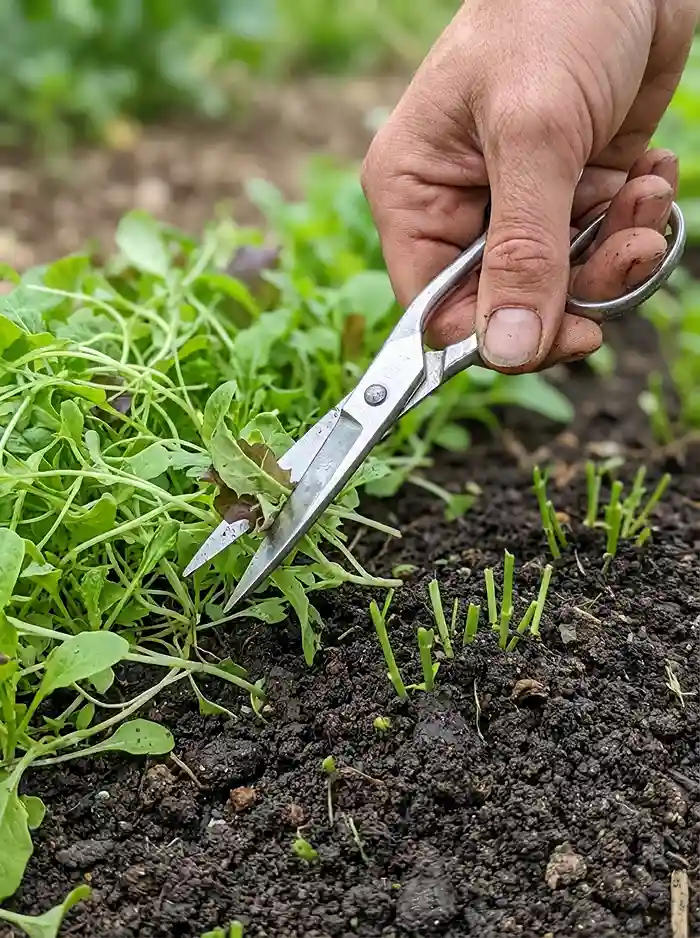
Grab clean, sharp scissors and cut the whole patch uniformly at 1–2 inches above the soil line. That stub is non-negotiable — it contains the basal meristem. Cut lower and the plant won’t come back. Expect a fresh flush of harvestable leaves in about 14–21 days.
The University of Maryland Extension recommends this exact same method for their salad table program, noting you can typically get two to three cuttings per planting cycle.
Method 3: Side Shoot Stimulation
Best for: Broccoli (after the main head is harvested), Fennel, branching herbs.
Cut the primary head, but leave the plant in the ground. Smaller side shoots will pop up from axillary buds over the following weeks. A single broccoli plant can keep producing side shoots for 6–8 weeks after the main harvest, effectively doubling or tripling total yield. Free broccoli! Who says no to that?
The Secret to Rapid Recovery: Mid-Season Care
Here’s where most people lose their CCAA momentum. The harvest is only half the equation — what you do between cuts is what determines whether you get two harvests or five.
Never Take More Than Two-Thirds
Always leave at least one-third of the plant’s foliage intact. That remaining leaf area is the critical mass your plant needs to photosynthesize enough energy to power regrowth. Strip too much and it basically starves itself trying to rebuild. Think of it like emptying your savings account and then being surprised you can’t pay rent.
Harvest Before 9:00 AM
Overnight, plants pull water from the soil and fill their cells to peak pressure (turgor pressure, if you want to sound smart at a dinner party). This peaks at dawn. Harvesting in the early morning gives you the crispest, most hydrated leaves with the best shelf life. By midday, the sun’s pulled a lot of that moisture out through transpiration, and your greens will be floppy and sad.
Feed the Soil After Every Cut
Every major harvest is a withdrawal from your soil’s nutrient bank. After each clear cut, side-dress with a high-nitrogen organic fertilizer or hit it with a liquid feed — fish emulsion, compost tea, whatever you’ve got. Nitrogen is what drives leaf growth specifically. This is not the time for bloom fertilizers. You want leaves, not flowers.
Overcoming the Two Biggest CCAA Problems
Bolting (Your Greens Going to Seed)
Here’s something most guides get wrong: bolting is triggered primarily by soil temperature, not just air temperature. That means mulching to keep the root zone stable is actually more effective than shade cloth alone. A 2–3 inch layer of straw can keep soil several degrees cooler than bare ground.
Once a plant bolts, the leaves go bitter fast. Your best defense is a three-pronged approach: choose bolt-resistant varieties, keep your succession planting pipeline full so young plants are always ready, and harvest aggressively before heat waves hit.
Flea Beetles
These tiny jerks are enemy number one for Brassica-family greens, leaving signature “lace-like” shothole damage all over your leaves. The fix? Install lightweight floating row covers right after sowing. They block the beetles physically while still letting light, air, and water through. Simple and incredibly effective.
Post-Harvest: The Professional Cooling Sequence
How you handle greens after cutting makes a huge difference — we’re talking shelf life of 3 days versus 10+ days.
- Ice Bath: Dunk harvested greens in ice-cold water for 5–10 minutes. This rapidly drops internal leaf temperature and slows wilting.
- Salad Spin: Remove ALL surface moisture. Water left on leaves is the number one cause of slimy rot in storage.
- Airtight Storage: Layer dry greens loosely between paper towels in a sealed container. Refrigerate at 34–38°F.
Bonus move: Before spinning, soak greens briefly in a 1:3 white vinegar-to-water solution. It kills surface bacteria and adds days of freshness without messing with flavor. Just give them a light rinse with plain water afterward.
Close the Gap: 14-Day Succession Planting
The biggest frustration for new CCAA growers is the “harvest gap” — that awkward stretch when your first planting is spent but the next one isn’t ready yet.
The fix is dead simple: succession planting on a 14-day cycle. Sow a new row or tray every two weeks. While Bed A is being harvested, Bed B is growing, and Bed C just germinated. Overlapping life cycles mean an unbroken supply of greens.
Here’s a quick seasonal framework:
- Spring (March–May): Lettuce, Spinach, Arugula, Mizuna.
- Summer (June–August): Heat-tolerant varieties (Black Seeded Simpson, Swiss Chard).
- Fall (September–November): Kale, Tatsoi, Mustard Greens, Mâche.
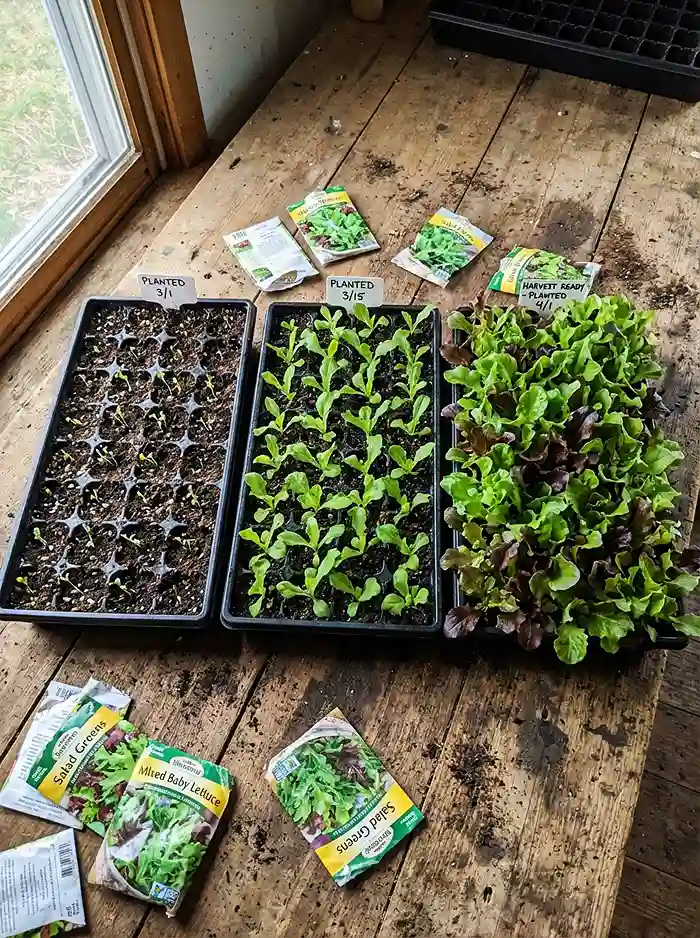
Growing in containers? Just rotate 3–4 pots on the same staggered 14-day schedule. No garden bed required.
Frequently Asked Questions
Can I grow cut and come again greens in containers?
Absolutely. Most CCAA greens have shallow roots and do great in containers with at least 6 inches of depth. Use quality potting mix, make sure drainage is solid, and feed with liquid fertilizer after each harvest cycle.
Is my lettuce still edible after it bolts?
It’s safe to eat — just bitter. The plant is dumping all its energy into flowering and seed production, which changes the leaf chemistry. You can reduce bitterness a bit by soaking leaves in cold water for 15 minutes, but honestly, the better move is to pull bolted plants and pop in fresh sowings from your succession pipeline.
How many times can I harvest a single plant?
Most cut and come again greens give you 3–5 solid harvests before they lose steam or bolt. The big exceptions are Swiss Chard and Kale harvested via the outer-leaf method — those workhorses can produce continuously for an entire season, often 20+ weeks with decent care and feeding.
Cut and come again greens aren’t some trendy gardening hack. They’re a system — built on real plant biology, smart variety choices, and consistent mid-season care. Start with one small bed, sow every two weeks, and harvest before breakfast. Give it one season. I promise you’ll wonder why you ever spent money on bagged salad.