

How Often Should You Change Potting Soil?
Discover how often you should change potting soil (hint: probably not as often as you think). Learn the science-backed signs, money-saving reuse methods, and sterilization tricks that’ll transform tired soil into thriving growing medium. Stop wasting money on new mix—read the complete guide now.
Here’s the honest truth nobody tells you when you start container gardening: how often should you change potting soil? Most potting soil needs changing every 12–18 months, but here’s where it gets interesting—the exact timing depends entirely on what you’re growing, your pot size, and how well you’ve been treating that soil.
And before you panic about the cost, let me tell you a secret: you can actually refresh and reuse a lot of that “old” potting soil instead of tossing it all.
I wish someone had told me this years ago before I threw away hundreds of dollars of perfectly salvageable growing mix!
Table of Contents
The Short Answer: When Should You Actually Change Potting Soil?
Look, I’m going to level with you—soil age isn’t some one-size-fits-all situation. Your hungry tomato plant and that chill succulent sitting in the corner? They’re living completely different lives, and their soil reflects that.
Here’s the real breakdown of how often you should change potting soil:
- Annuals & Vegetables: Every 12 months (these guys are nutrient-hungry beasts)
- Fast-Growing Tropical Plants: Every 12–18 months (they’re growing machines)
- Succulents & Cacti: Every 2–4 years (low-maintenance heroes)
- Large Outdoor Containers: Every 2–3 years (more soil = longer lifespan)
The thing is, nutrient demand, how often you’re watering, and root activity matter way more than just marking your calendar. That heavily fertilized tomato in a 10-inch pot? It’ll burn through soil nutrients faster than you can say “BLT season.”
Why Does Potting Soil Even “Expire”? The Science You Actually Need to Know
Okay, so potting mix doesn’t just wake up one day and decide to quit on you. There’s actual science happening in those containers—and understanding it will save you so much frustration.
Your Soil Is Literally Collapsing (And That’s Normal)
All those organic components—peat, coconut coir, shredded bark—they’re breaking down constantly. It’s like watching a soufflé deflate in super slow motion.
As this happens, those beautiful air pockets that make quality potting mix so fluffy? They disappear. Your roots need oxygen just like you do, and compacted soil is basically suffocating them.
Compacted soil creates a nasty domino effect:
- Water can’t drain properly, leaving roots sitting in swamp conditions
- Roots literally can’t breathe (yes, roots need oxygen!)
- Root rot becomes your new worst enemy
And here’s something weird I learned the hard way: really old, dried-out soil can actually become hydrophobic—meaning it repels water instead of absorbing it. You’ll pour water on top and watch it run straight through or pool on the surface like it hit pavement. Super frustrating.
For a deeper dive into understanding soil structure and what makes good potting mix work, check out our guide on soil basics for container gardening—it’ll change how you think about what’s happening in your pots.
The Chemistry Problem: When Your Soil Becomes a Salt Mine
Here’s what nobody warns you about: every time you fertilize and water (especially with tap water), you’re depositing minerals. Water evaporates, but those minerals? They stick around and accumulate.
That crusty white stuff forming on your soil surface or pot rim? That’s not mold—it’s salt buildup, and it’s a red flag that your soil chemistry is going sideways.
High salt concentration messes with your plants in sneaky ways:
- Creates osmotic stress (fancy term for “roots can’t drink even though water’s right there”)
- Causes “physiological drought”—your plant acts thirsty even when the soil’s wet
- Throws nutrient balance completely out of whack
Plus, as organic matter decomposes, it releases acids that shift your pH levels. When pH goes off the rails, you get nutrient lockout—where nutrients are technically in the soil but your plant can’t access them. It’s like having food in a locked refrigerator.
7 Dead Giveaways That Your Potting Soil Has Checked Out
Figuring out how often to change potting soil gets easier when you know what to watch for. Your plant-and-soil system will basically tell you when it’s time—if you know the signs.
Your Plant Is Screaming for Help:
- Growth just… stops, even though you’re doing everything “right”
- Leaves turn yellow (chlorosis) and fertilizer doesn’t fix it
- Your plant wilts an hour after watering (root problems, not thirst)
The Soil Looks Sketchy:
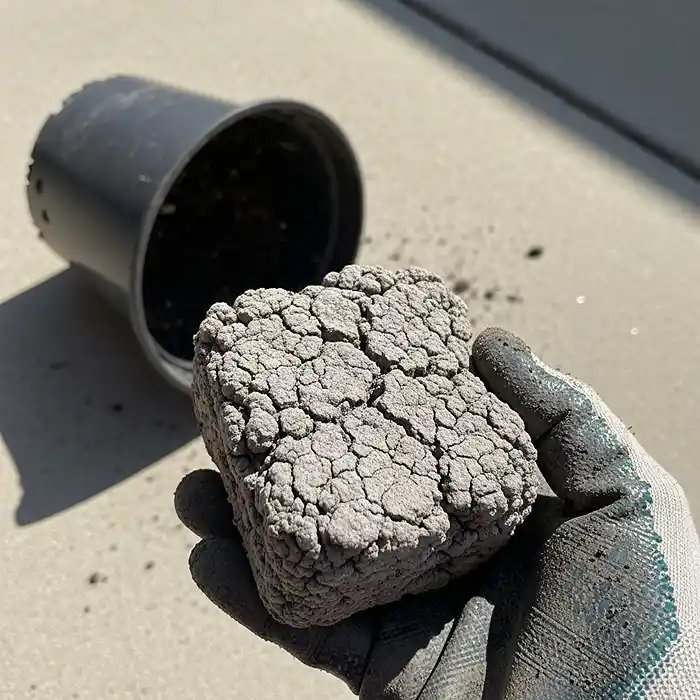
- Gone from rich and dark to gray, dusty, or just lifeless-looking
- Forms hard clumps or this weird “dry cake” texture that won’t absorb water
- Water literally runs straight through like the soil isn’t even there
The Container Is Giving Clues:
- Roots are doing circles like a NASCAR track or pushing the whole plant upward
- White crusty buildup on the soil surface or pot edges (salt city, population: your plant)
Even just one or two of these symptoms means it’s time to seriously consider refreshing or replacing your potting soil. Don’t wait until your plant is on life support!
How to Refresh and Reuse Potting Soil (Your Wallet Will Thank You)
Real talk: reusing potting soil isn’t just about saving money (though that’s a nice perk). It’s actually the sustainable choice, and once you know the tricks, it’s pretty straightforward.
Should You Refresh or Just Start Over?
Not all tired soil is dead soil—some just needs a spa day. Here’s how I decide whether soil gets refreshed or replaced.
Go ahead and refresh potting soil if:
- The structure still looks reasonably normal with visible particles
- You haven’t had disease or mysterious plant deaths in that container
- Water still drains, even if it’s slower than when the soil was fresh
Time to fully replace potting soil if:
- You had chronic root rot issues (that fungus doesn’t mess around)
- Serious pest infestations happened—fungus gnats, root aphids, the nightmare crew
- The soil has turned into this weird mud-like substance that never dries out properly
When there’s disease history, I don’t take chances. Fresh soil = peace of mind.
How to Sterilize Soil for Reusing (Kill the Bad Stuff, Keep the Good)
Before reusing potting soil, you need to deal with any hitchhikers—pathogens, weed seeds, pest eggs. Here are your best soil sterilization methods:
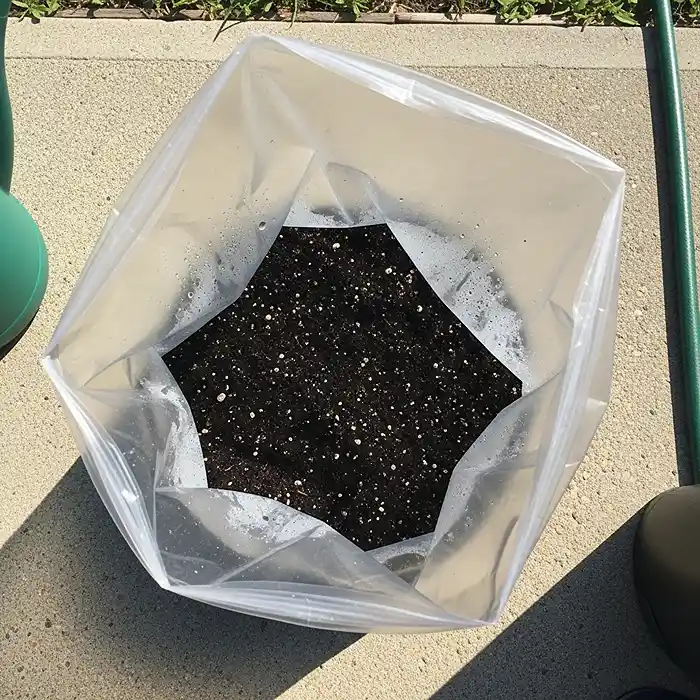
Solarization (My Favorite for Lazy Summer Days): Spread your soil 2–4 inches deep in black plastic bags or shallow trays. Cover with clear plastic and stick it in direct summer sun for 4–6 weeks. The heat buildup literally cooks the problems away. Zero effort required.
Oven Baking (When You Need It Done): Spread moist soil in baking pans, no more than 4 inches deep. Bake at 180–200°F for 30–60 minutes. Use a meat thermometer to hit 180°F internally. Warning: your kitchen will smell interesting.
Microwaving (For Small Batches): Small amounts in microwave-safe containers. Keep the soil moist and nuke in 90-second bursts, stirring between rounds, until it’s steaming hot throughout.
The goal with any sterilization method is killing the bad guys without nuking all the organic matter into oblivion with excessive heat.
Next-Level Soil Rejuvenation: Better Than “Just Add More Dirt”
If you’re just mixing old and new potting mix together and calling it a day, you’re missing out on some game-changing strategies for refreshing container soil.
Why Biochar Is a Container Gardening Superpower
I’m going to sound like a biochar evangelist here, but seriously—this stuff is incredible for long-term containers.
Biochar is carbon-stable for literally centuries. While peat and coir are breaking down and compacting, biochar just keeps doing its job year after year.
It prevents compaction by maintaining rigid pore structure even as everything else decomposes around it. Think of it as the skeleton that keeps your soil from collapsing.
Here’s what makes biochar worth the investment:
- Improves microbial habitat (gives beneficial bacteria cozy homes)
- Enhances nutrient retention (catches and holds minerals that would otherwise wash away)
- Perfect for perennials and long-term container systems
- One application keeps working season after season
According to research from the USDA, biochar can improve soil water retention by up to 18% while reducing nutrient leaching—pretty impressive for something that looks like crushed charcoal.
The Essential Amendments for Bringing Dead Soil Back to Life
Strategic additions can completely transform exhausted potting mix. Here’s my go-to revival kit:
Worm Castings (Nature’s Multivitamin): These restore microbial life and trace nutrients while providing gentle, slow-release nutrition. I add 10–20% by volume, and plants love it.
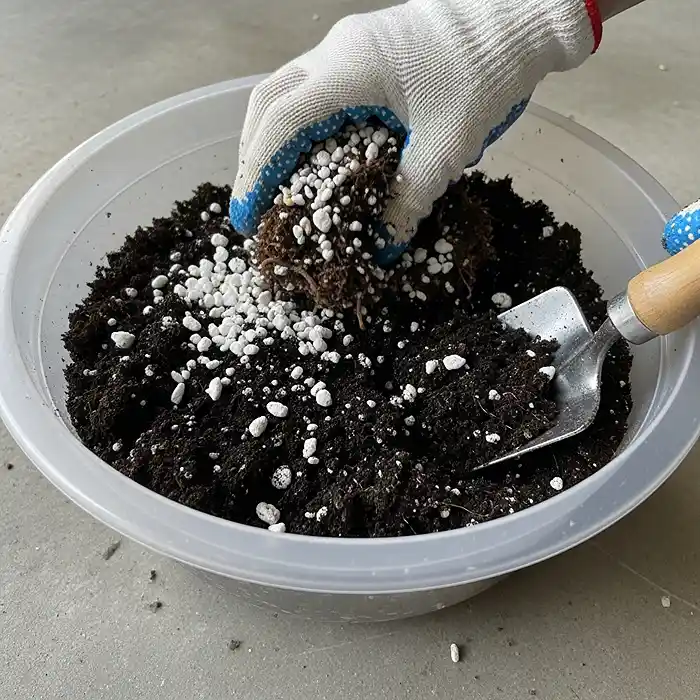
Perlite (The Fluffiness Factor): Reopens air spaces and improves drainage in compacted mix. Mix in 15–25% perlite to restore that original porosity and get oxygen moving again.
Neem Amendments (Pest Insurance): Neem cake or crushed neem seed meal suppress soil-borne pests biologically. Natural compounds keep working as they break down over time.
How Often Should You Change Potting Soil in Giant Containers? (Special Strategies Required)
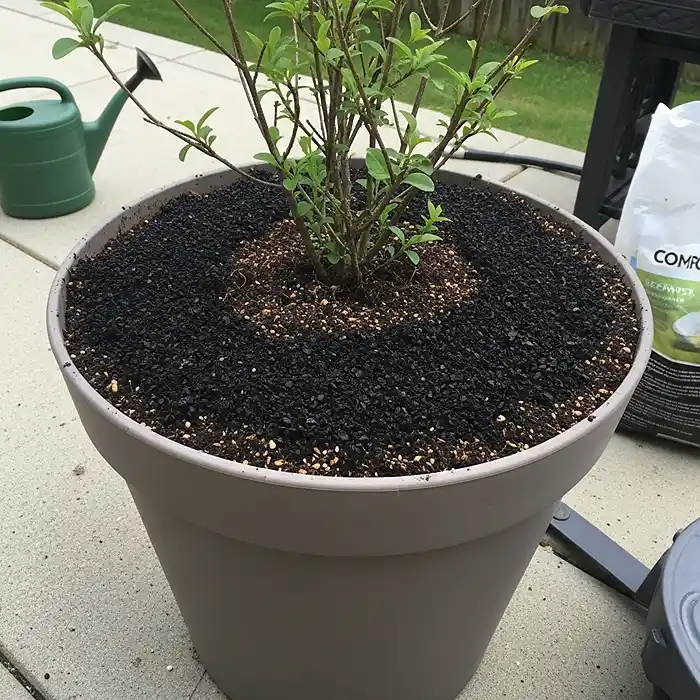
Large outdoor containers are a whole different ballgame when you’re thinking about how often to change potting soil. A 26-inch planter filled with soil can weigh several hundred pounds—full replacement is basically a construction project.
Smart Workarounds That Actually Work
Top-Dressing (The Lazy Gardener’s Best Friend): Just add 1–2 inches of fresh compost or worm castings to the soil surface annually. This refreshes the top zone where most feeding happens, and you don’t have to disturb anything.
Root Pruning (Sounds Scary, Isn’t Really): During refresh cycles, you can remove up to one-third of the root mass. This actually stimulates new feeder root growth while creating space for fresh soil amendments.
Fillers (The Money-Saving Hack): For shallow-rooted plants, use clean plastic milk jugs, large branches, or inverted nursery pots at the container bottom. Reduces total soil volume dramatically while still giving roots plenty of depth.
These techniques let you maintain soil health in massive planters without needing a chiropractor afterward.
Your Burning Questions About Changing Potting Soil, Answered
Does potting soil go bad just sitting in the bag?
Yep, unfortunately. Even unopened bags have a shelf life of about 1–2 years. Nutrients degrade, beneficial microbes die off, and perlite settles—basically, it loses its mojo sitting on the shelf.
Can’t I just use garden soil in my pots instead?
Please don’t! Garden soil is way too dense for containers, drains terribly, and often comes loaded with weed seeds and pathogens. It’s formulated for in-ground use where it has different physics working for it.
What’s this “repotting sulk” thing my plant’s doing?
It’s basically your plant throwing a temporary tantrum after you change its soil. Common in sensitive plants like Ficus. They might drop leaves or wilt for 1–2 weeks while new roots establish. It’s normal—they’ll bounce back.
So there you have it—the complete truth about how often you should change potting soil, when refreshing container soil makes way more sense than replacement, and all the tricks for reusing potting soil like a pro.
Understanding the actual science behind why potting mix breaks down (instead of just following random timelines) puts you in control. Whether you’re growing annual vegetables or managing perennials in massive containers, these strategies will keep your plants thriving and your budget intact. Happy gardening!