

DIY Potting Mix for Small-Space Gardeners
Stop wasting money on bagged soil that compacts by mid-season. Learn how to make your own DIY potting mix with just 3 ingredients—your balcony plants will actually thrive. Includes recipes for vegetables, succulents, and orchids, plus storage hacks for tiny apartments. Start mixing today.
Here’s the thing nobody tells you when you start container gardening: that bag of “potting soil” you grabbed at the store? It’s basically expensive fluff that’ll compact into a brick by mid-season.
I learned this the hard way after killing three gorgeous tomato plants on my apartment balcony. Turns out, making your own DIY potting mix isn’t just some Pinterest fantasy—it’s actually the secret weapon that separates thriving container gardens from sad, wilted disappointments.
Whether you’re squeezing herb pots onto a fire escape or turning your entire balcony into a veggie paradise, the right homemade potting soil gives your plants what they’re literally dying for: air, water, and food in perfect balance. And honestly? It’s way easier (and cheaper) than you’d think.
Let me show you how to mix up batches that’ll make your plants absolutely explode with growth.
Table of Contents
Why Regular Garden Soil Fails in Containers
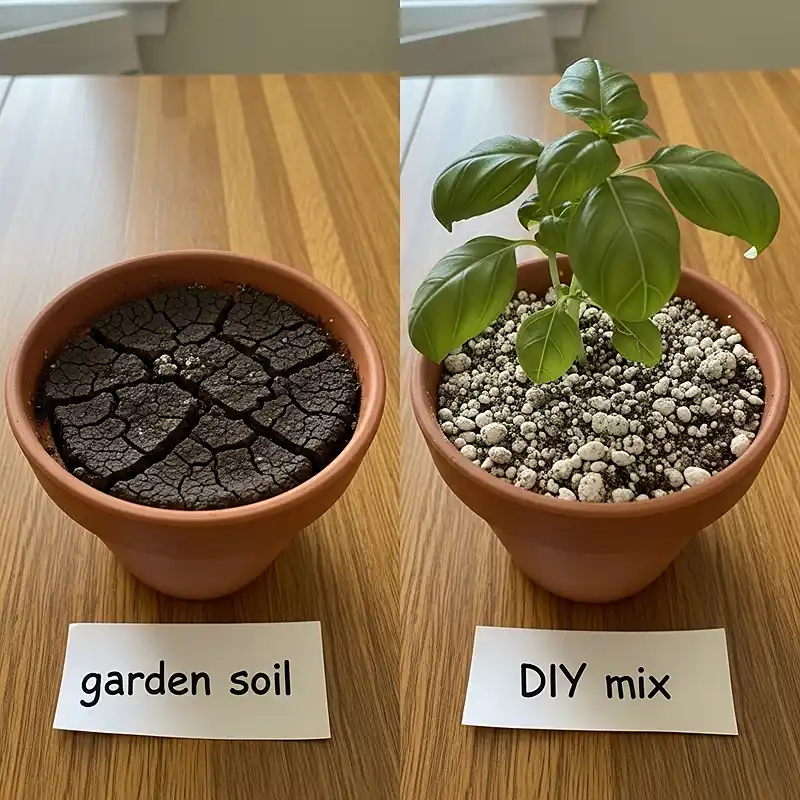
Okay, real talk: using garden soil in pots is like trying to breathe through a wet blanket.
I know it seems logical—dirt is dirt, right? Wrong. So wrong. When you dump garden soil into a container, it acts completely different than it does in the ground.
It basically suffocates your plants. Garden soil compacts under its own weight in pots, squeezing out all those air pockets that roots desperately need. Without oxygen, roots literally drown in their own container, even if you’re not overwatering. You’ll see yellowing leaves, stunted growth, and eventually—yeah, plant death.
Not sure if your containers even have proper drainage? Confused about whether you need fertilizer if you’re using compost? Yeah, those are the questions that tripped me up too. I covered all the container soil basics for container gardening essentials in another post—might want to skim that first if you’re just getting started.
Nutrients vanish into thin air. According to UC Master Gardeners (who know their stuff), container plants exist in tiny isolated worlds. There’s no underground water bringing fresh nutrients, no earthworms doing their thing, no natural decomposition happening below. Garden soil just doesn’t pack enough nutritional punch for these closed-loop systems.
You need something way lighter and fluffier. Good DIY potting mix holds moisture without turning into a swamp, keeps air flowing even when wet, and won’t break your back (or your balcony’s weight limit) when you’re hauling containers around.
Trust me, once you understand this, everything about container gardening clicks into place.
Core Ingredients: Building Your Mix
Think of potting mix like a recipe—once you know what each ingredient does, you can customize it for any plant.
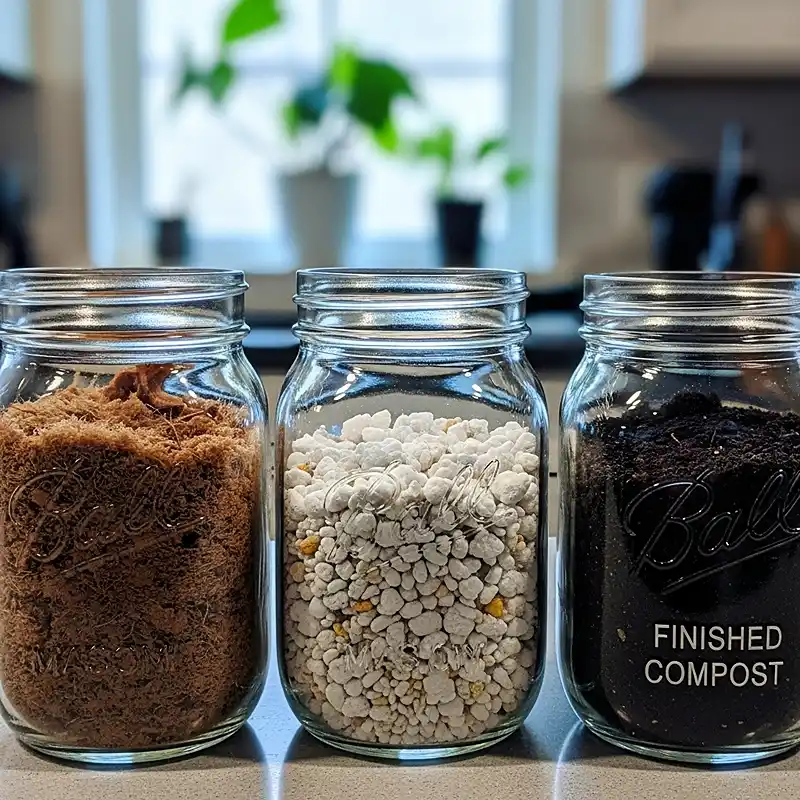
Organic Base: Peat vs. Coir
This is your water-holding, root-anchoring foundation.
Peat moss is the old-school choice. Super acidic (pH 3.5-4.5), holds water like crazy, and honestly works great for blueberries and azaleas that love acidity. But here’s where it gets uncomfortable: harvesting peat destroys ancient wetland ecosystems and releases tons of stored carbon. Not exactly eco-friendly.
Coconut coir is where I’ve landed, and I’m not looking back. It’s made from coconut husks (literally a waste product), sits at a nice neutral pH (5.5-6.8), and here’s the game-changer—it actually re-wets after drying out.
Ever tried watering a bone-dry peat pot and watched the water just run right through without absorbing? Yeah, peat becomes hydrophobic when it dries. Coir doesn’t do that annoying thing.
Quick reality check:
| Feature | Peat Moss | Coconut Coir |
|---|---|---|
| pH Level | 3.5-4.5 (acidic) | 5.5-6.8 (neutral) |
| Water Retention | Excellent | Excellent |
| Re-wetting Ability | Terrible (goes hydrophobic) | Easy peasy |
| Sustainability | Pretty bad | Actually good |
| Cost | Cheaper | Few bucks more |
For most small-space gardeners, coir just makes more sense. Better for the planet, easier to work with, and it doesn’t punish you for forgetting to water.
Aeration Components
These are the unsung heroes that keep your mix from turning into concrete.
Perlite is those little white volcanic rock bits that look like Styrofoam (but aren’t). They’re ridiculously lightweight, create instant drainage, and never break down. Perfect if you’re doing indoor containers or hanging baskets where every ounce matters.
Pumice is perlite’s slightly heavier cousin. If you’ve got a windy balcony where lightweight perlite literally blows away during watering (been there), pumice stays put while still doing the aeration thing beautifully.
Rice hulls are my sustainable favorite. They’re just agricultural leftovers, they aerate like champs, and as they slowly break down, they add silica that actually strengthens plant cell walls. Plus they’re way cheaper if you’re mixing up big batches of peat-free potting mix.
Nutrient Engine
This is what transforms boring dirt into actual living soil.
Compost and worm castings are like hiring a microscopic maintenance crew for your pots. They bring in beneficial bacteria and fungi that break down organic stuff, fight off diseases, and make nutrients available exactly when plants need them. Make sure your compost is completely finished—earthy-smelling, dark, with no visible food scraps or that hot ammonia smell.
Biochar is honestly kind of magical. It’s like charcoal but more porous, and it acts as a permanent hotel for beneficial microbes. They move into all those tiny pores, set up shop, and start doing their plant-feeding thing. Plus biochar holds onto nutrients and water, releasing them slowly instead of letting them wash away. Once you add it, it basically lasts forever and gets better with age.
Azomite or other rock dusts are optional but totally worth it. Just 1-2% of your total mix supplies all those trace minerals (calcium, magnesium, iron, and like 60 others) that plants need but indoor environments don’t provide. It’s like a multivitamin for your pots.
DIY Recipes for Small Spaces
Let’s get practical. Here are my go-to formulas that actually work.
Easy Everyday Mix
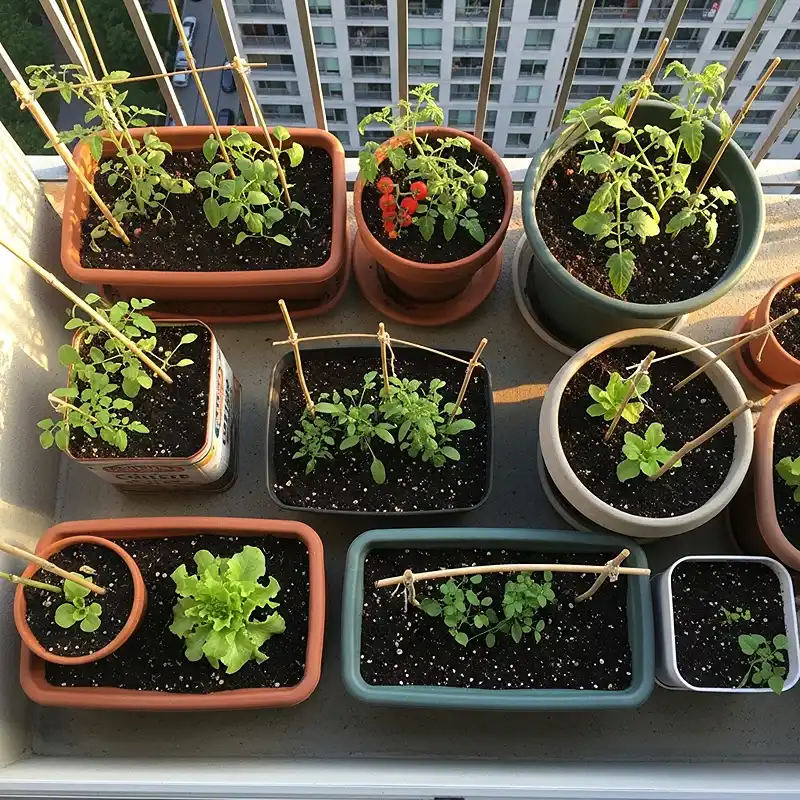
This is your workhorse homemade potting soil for most situations.
The recipe’s stupid simple:
- 1 part coconut coir
- 1 part finished compost
- 1 part perlite or rice hulls
Just mix it up, moisten it before planting, and boom—you’ve got a balanced blend that works for everything from your pothos collection to that basil plant you’re determined not to kill this year.
Seriously works for: snake plants, spider plants, lettuce, spinach, herbs, and basically every common houseplant you’re probably growing.
High-Yield Vegetable Mix
Okay, if you’re growing tomatoes or peppers—plants that actually produce food—they need the premium stuff.
Here’s what I use:
- 33% coconut coir
- 33% compost
- 10% pumice
- 10% coarse sand (adds weight so top-heavy tomatoes don’t tip over)
- 5% biochar
- 1% Azomite rock dust
This nutrient-dense blend supports heavy feeders all season long. The sand keeps things stable on windy balconies, and the biochar builds long-term soil structure.
Pro tip: top-dress with more compost every month during growing season. Your tomatoes will thank you with actual tomatoes.
Specialized Blends
For succulents and cacti: These drama queens need water to drain immediately.
Mix 40% coir, 30% coarse sand, and 30% pumice. Water should whoosh through in seconds while still keeping plants barely hydrated between waterings.
For orchids: According to Ashi Homes & Gardens (and my own murdered orchids that taught me this lesson), these air-loving weirdos need chunky mix.
Go 60% orchid bark, 25% coir, and 15% perlite. Those big bark chunks create massive air pockets that prevent the root rot that kills most grocery store orchids.
For ferns and peace lilies: These moisture lovers need extra water retention.
Equal parts coir, compost, and perlite, but throw in an extra 10% coir or peat moss. Keeps them from doing that dramatic wilting thing every three days.
When to Make Your Own vs. When Not To
Look, I love DIY, but I’m not gonna pretend it’s always the answer.
Make your own when:
You’ve got 10-50 containers to fill. The effort of mixing one big batch pays off all season while saving you serious cash compared to those fancy bagged mixes.
You actually care about sustainability. Building peat-free potting mix with coir bricks, local compost, and rice hulls slashes your carbon footprint dramatically.
You’re a tinkerer who loves customization. Blueberries want acid? Done. Lavender likes alkaline? Easy. Mixing your own lets you dial it in perfectly.
Just buy the bagged stuff when:
You need to repot something RIGHT NOW and haven’t planned ahead. Root-bound plants can’t wait three weeks while you sterilize compost.
You live in a studio apartment with zero storage. Five-gallon buckets of ingredients don’t exactly fit under a twin bed.
You’re managing hundreds of containers. At that scale, your time is worth more than the money you’d save.
Customization: Boost Growth and Prevent Issues
Want to level up your DIY potting mix? These tweaks solve specific problems.
- Aspirin water sounds weird but works. Dissolve one uncoated aspirin per gallon of water when you first moisten your mix. The salicylic acid primes plants’ immune systems against stress, pests, and diseases. It’s like giving them a flu shot.
- Calcium carbonate (garden lime) prevents that heartbreaking blossom end-rot on tomatoes. Mix 2 tablespoons per gallon for fruiting veggies. Also raises pH slightly if you’re using acidic peat.
- Coffee grounds from your morning brew add nitrogen and acidity—perfect for blueberries and azaleas. Use them at 10-20% of your compost portion, max. More than that actually stunts growth (learned that one the hard way).
- Rock dust replenishes all those trace minerals that closed containers can’t replace naturally. Just 1-2 tablespoons per gallon covers everything from chlorophyll production to disease resistance.
Safety First: Pathogen & Pest Prevention
Don’t skip this part—homemade mixes can harbor some nasty surprises.
Sterilization Protocol
You gotta bake your compost before mixing it in. Otherwise you’re potentially introducing fungus gnat larvae, weed seeds, and plant diseases.
Spread compost 3-4 inches deep in baking pans, cover with foil, and bake at 180-200°F for 30 minutes. Use a meat thermometer to confirm it hits 180°F internally. Let it cool completely before mixing.
The USDA recommends soil sterilization at 180-200°F specifically to kill common pathogens while preserving beneficial microbes. Going hotter kills everything, which defeats the whole ‘living soil’ concept we’re building here.
This kills the bad stuff while keeping beneficial microbes that can handle heat. Don’t go hotter—you’ll sterilize it completely and lose all the good biology you want.
Protective Measures
Always wear a dust mask when mixing. Dry coir, compost, and perlite create clouds of fine particles that’ll have you coughing for hours.
Gloves aren’t optional. Compost can harbor rare but nasty stuff like Legionella bacteria. It enters through cuts or gets inhaled from dust.
Mix outside or in a super well-ventilated space. Your lungs will appreciate it.
Storage & Logistics for Small Spaces
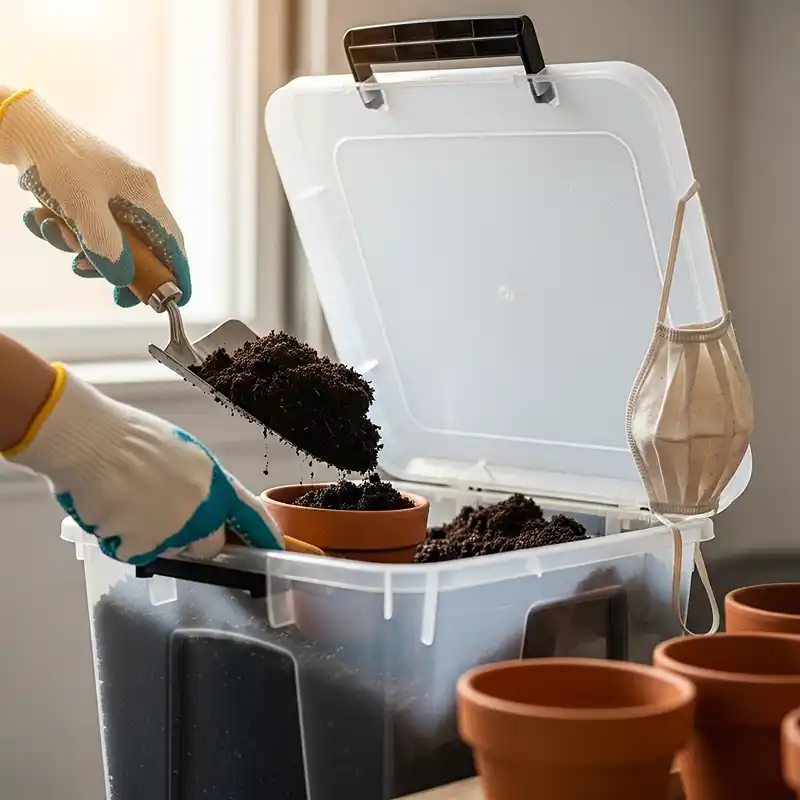
Here’s how to make homemade potting soil work in an apartment.
The tote method is genius. Mix everything in a big plastic storage bin with a lid. When you’re planting, just scoop directly from the tote into pots. No spills on your balcony or living room floor, everything stays contained.
Cute containers make it bearable. I store perlite and amendments in vintage coffee tins and ceramic crocks. Looks intentional instead of like you’re hoarding dirt in your apartment.
Storage tips that matter: Keep mixed soil in a cool, dry spot in semi-airtight containers. Don’t seal them completely—they’ll go anaerobic and kill your beneficial microbes. Use containers with loose-fitting lids that allow minimal air exchange.
Properly stored DIY potting mix stays good for 1-2 years. Before using old mix, fluff it up and check for mold or sour smells that mean something went anaerobic.
Recharging Old Mix (Sustainability)
Here’s my favorite part: you can reuse quality mix for literally a decade.
After each season, dump your used mix into a big container. Pull out dead roots and break up compacted chunks. This fluffing reintroduces air that got compressed during growing season.
Feed it fresh amendments. Mix in new compost (10-20% by volume) and more rock dust or biochar. You’re replacing depleted nutrients and restoring microbial populations.
Test pH yearly and adjust as needed. Most plants want 6.0-7.0. Add lime to raise it, sulfur to lower it.
This costs pennies compared to buying new mix every year. I know gardeners who’ve been reusing the same base mix for 10+ years with amazing results.
DIY potting mix FAQs
Can I use garden soil in pots?
Nope. Garden soil compacts in containers, suffocates roots, and blocks drainage. Always use actual potting mix designed for container growing.
Is Miracle-Gro safe for vegetables?
Yeah, when used as directed. If you’re growing certified organic, check for OMRI (Organic Materials Review Institute) listings. They’ve got organic options now.
How do I adjust pH in potting mix?
Add garden lime (calcium carbonate) to raise pH—use 2-4 tablespoons per gallon for acidic peat. Lower pH with elemental sulfur at 1 tablespoon per gallon if needed.
What’s the difference between potting soil and potting mix?
Potting mix has zero actual soil—it’s soilless stuff like coir, perlite, and nutrients. “Potting soil” sometimes contains composted soil but should still be lightweight for containers.
How often should I replace potting mix?
With recharging? 10+ years easily. Only do a complete replacement if you’ve got persistent disease issues, severe pest infestations, or it smells sour.
Conclusion: Start Your Small-Space Garden with the Right Mix
Look, making your own DIY potting mix isn’t complicated—it just requires understanding what plants actually need.
The right peat-free potting mix creates genuine living soil even in a 6-inch pot. You’re building a complete ecosystem of air, water, nutrients, and beneficial microbes that supports explosive plant growth, strong stems, and real harvests.
Whether you’re growing one basil plant on a windowsill or filling an entire balcony with vegetables, spending an hour making quality potting mix pays off all season. Healthier plants, fewer pest problems, and the satisfaction of growing stuff in limited space with materials you mixed yourself.
Start with the Easy Everyday Mix for your first batch. As you get comfortable, start customizing for specific plants, experiment with local amendments, and develop your own signature blends that work in your unique setup.
Your plants will absolutely notice the difference. And honestly? So will your grocery bill when you’re harvesting fresh herbs and veggies all summer instead of buying sad, overpriced supermarket produce.
Happy growing!