

Microgreens Growing System for Small Apartments
This microgreens growing system for small apartments grows 40x more nutritious greens in 7 days. Setup, costs & varieties inside. Start growing today!
With grocery prices doing their best impression of a rocket launch and fresh produce wilting before you even get it home, growing microgreens indoors is one of the smartest (and frankly, most satisfying) moves an apartment dweller can make. Think of it as your tiny, personal food factory.
A Microgreens Growing System for Small Apartments is a compact indoor setup that combines trays, lighting, watering, and airflow to grow nutrient-dense greens from seed to harvest in 7–14 days—no yard required.
In this guide, I’ll walk you through exactly what you need to get started, how to nail every stage of the growing cycle, which varieties taste best and pack the most nutrition, and how quickly this little hobby pays for itself. Whether you’re eyeing indoor hydroponic kits or keeping it simple with soil trays, you’re about to build a nutrient-dense home garden that fits next to your coffee maker.
Table of Contents
What Are Microgreens and Why They’re Perfect for Apartment Living
What Exactly Are Microgreens?
Microgreens are baby vegetables and herbs harvested at the cotyledon stage—that brief, beautiful moment when the first set of seed leaves have fully opened. You snip them 7–14 days after planting, when they’re just 2–4 inches tall. They’re tiny, sure, but they’re doing a lot of heavy lifting nutritionally.
Now, people mix these up all the time, so let’s clear this up once and for all. Sprouts are seeds germinated in water for 2–5 days—you eat the whole thing, root and all, no light needed. Baby greens are older plants with multiple true leaves, harvested after 15–40 days.
Microgreens sit right in the sweet spot between the two: grown in soil or a soilless medium, under light, and harvested once those first cotyledon leaves open up.
Nutritional Power of Microgreens
Here’s where things get genuinely impressive. A landmark study by USDA and University of Maryland researchers found that microgreens contain 4 to 40 times more vitamins than their fully grown counterparts.
Red cabbage microgreens, for instance, pack roughly six times the vitamin C of a mature cabbage head. That’s wild for something you can grow in a takeout container.
The key compounds showing up in high concentrations include antioxidants, polyphenols, carotenoids, and vitamins C, E, and K. Broccoli microgreens deserve a special shoutout for their sulforaphane content—a compound studied for anti-inflammatory and cancer-preventive properties—clocking in at an estimated 10–40 times more than what you’d find in mature broccoli from the grocery store.
Why Microgreens Thrive in Small Apartments
This is what makes a microgreens growing system for small apartments such a no-brainer. A single 10×20-inch tray fits on a kitchen counter, a bookshelf, or even on top of your microwave. Stack a few trays vertically and you’ve multiplied your output without losing a single square foot of living space.
The harvest cycles are ridiculously fast—radish microgreens can be ready in seven days. That means continuous batches rolling through all year, regardless of what the weather’s doing outside.
LED grow lights make sunlight optional, and the whole setup genuinely supports urban self-sufficiency. If you’re curious about making the most of limited indoor space, check out our full guide on indoor gardening for small spaces for more ideas beyond microgreens.
Tools and Equipment for a Microgreens Complete Growing System
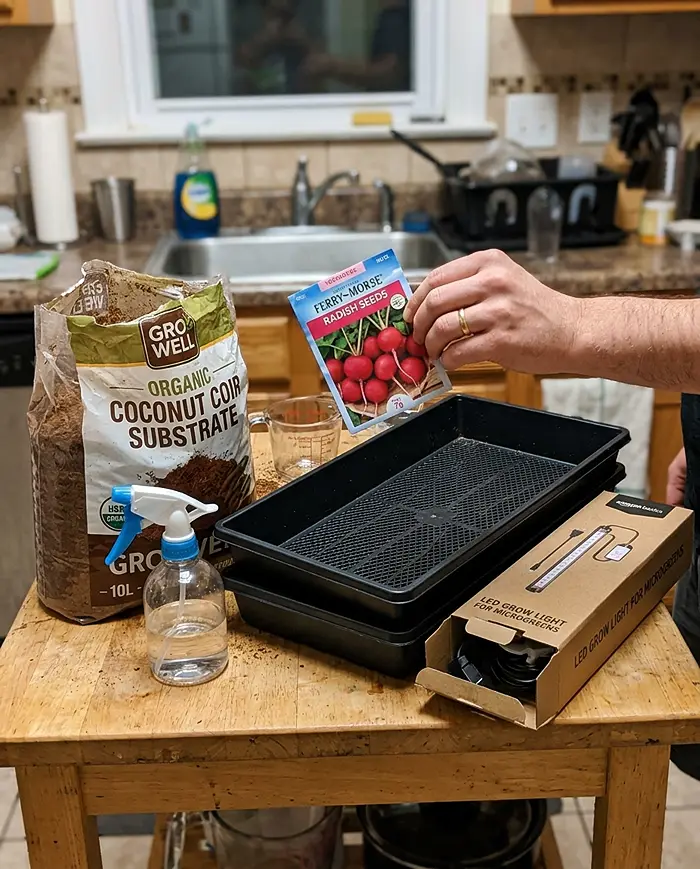
Essential Equipment
Setting up a microgreens growing system for small apartments doesn’t require a trip to a specialty store.
You need four things: growing trays (one with drainage holes for the seeds, one solid tray underneath to catch water), a growing medium like organic potting soil, coconut coir, or hemp mats, high-quality microgreen seeds bought in bulk, and a fine-mist spray bottle for gentle watering. That’s it. Seriously.
Lighting Systems for Apartments
If you’ve got a south-facing window pulling in 4–6 hours of direct sunlight, some varieties will do just fine. But I’ll level with you—most growers (myself included) get way better, more consistent results with full-spectrum LED grow lights.
For leafy microgreen growth, you want a light spectrum heavy on blue wavelengths (440–470nm) for compact, sturdy stems and red wavelengths (640–680nm) for solid photosynthesis. Run the lights for 14–16 hours a day. It sounds like a lot, but your greens will thank you with noticeably thicker, more vibrant growth.
Optional Automation Tools
Want to make your microgreens growing system for small apartments practically run itself? Indoor hydroponic kits use bottom-watering reservoirs and soilless pads to eliminate the soil mess entirely—your roommates will appreciate that one. Automated watering trays deliver steady moisture through capillary action. Humidity domes keep things cozy during germination, and a small USB-powered fan improves airflow to keep mold at bay.
From Seed to Harvest: The Complete Microgreens Growing Cycle
Step 1: Seed Selection and Preparation
Start with untreated, high-germination-rate seeds from a reputable microgreen supplier. Don’t just grab random seeds from a garden center—you want varieties specifically selected for microgreen production.
Larger seeds like peas and sunflowers benefit from an 8–12 hour pre-soak in clean water to soften the seed coat and jumpstart germination. Smaller seeds like broccoli and radish? Toss them right onto the tray—no soaking needed.
Step 2: Sowing and Seed Density
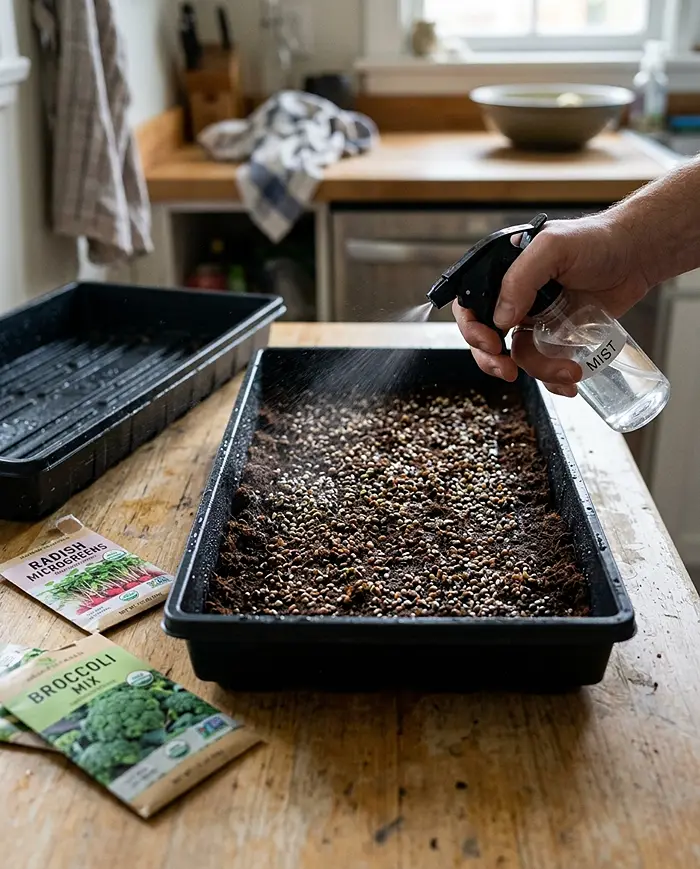
Spread seeds evenly across your moistened growing medium. Here’s where beginners almost always go wrong: they overcrowd the tray. I get it—more seeds feels like more greens.
But overcrowding chokes airflow, produces weak stems, and basically rolls out the welcome mat for mold. Small seeds should form a single, even layer with minimal overlap. Larger seeds like sunflower can be packed a bit tighter since each plant takes up more individual space.
Step 3: Germination and Blackout Period
After sowing, cover the tray with an inverted second tray or a humidity dome. This blackout period lasts 2–4 days and mimics the darkness of soil, encouraging seedlings to push upward and develop strong root systems. The weight of the cover tray also provides gentle resistance that strengthens stems. Mist lightly once a day if the surface feels dry—don’t drench it.
Step 4: Growth Stage Under Light
Once you see pale yellow shoots reaching 1–2 inches (usually around day 3–4), it’s showtime. Remove the cover and slide the tray under your LED grow lights for 14–16 hours daily.
Those yellow shoots will green up within 24–48 hours through photosynthesis—it’s honestly one of the most satisfying things to watch. Keep humidity around 40–60% and maintain gentle airflow across the surface to prevent damping off disease.
Step 5: Harvesting Microgreens
Harvest when greens hit 2–4 inches and the cotyledon leaves are fully expanded. Grab clean, sharp scissors and cut just above the soil line. Rinse gently, pat dry, and store in a sealed container lined with a paper towel in the fridge. Done right, they’ll stay fresh for 5–7 days—though in my experience, they rarely last that long once you start adding them to everything.
Best Microgreens for Beginners in Small Apartments
Fast and Easy Varieties
If you’re brand new, start here. Radish microgreens are the overachievers of the bunch—ready in as few as 7 days with a bold, peppery kick. Broccoli microgreens mature in 8–10 days and taste mild enough to sneak into almost anything. Pea shoots take a bit longer at 10–12 days but reward you with a sweet, satisfying crunch that’s hard to beat on sandwiches.
Nutrient-Dense Microgreens
For maximum nutritional bang per tray, grow red cabbage (loaded with vitamin C and anthocyanins), kale (rich in vitamins K and A), and mustard greens (packed with polyphenols and a sharp, peppery personality). None of these need special techniques—just follow the standard cycle outlined above.
Flavor-Based Selection Guide
| Microgreen | Flavor Profile | Growth Time |
|---|---|---|
| Radish | Spicy | 7 days |
| Pea shoots | Sweet | 10–12 days |
| Sunflower | Nutty | 10 days |
| Broccoli | Mild | 8–10 days |
The Science of High-Yield Microgreen Production
Optimizing Light in Apartments
Two numbers matter when dialing in your lighting: PPFD (Photosynthetic Photon Flux Density), which measures how much usable light is actually hitting your plants, and DLI (Daily Light Integral), the total light your greens accumulate over 24 hours.
For most microgreens, target a PPFD of 100–200 µmol/m²/s and a DLI of 6–12 mol/m²/day. Position lights 6–12 inches above the tray and raise them gradually as the greens grow to maintain even coverage.
Maximizing Nutrient Density
Here’s the cool science behind why microgreens are so nutritious. In their early growth stage, plants produce concentrated secondary metabolites—compounds involved in stress response and rapid cell development.
As the plant matures and grows bigger, those compounds get diluted across more tissue. Harvesting at the microgreen stage captures these metabolites at peak concentration. It’s like catching a wave at its highest point.
Nutrient Concentration Table
| Microgreen | Key Nutrient | Approximate Increase vs Mature Plant |
|---|---|---|
| Red cabbage | Vitamin C | 6x |
| Broccoli | Sulforaphane | 10–40x |
| Cilantro | Antioxidants | 3x |
| Radish | Polyphenols | 10x |
Choosing the Best Growing Method for Apartments
Not every microgreens growing system for small apartments looks the same. Here’s how the three main approaches stack up:
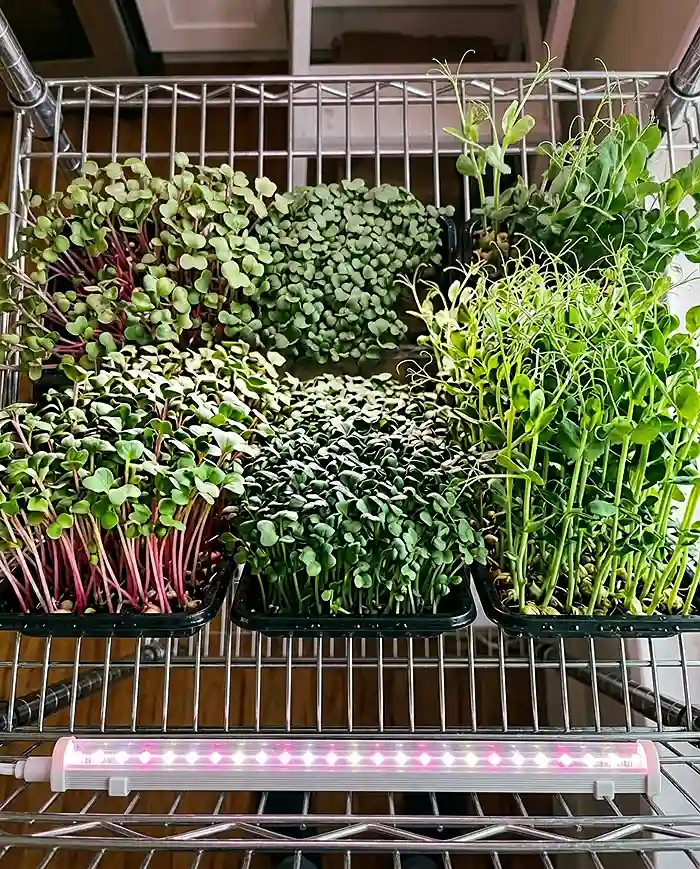
System Selection Matrix
| Method | Mess Level | Maintenance | Cost | Yield Potential |
|---|---|---|---|---|
| Soil trays | Medium | Low | Low | High |
| Passive hydroponic trays | Low | Low | Medium | High |
| Automated indoor systems | Very low | Very low | High | High |
Soil-Based Microgreen Systems
This is the classic starting point, and honestly, it’s hard to beat for beginners. Organic potting mix or coconut coir provides natural water retention and a very forgiving growing environment. Startup costs are the lowest of all three methods, and you can be up and running in under an hour.
Passive Hydroponic Systems
Bottom-watering hydroponic trays use a reservoir and capillary mat to wick moisture up to the root zone. No top-watering means less mess in your apartment—a real win when your “farm” is six inches from your toaster. This is an excellent middle-ground option that balances cleanliness with affordability.
Fully Automated Microgreen Systems
Smart indoor gardens with built-in LED lighting, automated watering, and app-based controls are the luxury tier. They minimize daily effort to almost nothing. The tradeoff is a higher upfront price tag, but for apartment dwellers who want a true set-it-and-forget-it nutrient-dense home garden, they’re worth considering.
The 5 Levers of Microgreen Yield Optimization
These are the five things that separate okay harvests from genuinely impressive ones. Nail these and your microgreens growing system for small apartments will consistently outperform expectations.
Lever 1: Correct Seed Density. Overcrowding produces thin, leggy stems and invites disease. Aim for even coverage with minimal seed overlap so every plant gets adequate light and airflow.
Lever 2: Blackout Period Management. A solid 2–4 day blackout encourages taller, sturdier growth. The cover tray’s weight acts as gentle resistance training for your seedlings—think of it as plant CrossFit.
Lever 3: Humidity and Airflow Control. Stagnant, humid conditions are mold’s best friend. A small fan on low speed near your trays reduces fungal risk dramatically while strengthening cell walls.
Lever 4: Bottom Watering Techniques. Adding water to the solid bottom tray instead of spraying the surface keeps foliage dry and slashes fungal disease risk. This one change is probably the single biggest upgrade an intermediate grower can make.
Lever 5: Harvest Timing. Cut within the peak nutrition window—when cotyledon leaves are fully open but before the first true leaves show up. That’s where maximum nutrient density and the best flavor live.
Cost Breakdown and Profit Potential
Initial Setup Costs
| Item | Estimated Cost |
|---|---|
| Trays and lids | $15–30 |
| LED grow light | $25–60 |
| Seeds | $10–20 |
| Growing medium | $10 |
A complete basic microgreens growing system for small apartments runs between $60 and $120. That’s less than two fancy grocery hauls.
Cost Per Harvest
An average 10×20-inch tray produces 4–8 ounces of microgreens per cycle. Factoring in seeds and growing medium, each tray costs roughly $1.50–3.00 to produce. For context, that same amount from a store would run you $16–$48.
Retail vs Homegrown Microgreens
| Source | Price per oz |
|---|---|
| Grocery store | $4–6 |
| Farmers market | $5–8 |
| Homegrown | $0.30–0.80 |
You’re looking at 80–90% savings compared to retail. Most microgreens complete growing systems for small apartments pay for themselves within 1–2 months of regular harvesting. After that, it’s basically free food with a tiny seed budget.
Maintenance and Troubleshooting
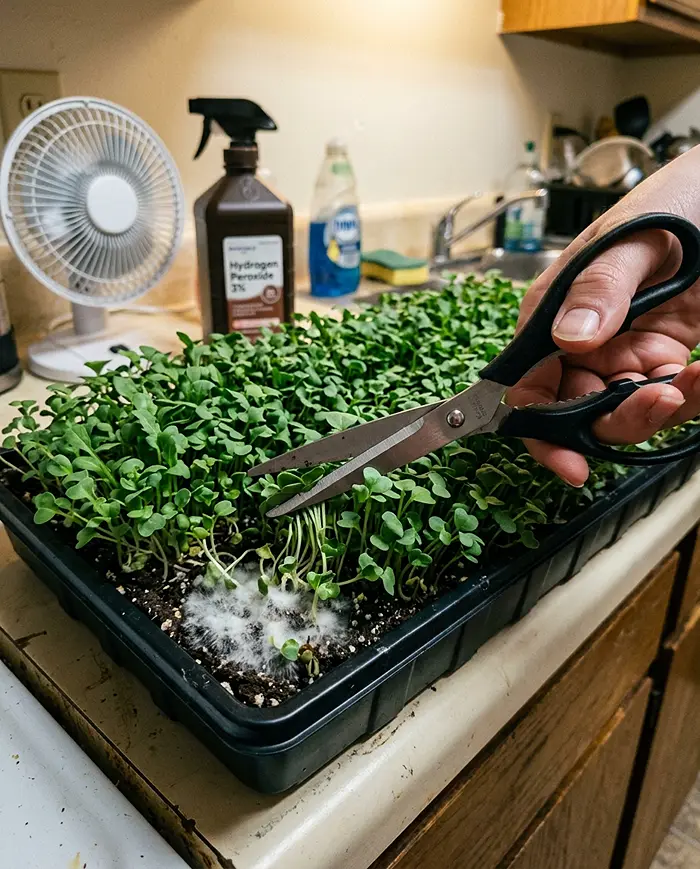
Preventing Damping Off Disease
Damping off—that frustrating fungal condition where seedlings suddenly collapse at the soil line—is the number one headache for indoor growers. Prevent it by sterilizing trays between cycles, keeping airflow consistent with a small fan, and resisting the urge to overwater during germination. Less is more when it comes to moisture in the early days.
Sanitization Protocol
After each harvest, clean all trays thoroughly. Soak them in a solution of one tablespoon of 3% food-grade hydrogen peroxide per quart of water for 10 minutes, rinse, and air dry before replanting. It takes five minutes and eliminates lingering mold spores and bacteria. Don’t skip this step—future you will be grateful.
Managing Light and Airflow in Apartments
Seeing leggy, stretched-out stems? That’s your greens begging for more light. Lower your LED panel closer to the tray or extend the photoperiod.
For airflow, crack a nearby window when weather cooperates or position a small oscillating fan to create gentle, continuous air movement across the growing area. Your microgreens growing system for small apartments works best when light and air are both dialed in.
Microgreens Growing System for Small Apartments FAQs
Can microgreens regrow after cutting?
Nope. Most varieties give you one harvest because you’re removing the growing point when you cut above the soil line. Pea shoots are the one exception—they might push out a smaller, less vigorous second cut, but don’t count on it.
How much light do microgreens need?
At minimum, 4–6 hours of direct sunlight or 14–16 hours under LED grow lights. Honestly, artificial lighting almost always produces more uniform results than relying on window light, especially in north-facing apartments.
Are hydroponic microgreens as nutritious as soil-grown?
Yes. Research shows that with adequate light and a balanced nutrient solution, hydroponic microgreens match the nutritional profile of soil-grown ones. The growing medium matters less than light quality and when you harvest.
How long do microgreens take to grow?
Most varieties are ready within 7–14 days. Radish is the speed demon at 7 days, while sunflower and pea shoots take 10–12 days. Either way, you’re eating homegrown greens before your next Amazon order arrives.
Conclusion: Producing Fresh Food in Any Apartment
Microgreens are, hands down, one of the simplest and most rewarding indoor food systems available to apartment dwellers. They take up almost no space, require minimal equipment, and deliver highly nutritious greens year-round—no matter your climate, your apartment size, or your gardening experience level.
A microgreens complete growing system for small apartments turns any countertop, shelf, or windowsill into a compact, nutrient-dense food garden that combines smart technology, sustainability, and fresh nutrition in just a few trays. Start with one tray of radish microgreens this weekend. In seven days, you’ll be eating greens you grew yourself—for pennies—and wondering why you didn’t start sooner.