

Growing Radishes and Turnips in Containers
Growing radishes and turnips in containers gets you real, crunchy vegetables in 25 to 40 days flat, no garden bed required, just a pot and a sunny railing.
Table of Contents
The Instant Gratification of Fast Container Root Crops
Most vegetables make you wait. Tomatoes take 70+ days. Peppers can take 90. If you’re new to container vegetable gardening, that kind of patience is a hard sell when your only growing space is a fourth-floor balcony.
Radishes and baby turnips flip the script. I grow both on a north-east facing balcony in zone 6b, and my first-ever radish crop was ready to pull in 24 days. That speed is exactly why these two roots are the best entry point into vegetables in pots for anyone who wants proof their thumb isn’t actually black.
They’re forgiving, they’re fast, and a single 12-inch window box can feed a household a steady trickle of fresh roots all spring or fall. Once you see a radish swell in three weeks, you’re hooked.
Choosing the Right Varieties for Quick Harvests
Success starts at the seed packet. Standard field radishes and storage turnips bred for deep garden soil and long seasons will sulk in a container. You want dwarf, quick-maturing cultivars bred specifically for shallow root runs and compressed timelines.
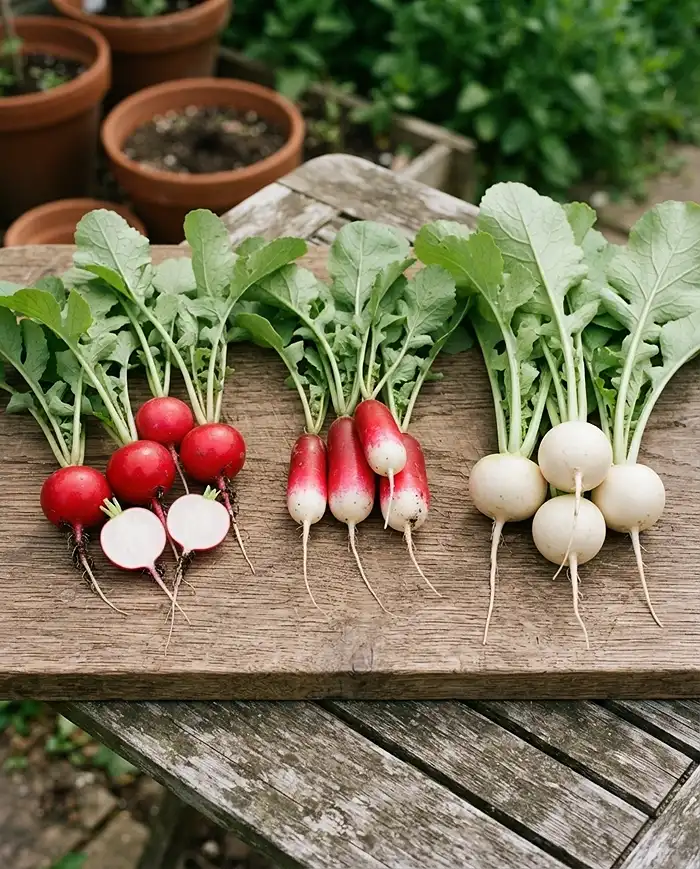
Best Radish Varieties for Pots (French Breakfast and Cherry Belle)
Cherry Belle is the classic for a reason: perfectly round, cherry-red globes ready in about 22 to 24 days. It’s what I sow in my first spring batch every year because it’s nearly foolproof.
French Breakfast is my second go-to. It’s elongated, mild, and the shoulders push up out of the soil line as it matures, so you can literally watch harvest day approach without pulling a single test root.
- Cherry Belle: 22-24 days, round red globes, very beginner-friendly
- French Breakfast: 25-30 days, oblong red-and-white, mild flavor
- Sparkler: 24-27 days, bicolor, holds well without turning pithy
Top Baby Turnip Cultivars (Hakurei and Tokyo Market)
Hakurei changed how I think about turnips. These smooth, golf-ball-sized white roots are sweet and crisp enough to eat raw, sliced onto a salad like an apple. No cooking, no bitterness.
Tokyo Market is nearly identical and just as reliable in shallow pots. Both mature in roughly 35 to 45 days and stay tender if you pull them at the right size instead of letting them oversize in the container.
Pre-Planning Your Container and Soil Setup
Root vegetables live and die by what’s happening underground. Skip this prep and you’ll get forked, stunted, or split roots no matter how well you water. This is where most first-time container garden tips fall short: they focus on watering and skip the soil physics entirely.
Sizing Your Containers for Shallow Root Crops
Forget depth obsession. Radishes and baby turnips need a minimum of 6 to 8 inches of soil depth, but what actually matters is surface area. A wide, shallow window box or bowl planter lets you sow far more seeds than a single deep pot of the same volume.
I use a 24-inch by 8-inch by 8-inch window box and get roughly 20 to 24 radishes per succession sowing. Check the pot size guide for vegetables if you’re unsure what container fits your space, and see this breakdown of deep vs. shallow root vegetables for pots for why radishes don’t need the depth that carrots do.
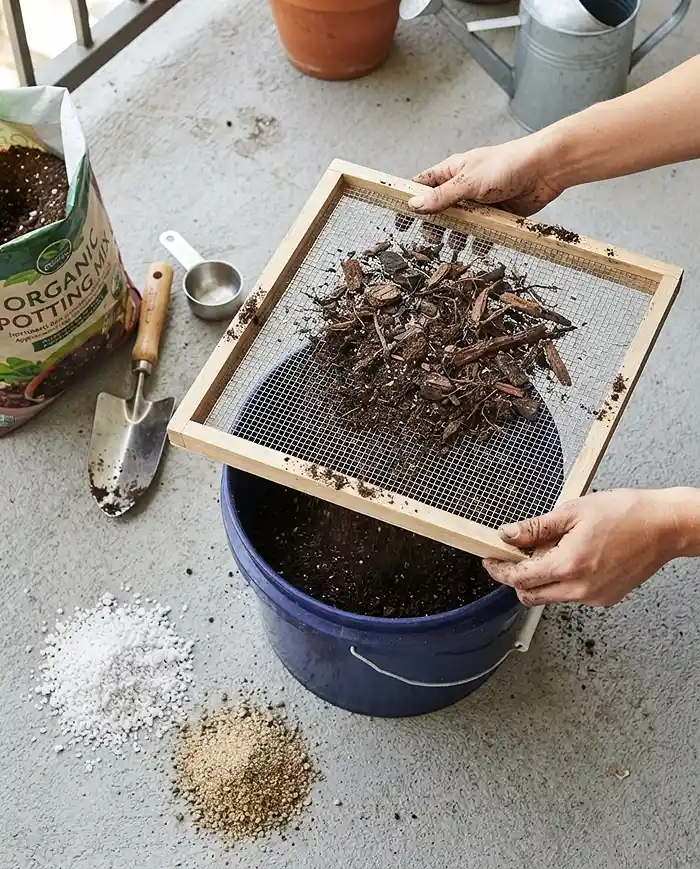
Formulating a Loose, Stone-Free Soil Mix
Straight potting soil out of the bag usually has bark chips and wood chunks that deflect a growing root sideways, causing forking. Sift your potting mix through a half-inch hardware cloth screen first to pull those chunks out.
My working ratio is 60% sifted potting soil, 25% perlite, and 15% coarse sand. It drains fast, stays fluffy, and gives zero resistance to a swelling root. The first season I skipped sifting, half my Cherry Belles came out looking like tiny octopi.
| Mix Component | Ratio | Why It Matters |
|---|---|---|
| Sifted potting soil | 60% | Base nutrition, moisture retention |
| Perlite | 25% | Prevents compaction, keeps mix airy |
| Coarse sand | 15% | Adds drainage, discourages forking |
Step-by-Step Seed Sowing and Thinning Guide
Root crops hate being moved. Never start them in trays for transplanting. Every seed goes straight into its final container, permanently, from day one.
Direct Sowing Techniques and Succession Planting
Sow seeds about half an inch deep, in rows spaced 3 inches apart. Cover lightly, water gently, and keep the surface consistently moist until germination, usually 4 to 7 days.
To avoid a single giant harvest you can’t use fast enough, sow a new row every 2 weeks. This is called succession planting, and it’s the single biggest upgrade to my spring rotation. One window box, staggered every two weeks, gives me radishes from April through early June in zone 6b.
The Critical Importance of Thinning Seedlings
This is the mistake nearly every beginner makes: leaving every seedling in place because pulling healthy little sprouts feels wasteful. Don’t. Crowded roots stay skinny and never bulb.
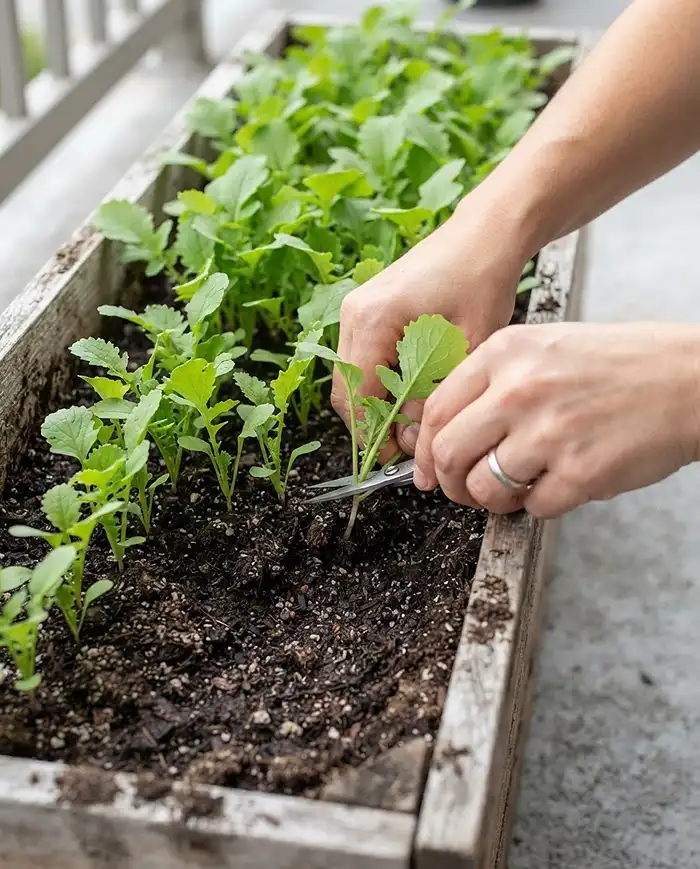
Once seedlings have their first true leaves, snip (don’t pull, to avoid disturbing neighboring roots) extras with small scissors until each remaining plant has a full 2 inches of open space around it. That spacing is non-negotiable biology, not a suggestion.
- Wait until true leaves appear before thinning
- Snip at soil level, don’t yank
- Leave 2 inches between remaining radish seedlings
- Leave 3 inches between remaining turnip seedlings
Maintenance for Rapid, Uninterrupted Growth
Fast crops have zero tolerance for stress. A few dry days followed by a flood, or a week of extreme heat, and the whole batch suffers in ways you can’t undo before harvest.
Consistent Watering to Prevent Cracking and Spice
Letting the soil dry out and then drenching it is the number one cause of split, woody, overly hot-tasting radishes. The root grows in fits and starts instead of smoothly, and the skin can’t keep up with sudden swelling.
Check the soil daily with a finger test. It should feel like a wrung-out sponge, damp but never soggy. In peak summer heat I water my containers every single day; in cooler fall weather, every other day is usually enough.
Fertilization Rules for Root Crops (Low Nitrogen)
Skip the high-nitrogen fertilizer you’d use on leafy greens or tomatoes. It pushes the plant into producing lush green tops while the actual root underground stays thin and undeveloped.
Work a phosphorus-rich amendment like bone meal into the soil mix before sowing. It’s one of my most repeated container garden tips because it’s such an easy swap that fixes an otherwise invisible problem.
Common Problems and Solutions
Two issues account for almost every failed batch: leafy plants with no roots underneath, and lace-holed leaves from flea beetles. Both are easy to diagnose and fix for your next sowing.
“All Leaves, No Roots” Syndrome
If your radish tops look lush but there’s nothing worth pulling underneath, it’s almost always one of three things: skipped thinning (roots are competing for space), too much nitrogen fertilizer, or bolting from heat stress above 75°F.
For your next sowing, thin ruthlessly, switch to a low-nitrogen feed, and time summer sowings for early morning shade or wait until temperatures cool in early fall.
Dealing with Flea Beetles
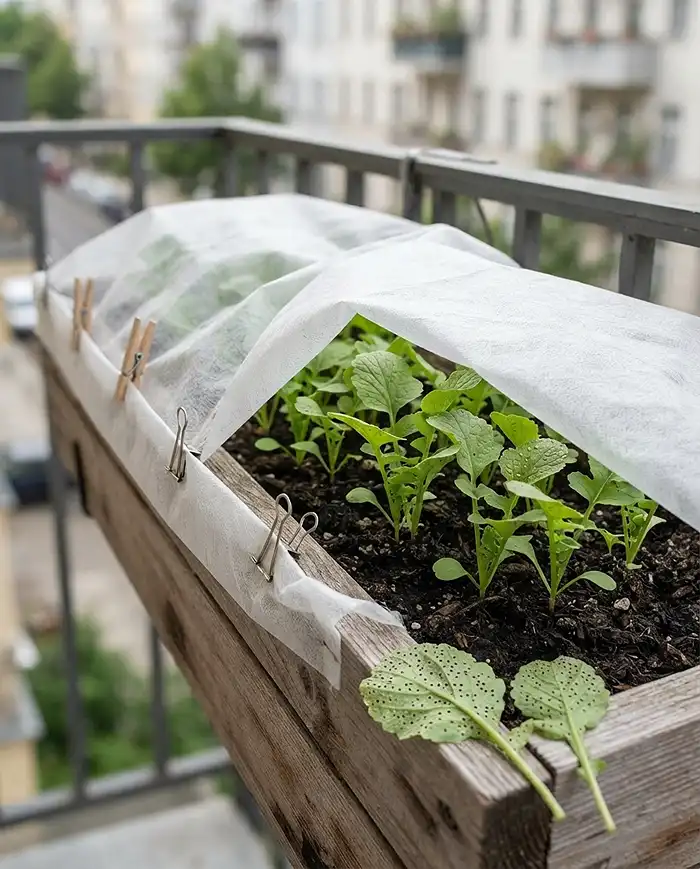
Flea beetles leave tiny “shot holes” scattered across leaves, like the plant was hit with a tiny shotgun blast. They’re most active in warm, dry weather and hit brassica-family crops hardest, which includes both radishes and turnips.
Deploy a floating row cover immediately after sowing, before beetles find the bed, and keep it secured at the edges. Yellow sticky traps and a neem oil spray help knock down existing populations. The University of Maryland Extension’s flea beetle guide is a solid reference if damage gets ahead of you.
growing radishes and turnips in containers FAQs
Exactly how long does it take to grow radishes and baby turnips?
Standard globe radishes like Cherry Belle are ready to pull in 25 to 30 days. Baby turnips such as Hakurei need roughly 35 to 45 days. Harvest both promptly once they reach the size of a large marble to a golf ball for the best texture.
Can I eat the radish and turnip greens?
Yes, the leafy tops of both radishes and turnips are edible and nutritious. Saute them with garlic, add them to soup, or blend them into a spicy pesto as a bonus harvest from the same container.
Can I regrow radishes from kitchen scraps?
Only partly. A cut radish top will sprout new green leaves you can use in salads, but the actual radish bulb will not reform once it has been harvested and sliced. You’ll need new seed for another root crop.
What size container do I need for growing radishes and turnips in containers?
A minimum of 6 to 8 inches of soil depth works for both crops, but prioritize width over depth. A window box or wide bowl planter lets you sow more seeds and produce a bigger harvest from the same volume of soil.
Why did my radishes turn out spicy and woody instead of mild?
Inconsistent watering is the usual cause. Letting soil dry out completely and then flooding it stresses the root and produces a sharp, woody, overly spicy flavor. Keep the soil evenly moist, like a wrung-out sponge, for mild, crisp roots.
Conclusion
Growing radishes and turnips in containers is the fastest, most forgiving way to get real harvests from a small balcony. Pick the right dwarf cultivars, sift your soil, thin without mercy, and water on a steady rhythm.
Do those four things and you’ll have your first crisp roots in under a month, with another batch already coming up behind it. For more crop ideas that thrive in tight spaces, browse the best root vegetables for container gardening.
- Cherry Belle radishes mature in 22-24 days; Hakurei turnips take 35-45 days
- Prioritize container width over depth, with 6-8 inches minimum soil depth
- Sift soil and blend in perlite and sand to prevent forked or stunted roots
- Thin seedlings to 2-3 inches apart or roots will never bulb properly
- Keep watering consistent to avoid split, spicy, woody roots