
Indoor Kitchen Herb Garden
A productive indoor kitchen herb garden starts with one honest decision: the right container setup. Get that right, and you’ll snip fresh basil into a sauce without thinking twice.
Get it wrong — a sealed mason jar, a north-facing window, soggy soil — and you’ll replace dead plants every three weeks. I’ve done both. This guide covers what actually works.
Table of Contents
Hook Your Cooking with an Indoor Kitchen Herb Garden
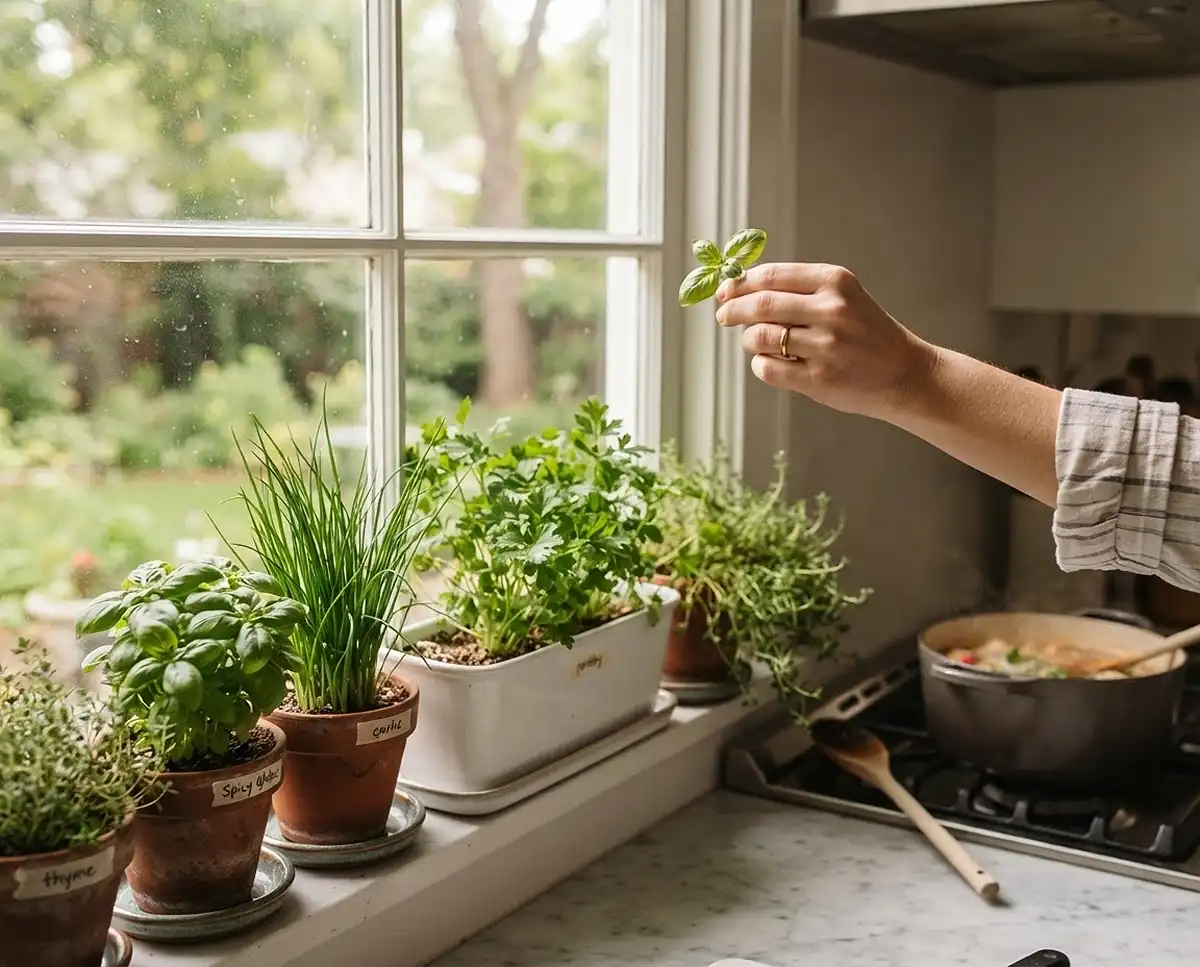
Imagine reaching six inches to your left mid-cook and pinching a sprig of thyme directly into the pan. That’s the real value of a windowsill herb garden — not aesthetics, not Pinterest points.
The foundational secret most beginner guides skip? Container choice and cultivar selection are inseparable. Plant a sun-hungry sweet basil on a dim east window in a pot with no drainage, and you’ll lose it within two weeks.
Choose the right container setup, match your herbs to your actual light conditions, and you’ll have a living, productive collection of indoor windowsill herbs that earns its counter space year-round.
Assessing Your Kitchen Windowsill Microclimate
Before you buy a single pot, spend three days observing your kitchen window. The glass barrier between your herbs and the sun does more damage than most gardeners realize.
Glass filters out UV wavelengths, drops light intensity by up to 50%, and creates temperature swings that outdoor gardens never experience. What feels warm to you at the windowsill can be dangerously cold for herb roots after sunset.
Measuring Sunlight and Window Direction
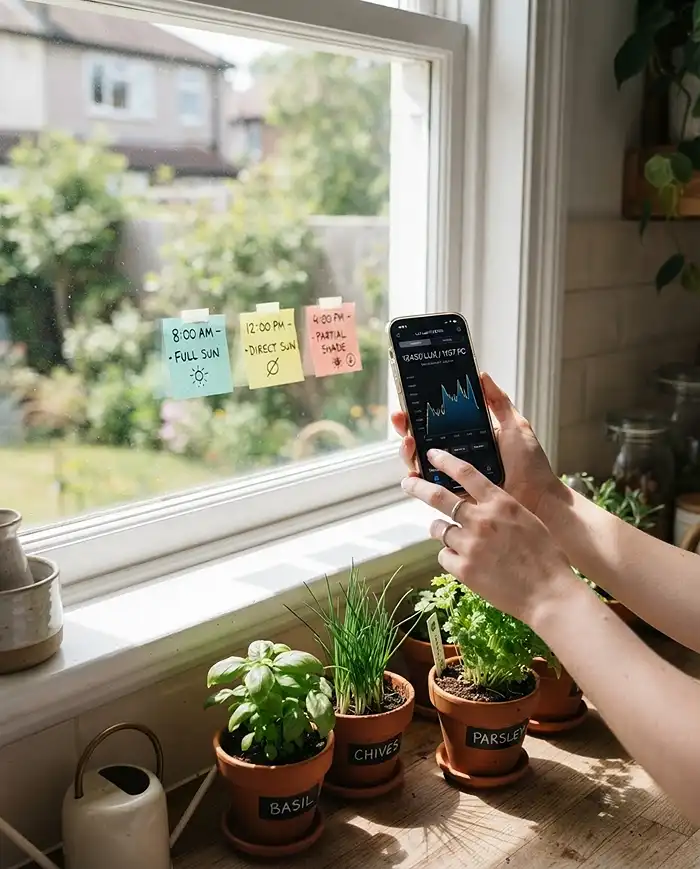
Quick Answer: South-facing windows are your best option for a windowsill herb garden, followed by west-facing. Both deliver the 6+ hours of direct sunlight that Mediterranean herbs need. East-facing windows work for shade-tolerant herbs only. North-facing windows require a grow light.
Here’s what I do with every new kitchen: I tape a sticky note to the window at 9 a.m. and mark it every hour to see when direct sun hits and when it disappears. It takes 10 minutes and saves months of dead plants.
A south-facing window in zone 6b (where I garden) delivers strong light from roughly 10 a.m. to 4 p.m. in winter — borderline adequate for thyme and oregano. In summer, the same window gets 7+ hours. That seasonal swing matters for your herb choices.
- South-facing: Best for all herbs, especially Mediterranean varieties needing 6+ hours
- West-facing: Strong afternoon light — good for most herbs, slightly stressful for mint
- East-facing: Gentle morning light — suitable for chives, parsley, and mint only
- North-facing: Insufficient for any culinary herb without supplemental lighting
Check your sill with a simple light meter app (Lux Light Meter on iOS works well) as of spring 2025. Aim for 2,000+ lux for shade-tolerant herbs, 5,000+ for basil and oregano.
Managing Winter Drafts and Stovetop Heat
Quick Answer: Cold drafts from single-pane windows can kill herbs overnight. Stovetop heat and cooking grease above a range will dehydrate soil rapidly and clog leaf pores. Position pots at least 18 inches from any burner or heating vent.
Last January, I lost a thriving pot of ‘Fernleaf’ dill because I didn’t realize my kitchen window had a gap in the weatherstripping. The roots froze in under 48 hours of sub-20°F nights. The fix cost $4 in foam tape.
Before winter, hold a lit incense stick near your window frame. If the smoke wavers sideways, you have a draft. Seal it before your herbs move in.
The stovetop problem is subtler. Herbs placed directly above a range accumulate a fine film of cooking grease on their leaves. This clogs the stomata (the microscopic pores herbs use to breathe and release water). Growth slows, flavor weakens, and the plant eventually collapses.
Pro Tip: If your only viable sill is above the stove, use a stick-on removable hook on the cabinet above it to hang a small pot 8 inches out from the wall, away from direct heat and grease.
The Best Herbs for Small Kitchen Windowsills
Not every herb belongs indoors. The ones that thrive share a few traits: tolerance for reduced light, compact root systems, and resilience to dry indoor air. Here’s what to grow based on your actual conditions.
For deeper variety guidance, see this curated list of best windowsill herbs for indoor growing.
Low-Light Survivors: Chives, Mint, and Parsley
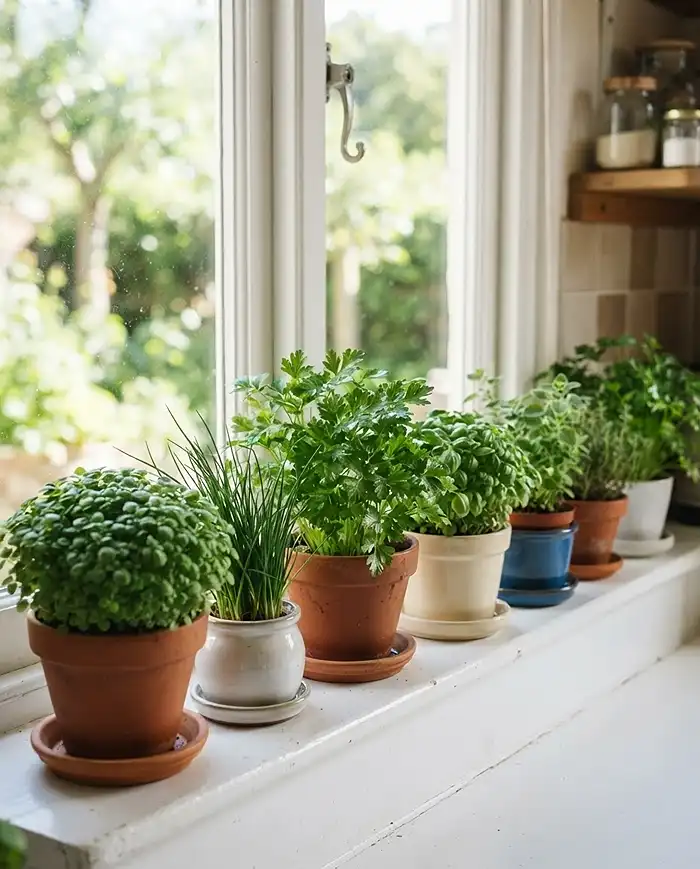
Quick Answer: Chives, mint, and flat-leaf parsley are the most forgiving herbs for indoor container growing. They tolerate east-facing windows with as little as 3-4 hours of indirect light and bounce back quickly from neglect.
I grow ‘Garlic Chives’ in a 4-inch terracotta pot on my east-facing bathroom sill (which actually gets more light than my kitchen) — they’ve been producing for 14 months without a single replanting.
One hard rule with mint: always pot it alone. Its root system is aggressively expansive and will outcompete and strangle every neighbor in a shared container within a single growing season.
- Chives: Pot size 4-6 inches, tolerates 3-4 hours light, harvest outer leaves first
- Mint: Pot alone in 6-inch pot, keep consistently moist, harvest tips frequently
- Flat-leaf parsley (‘Italian Giant’): 6-inch deep pot for taproot, slow to establish but long-lived
Pro Tip: Parsley goes through a “sulking” phase of 3-4 weeks after transplant. Don’t fertilize during this period — it stresses the roots further. Just keep the soil evenly moist and leave it alone.
Sun-Loving Mediterranean Herbs: Thyme and Oregano
Quick Answer: Thyme and oregano need your brightest south-facing window, sharply draining soil, and near-drought conditions between waterings. These are the herbs most often killed by kindness — overwatering destroys them faster than neglect.
Both herbs produce their characteristic essential oils (the compounds that make them taste like thyme and oregano rather than bland green leaves) only under mild stress. A slightly dry, sun-baked environment is exactly what they want.
I grow ‘Doone Valley’ thyme in a 5-inch unglazed terracotta pot with 40% perlite mixed into the potting mix. The porous clay wicks excess moisture away from the roots. It’s survived three consecutive winters on a south-facing sill in zone 6b.
Pro Tip: Let thyme and oregano get slightly root-bound — a pot that’s slightly too small actually concentrates flavor in the leaves.
The Basil Challenge: Growing Tender Micro-Varieties
Quick Answer: Standard sweet basil (‘Genovese’) is the most difficult herb to grow indoors long-term. Choose compact micro-varieties like ‘Spicy Globe’ or ‘Boxwood’ basil instead — they adapt to indoor pot life far better and stay bushy without constant pinching.
Here’s my honest failure: in 2022, I spent three months trying to keep a grocery store basil alive on a west-facing sill. It bolted, turned yellow, then collapsed. The problem was two-fold: the pot was too small (those grocery plugs are meant for immediate use, not long-term growing) and my window dropped below 60°F at night.
Basil refuses to thrive below 60°F. Cold windowsills — even on a sunny day — cause the leaves to turn black at the edges. Always check nighttime temps at your sill with a cheap min/max thermometer.
‘Spicy Globe’ basil stays naturally compact at 8-10 inches, rarely bolts, and produces dense, flavorful leaves perfect for a container herb garden. Start from seed in a 6-inch pot with fresh potting mix each spring.
Pro Tip: Pinch the center growing tip the moment you see it — even before the plant looks like it needs it. This forces two branches where one would have grown and keeps the plant bushy from the start.
Choosing the Ultimate Space-Saving Container Setup
Small kitchens demand containers that earn every square inch. Here’s how to choose hardware that fits your sill, protects your counters, and keeps your herbs healthy — without sacrificing meal-prep space.
Window Ledge Troughs and Sill Planters
Quick Answer: A long, narrow rectangular trough (typically 24 inches x 6 inches) is the most space-efficient container for a kitchen windowsill herb garden. It sits flush against the glass, maximizes the light zone, and holds 3-4 compatible herbs in a single stable footprint.
The best herb combinations for a shared trough are plants with similar water needs. Chives and flat-leaf parsley share near-identical watering requirements and won’t compete aggressively for root space. Thyme and oregano pair well together in a separate trough.
Never mix moisture-loving herbs (mint, parsley) with drought-tolerant ones (thyme, oregano) in the same container. One group will always be either drowning or dying of thirst.
| Container Type | Best For | Watch Out For |
|---|---|---|
| 24″ rectangular trough | 3-4 herbs with similar water needs | Heavy when wet — check sill load capacity |
| Individual 4-6″ terracotta pots | Mediterranean herbs needing fast drainage | Dries out quickly — needs more frequent checks |
| 6″ glazed ceramic pots | Moisture-loving herbs (mint, parsley) | Retains water — risk of overwatering |
| Self-watering sill planters | Busy households, consistent moisture herbs | Not suitable for thyme/oregano |
The Non-Negotiable Need for Drainage Trays
Quick Answer: Every herb pot needs bottom drainage holes and a fitted saucer beneath it. Planting herbs in sealed containers — including mason jars with rocks at the bottom — causes fatal root rot within weeks. This is not optional.
The “rocks in the bottom of a jar” trick is the most persistent myth in indoor gardening. Those rocks don’t create drainage — they raise the water table closer to the roots, guaranteeing rot. I’ve seen it kill plants in under three weeks.
Use exact-fit glazed ceramic saucers rather than plastic ones. They’re heavier (more stable), don’t discolor your windowsill, and are easy to wipe clean. Empty them within 30 minutes of watering — standing water in a saucer is just slow root rot.
Pro Tip: Place a small piece of fine mesh screen (cut from a bag of onions) over the drainage hole before adding soil. It keeps the mix from washing onto your sill while keeping drainage fully open.
Step-by-Step Guide to Planting Your Kitchen Herbs
Setup order matters. Do this right once and you won’t be repotting failed plants every month.
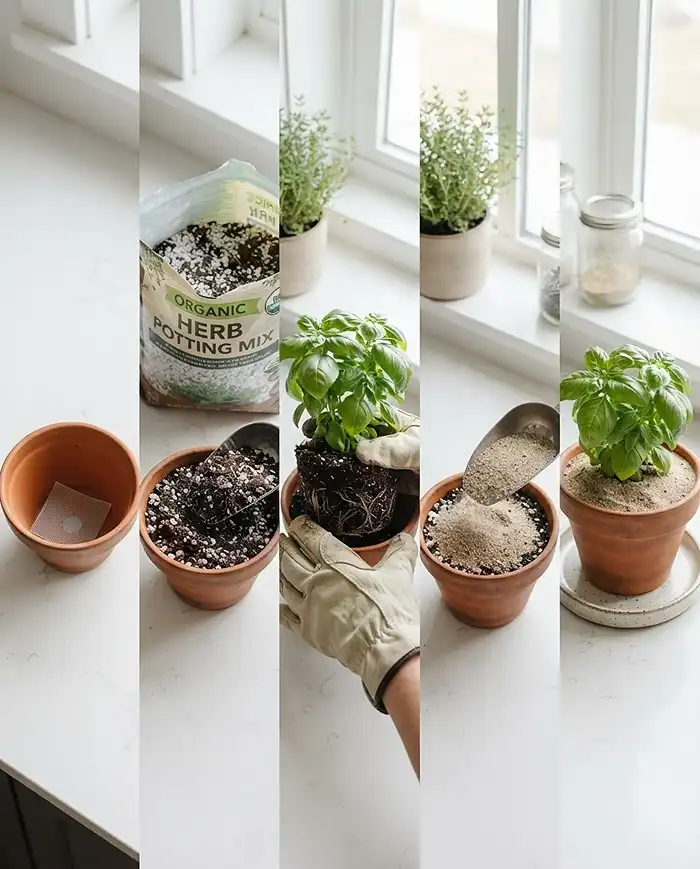
- Choose your potting mix: Use a lightweight organic indoor potting mix — not garden soil. Mix in 25-30% perlite by volume for Mediterranean herbs. Standard mix works for parsley, chives, and mint.
- Cover the drainage hole: Cut a small square of fine mesh screen and place it over the hole. This prevents soil loss without blocking drainage.
- Add a base layer: Fill the pot one-third full with your amended potting mix before adding the plant.
- Transplant gently: Loosen the root ball with your fingers before setting the nursery plug in. The crown of the plant (where stem meets roots) should sit about half an inch below the pot rim.
- Fill and firm gently: Add potting mix around the root ball, pressing lightly to eliminate air pockets. Don’t pack it tightly — roots need air as much as water.
- Top-dress with fine gravel: A thin layer of coarse sand or fine horticultural grit on top of the soil deters fungus gnats from laying eggs in the surface layer.
- Water thoroughly once: Water until it runs freely from the drainage hole. Then don’t water again until the finger test says it’s time.
For a deeper look at which varieties suit different light levels, the top herbs for sunny windowsills guide covers specific cultivar recommendations by window direction.
Maintaining Your Indoor Culinary Garden
Indoor herbs have a slower metabolism than outdoor plants. The biggest maintenance mistake is treating them like outdoor container plants — watering on a schedule, fertilizing heavily, and harvesting aggressively all at once.
Dial back every input. Less water, less fertilizer, more harvesting. That’s the indoor maintenance mindset.
Mastering the “Finger Test” for Indoor Watering
Quick Answer: Push your index finger two inches into the soil. Water only if it feels completely dry at that depth. For Mediterranean herbs (thyme, oregano), wait an additional day after the dry test before watering. For mint and parsley, water when the top inch is dry.
Overwatering kills more indoor herbs than anything else — including low light. In a windless kitchen without outdoor airflow, soil stays wet two to three times longer than you’d expect. What dries out in two days in your garden takes five days indoors.
I water my thyme approximately every 10-14 days in winter, sometimes stretching to 18 days. My mint gets water every 4-5 days. Same apartment, same season — completely different needs.
When you do water, water thoroughly. Pour slowly until water runs from the drainage holes, then stop. This flushes accumulated salts from fertilizer out of the soil and ensures the entire root zone gets moisture.
Pro Tip: Use room-temperature water, not cold tap water straight from the faucet. Cold water shocks herb roots, especially basil, and can trigger leaf drop.
Harvesting Techniques to Encourage Bushy Growth
Quick Answer: Always harvest from the top of the plant, cutting just above a leaf node (the point where leaves branch off the stem). Never remove more than one-third of the plant at a single harvest. This triggers two new shoots to grow where you cut one.
Most beginners strip leaves from the bottom and sides of the plant, which leaves bare stems and encourages legginess. Pinching from the top is the opposite approach — and it works dramatically better.
Deadheading [removing flower buds before they open] is equally important. The moment a herb starts flowering, it redirects all its energy from leaf production to seed production. Pinch every flower bud the second you see it to keep leaves coming.
- Harvest basil by pinching the top 2-3 pairs of leaves, just above a node
- Harvest thyme and oregano by cutting stems back by one-third, never into bare woody growth
- Harvest chives by cutting the outer leaves at the base, leaving the inner growth intact
- Harvest mint tips frequently — it’s the one herb that actively benefits from aggressive harvesting
Common Problems and Solutions
Two problems account for the majority of indoor herb failures. Both are fixable once you know what you’re looking at.
Banishing Annoying Fungus Gnats
Quick Answer: Fungus gnats are tiny black flies (about 1/8 inch) that hover around moist indoor soil. Their larvae live in the top 2 inches of soil and feed on roots. Yellow sticky traps catch adults; a hydrogen peroxide drench kills larvae safely.
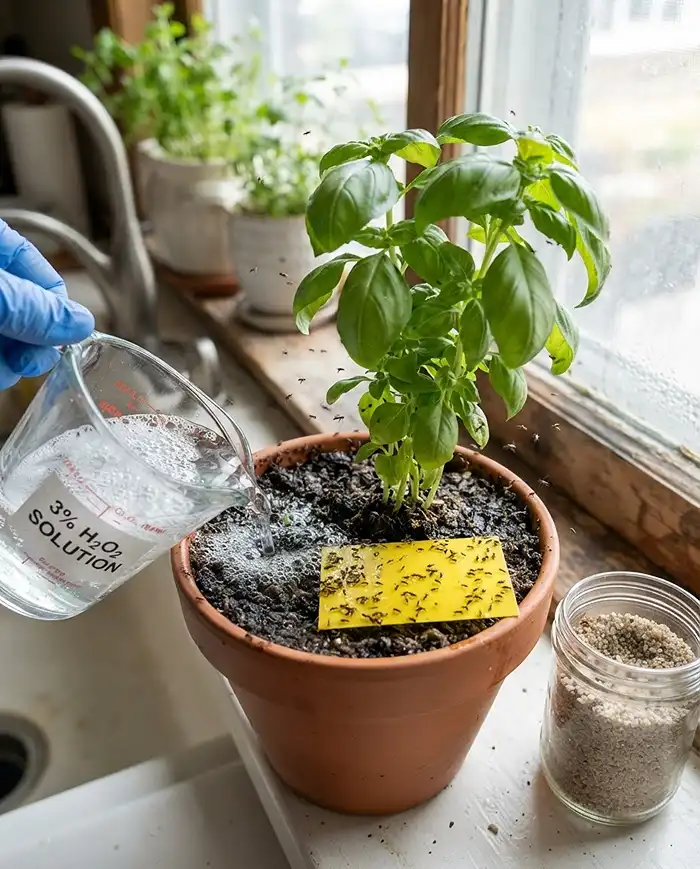
The moment you see tiny black flies near your herb pots, act immediately. The adult flies are annoying but harmless — it’s the larvae in the soil that damage roots and introduce disease.
Food-safe eradication protocol: let the soil dry out completely (this kills a portion of larvae), then water with a solution of 1 part 3% hydrogen peroxide to 4 parts water. The solution fizzes on contact with organic matter in the soil, killing larvae without harming roots or leaving any residue.
Place yellow sticky traps (available at any garden center) horizontally on the soil surface — not vertically above the pot — to catch the adults before they lay more eggs.
Pro Tip: The top-dressing of coarse sand or fine gravel recommended during planting is your best prevention. Fungus gnats prefer to lay eggs in moist, bare organic soil. Sand makes the surface inhospitable.
Leggy, Weak Growth from Low Light (Etiolation)
Quick Answer: Etiolation is the technical term for pale, stretched stems reaching toward the light source. It means your herb isn’t getting enough light. The fix: pinch back the stretched growth immediately and either move the pot to a brighter window or add a grow light.
Etiolated growth looks like this: stems get long and thin between leaf nodes, leaves are smaller and paler than normal, and the whole plant leans hard toward the glass. It’s the plant’s desperate attempt to find more light.
Don’t let it go — etiolated growth is weak, prone to disease, and produces flavorless leaves. Pinch the tall, pale tops (toss them in whatever you’re cooking) and rotate the pot 90 degrees every three days to encourage even, compact growth from all sides.
If you’ve pinched back twice and the leggy growth keeps returning, the light is genuinely insufficient. A small full-spectrum grow light mounted under a cabinet can add the equivalent of a south-facing window and costs very little to run.
Frequently Asked Questions
Can I grow herbs in mason jars without drainage holes?
No. Adding rocks to the bottom of a sealed jar raises the water table closer to the roots, not lower. Root rot sets in within weeks, accompanied by foul bacterial growth. Always use pots with drainage holes and fitted saucers. Mason jars work as decorative covers only — place a properly drained pot inside one if you like the look.
Do I need a grow light for my kitchen windowsill?
If your only available window faces north or is blocked by adjacent buildings, yes — a small full-spectrum LED grow light is mandatory for sun-loving herbs like basil, thyme, and oregano. Look for under-cabinet LED strips rated at 2000-3000 lumens with a 5000-6500K color temperature. Shade-tolerant herbs like chives and mint can manage with less supplemental light.
How often should I fertilize indoor kitchen herbs?
Once a month during the active growing season (spring through early fall), using a diluted water-soluble organic fertilizer such as liquid seaweed at half the recommended strength. Do not fertilize in winter when growth slows. Over-fertilizing causes rapid, lush growth but dramatically reduces the concentration of essential oils that give herbs their flavor.
Can I mix different herbs in one container?
Yes, but only herbs with matching water needs. Chives and parsley pair well. Thyme and oregano work together. Never combine drought-tolerant Mediterranean herbs with moisture-loving ones like mint or parsley in the same pot — one group will always suffer.
Why do my indoor herbs keep dying after a few weeks?
The three most common causes are overwatering (use the finger test — water only when 2 inches deep is fully dry), insufficient light (south or west windows only for most herbs), and pots without drainage holes. Solve all three at once and most indoor herb failures disappear entirely.
Key Takeaways
- A thriving indoor kitchen herb garden depends on matching your herb choices to your actual window direction — south or west for Mediterranean herbs, east for chives, mint, and parsley.
- Every container needs bottom drainage holes and a fitted saucer. Sealed jars and rocks-at-the-bottom tricks cause root rot, not drainage.
- Use the finger test (two inches deep, fully dry = time to water) to prevent the number one killer of indoor herbs: overwatering.
- Harvest from the top, not the sides or bottom, and pinch flower buds the moment they appear to keep your windowsill herb garden producing for months.
- Choose compact cultivars designed for container life — ‘Spicy Globe’ basil, ‘Garlic Chives’, ‘Italian Giant’ parsley, and ‘Doone Valley’ thyme — over standard full-size varieties that struggle in small pots.