

How to Reuse Potting Soil Safely for a New Season
Tossing last year’s potting mix after one season wastes money you don’t need to spend. Here’s how to reuse potting soil safely without spreading disease to your new plants.
I grow tomatoes, peppers, and salad greens in fabric grow bags on a south-facing patio in zone 7a, and for years I dumped my mix every fall. Then I did the math: at roughly $15 for a 20-quart bag, refreshing six containers was costing me almost $100 a season. Once I learned to rehab old dirt instead of replacing it, that dropped to about $25 in amendments. That’s the whole game with container vegetable gardening on a budget — you’re not buying new soil, you’re reviving what you’ve got.
Table of Contents
The Financial and Ecological Benefits of Reusing Potting Soil
The minerals and structural components in potting mix don’t disappear after one growing season. Perlite, vermiculite, and coarse sand stay physically intact indefinitely. What’s actually “used up” is the biology and the nutrients: nitrogen, phosphorus, and potassium get pulled out by roots, and organic matter like peat or coir breaks down into fine, compacted particles.
That means most spent mix isn’t garbage — it’s a skeleton that needs new muscle. Rebuilding it with compost, fresh aeration material, and a bit of fertilizer costs a fraction of buying bagged mix new. It also keeps a surprising volume of peat and coir out of the landfill, which matters if you’re running more than a couple of pots.
Evaluating Your Old Dirt: When to Reuse and When to Toss
Quick Answer: Reuse potting soil if it grew healthy plants and just looks tired — pale, compacted, or root-filled. Toss it if it hosted a diseased or heavily pest-infested plant, since pathogens and eggs can survive in the mix over winter.
Before you rehab anything, do a quick audit. This ten-minute check saves you from infecting an entire season of container vegetable gardening with a problem you could have avoided.
Identifying Soil-Borne Diseases and Root Rot
Quick Answer: If any plant in that pot had late blight, fusarium wilt, or root rot, throw the whole batch out. Don’t try to salvage it.
These pathogens don’t die off in storage — they form dormant structures that survive cold winters and reinfect the next crop within weeks of planting. I learned this the hard way with a pepper plant that wilted mysteriously in August one year. I reused that soil the following spring for lettuce, and within three weeks the seedlings collapsed with the same root rot. One bag of mix, roughly $18, would’ve been cheaper than the seed-starting time I lost.
Pro tip: When in doubt, discard it. A $15 bag of fresh mix is cheap insurance against losing an entire season’s harvest.
Checking for Overwintering Pests and Weeds
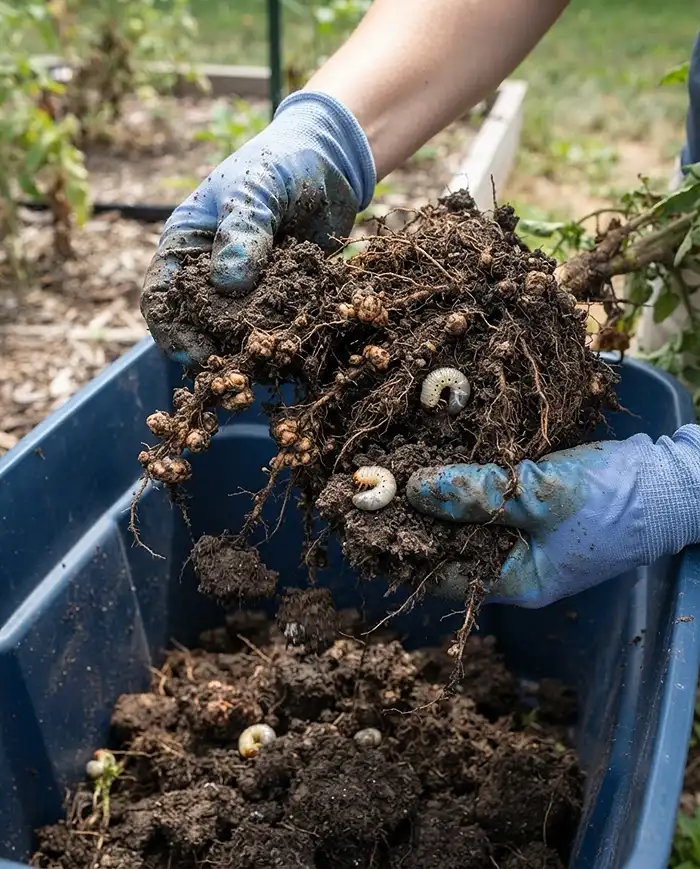
Quick Answer: Break up the old root ball and look for grub larvae, root-knot nematodes (small knotty swellings on roots), or perennial weed rhizomes. Heavily infested or sludgy soil should go in the trash, not the compost pile.
Signs to check for before you commit to reusing a batch:
- Small white or C-shaped larvae in the top few inches — likely overwintering grubs
- Knotty, swollen bumps along old roots — a sign of root-knot nematodes
- Thick white rhizomes or fleshy taproot fragments — perennial weeds like bindweed or dandelion
- Soil that’s gone gray, slimy, and airless — it’s broken down past the point of easy repair
If the mix is just dry and root-bound with none of the above, it’s a good candidate for revival.
Essential Materials to Revitalize Dead Soil
Quick Answer: You’ll need compost or worm castings for nutrients, perlite and coco coir for structure, and a balanced organic granular fertilizer to round out the mix.
| Amendment | What It Fixes | Typical Amount per 5-Gallon Batch |
|---|---|---|
| Compost | Depleted nitrogen and organic matter | 1–1.5 gallons |
| Worm castings | Micronutrients, microbial life | 1–2 cups |
| Perlite | Compaction, poor drainage | 1–2 cups |
| Coco coir | Lost moisture retention | 1–2 cups (rehydrated) |
| Granular organic fertilizer | Baseline NPK for the new crop | Per label rate |
Organic Amendments: Compost and Worm Castings
Quick Answer: Compost and worm castings replace the nitrogen, phosphorus, and potassium your last crop pulled out. Both also reintroduce the microbial life that makes nutrients available to roots in the first place.
I use my own backyard compost when it’s ready, but bagged options like Black Gold or a municipal compost work fine too. Worm castings are worth the extra cost for containers specifically — they’re gentle enough not to burn roots, which matters in a small volume of soil where mistakes concentrate fast.
Real example: Last spring I mixed two-year-old tomato soil with 40% fresh compost and a cup of worm castings before planting Genovese basil. The basil outgrew a fresh-bagged control pot by about two weeks.
Aeration Restorers: Perlite and Coco Coir
Quick Answer: Perlite restores the air pockets that peat-based mixes lose as they break down, and coco coir rebuilds the spongy texture that holds moisture without waterlogging roots.
Peat moss physically collapses over a growing season — those big fluffy particles turn into fine, compacted dust that drains poorly and suffocates roots. Perlite doesn’t break down the same way, so adding it back restores that structure. Coco coir does double duty: it holds water like peat but resists compaction longer, which is exactly what container vegetable gardening needs when you’re watering daily through a hot July.
Pro tip: Buy coir in compressed bricks — one brick expands to roughly 2 gallons and stores flat until you need it.
Step-by-Step Guide to Safely Reusing Potting Mix
Quick Answer: Sift out old roots, sterilize the soil in a sealed bag in the sun, rehydrate if it’s gone hydrophobic, then blend in 30-50% fresh amendments before replanting.
Do this messy work in a wheelbarrow, a large plastic tote, or on a heavy-duty tarp — not crammed inside a balcony pot. You need room to actually mix.
Step 1: Root Sifting and De-Clumping
Quick Answer: Dump the pot out, break up compacted clods by hand, and pull out every visible piece of old root before moving on.
A basic hardware-cloth sieve (half-inch mesh works well) makes this faster, but your hands do the job fine for a few pots. Old root matter left in the mix decays anaerobically once you water it again, which produces a sour smell and can attract fungus gnats. I skip this step at my own risk about once a season, and I always regret it by week three.
Step 2: Solarization for Natural Sterilization
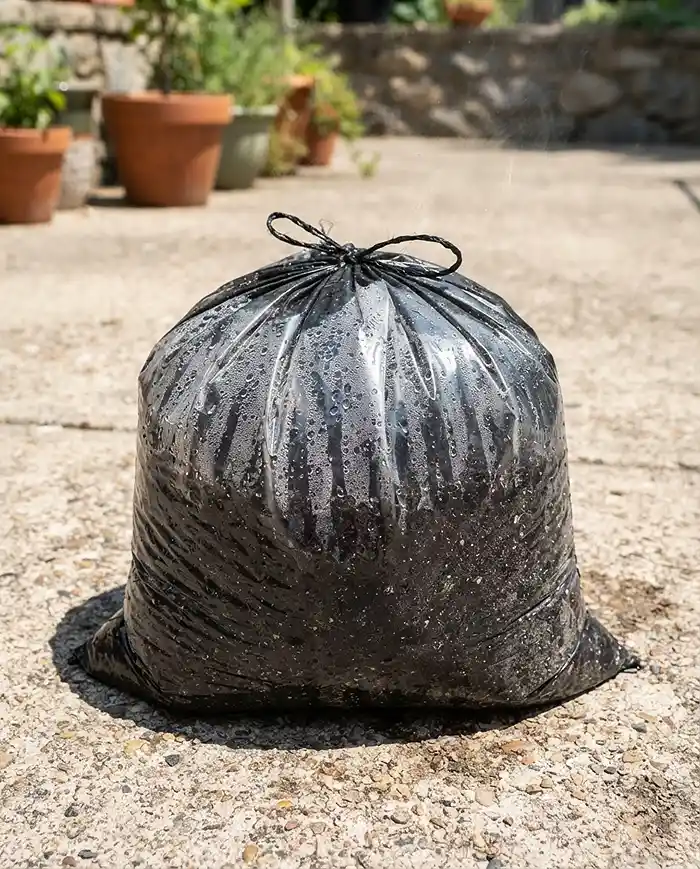
Quick Answer: Seal the slightly damp, sifted soil in a black plastic garbage bag and leave it in direct sun for one to two weeks. The trapped heat pasteurizes pest eggs and weed seeds without killing every beneficial microbe.
This is passive solarization, and it’s the same principle UC IPM’s home garden guidance on soil solarization describes for garden beds, scaled down to a garbage bag. Double-bag it for durability, and flip the bag halfway through so both sides get equal sun exposure.
Pro tip: Solarizing works best in peak summer heat — a week in July does more than two weeks in cool October sun.
Step 3: Rehydrating Hydrophobic Soil
Quick Answer: Bone-dry peat-based mix repels water instead of absorbing it. Add a few drops of mild, biodegradable dish soap to a watering can to break the surface tension and let moisture soak in evenly.
You’ll know you’ve got hydrophobic soil if water beads up and runs straight through the pot instead of darkening the mix. The soap acts as a surfactant — it doesn’t harm plants at this dilution, and it’s a trick I picked up from a nursery grower years ago after watching water pool uselessly on top of a “dry” 5-gallon pot for ten minutes straight.
Step 4: The 50/50 Blending Ratio
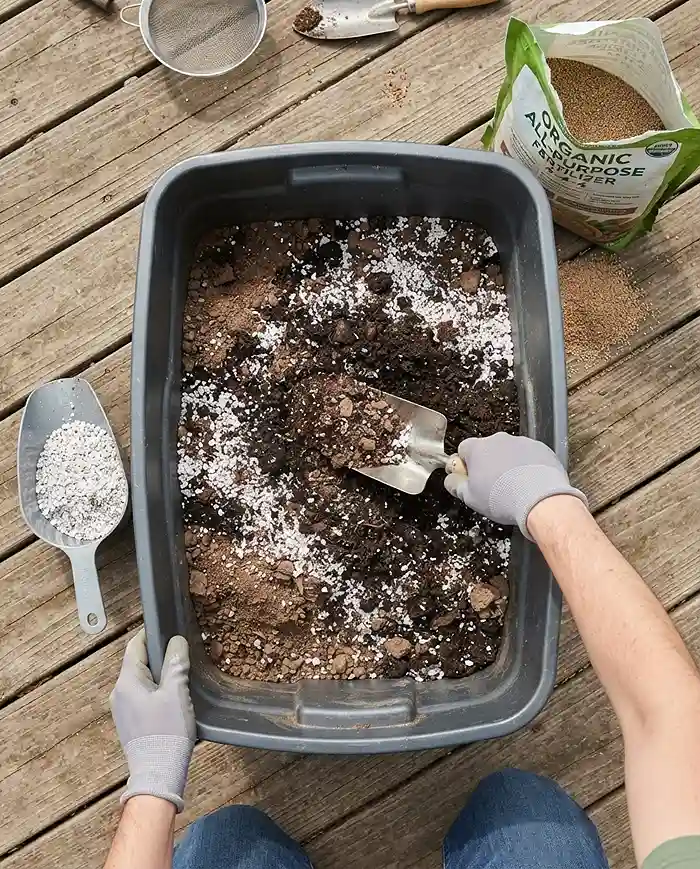
Quick Answer: Blend your sifted, sterilized old soil with 30% to 50% fresh compost, perlite, and a balanced organic fertilizer so the finished mix is light, fluffy, and nutritionally complete.
A working ratio I use for a 5-gallon container batch:
- 3 parts old, sifted, solarized soil
- 1.5 parts fresh compost
- 0.5 part perlite
- Granular organic fertilizer at the label’s transplant rate
If you want a full breakdown of ratios for building mix from scratch, our guide to DIY potting mix covers the base recipe this rehab method builds on.
Tailoring the Reused Mix to Specific Plant Families
Crop rotation matters even in a single pot. What you grew last determines how aggressively you need to amend before planting again.
Recharging After Heavy Feeders (Tomatoes and Peppers)
Quick Answer: Nightshades like tomatoes and peppers strip heavy amounts of calcium and phosphorus. Amend reused soil from these pots with bone meal, agricultural gypsum, and a generous helping of compost before planting anything else there.
I add about 2 tablespoons of bone meal and 1 tablespoon of gypsum per 5-gallon batch after a heavy-feeding season. Skipping this step is exactly how I ended up with blossom-end rot on a second round of container tomatoes — the calcium just wasn’t there anymore.
Prepping for Light Feeders (Leafy Greens and Herbs)
Quick Answer: Moving from a light feeder like lettuce to a nitrogen-fixer like bush beans only needs a light refresh — a few handfuls of compost and perlite is enough.
Legumes actually add nitrogen back to the soil through root nodules, so there’s no need to over-amend before planting beans. Save your heavier compost applications for containers coming out of a tomato or squash season instead.
Maintenance for Biologically Active Soil
Quick Answer: Water your freshly blended mix with compost tea or a mycorrhizal fungi inoculant right after transplanting to jumpstart the microbial life that makes nutrients available to roots.
Solarization and sifting are a bit of a reset button — they knock back pathogens but also some beneficial organisms along with them. A dose of compost tea or a powdered mycorrhizal inoculant (mixed into the planting hole) helps repopulate that biology fast, which matters most in the first few weeks when young roots are establishing. For more on which crops thrive in revived mix, see our list of the best vegetables for container gardening.
Common Problems and Solutions
Even a careful rehab job can go sideways. Here’s how to fix the two issues I see most often.
Soil Compacting and Draining Too Slowly
Quick Answer: If water pools on the surface for several minutes before soaking in, the soil has lost its structure. Dump the pot out and double your ratio of coarse perlite and pine bark fines.
This usually shows up in mixes that are three-plus seasons old without enough fresh aeration material added along the way. Pine bark fines are worth adding here specifically because, unlike perlite, they break down slowly and keep contributing structure for another year or two.
Fungus Gnats Hatching in the Revived Mix
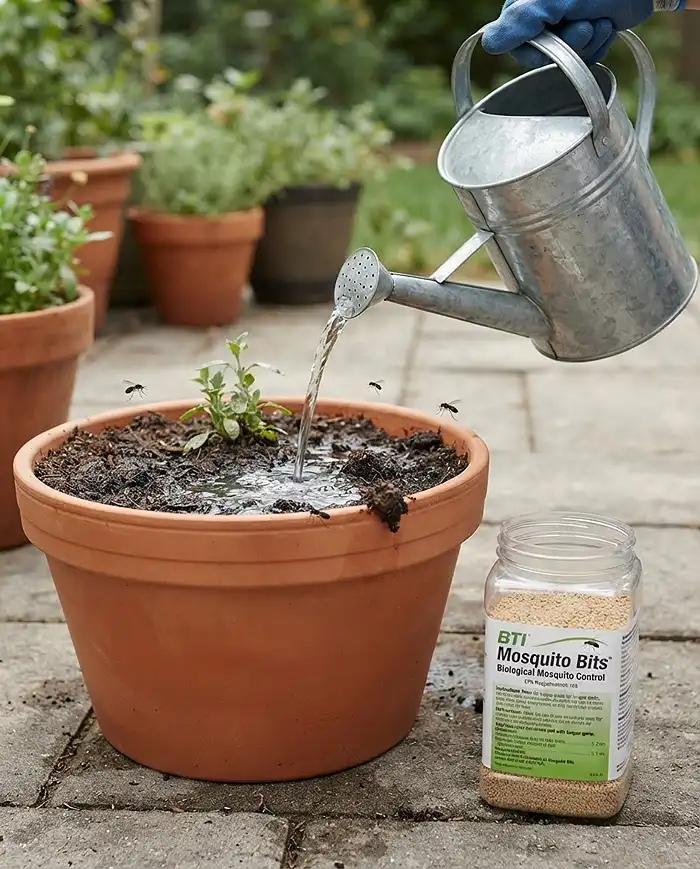
Quick Answer: Fungus gnats often hatch when old, damp soil is disturbed and rehydrated. Soak Mosquito Bits (BTI) in your watering can water for a few hours, then water as normal to kill the larvae organically.
BTI (Bacillus thuringiensis israelensis) targets gnat larvae specifically and won’t harm your plants, pets, or beneficial insects. I keep a container of Mosquito Bits on hand every spring specifically for this — it’s become a routine step whenever I rehab mix that sat outside over winter.
If you’re setting up new containers rather than just refreshing old ones, our guide to the best soil mix for balcony vegetables and herbs walks through container sizing and mix selection from scratch.
how to reuse potting soil FAQs
Can I bake my potting soil in the oven to sterilize it?
It’s not recommended. Oven-baking kills pathogens, but it also destroys every beneficial microbe, leaves a strong smell in the house, and gives you sterile, dead dirt that needs heavy reinoculation with compost or microbial products before it can support healthy plants again.
How many seasons can I keep reusing the same container soil?
Indefinitely, as long as you remove old root mass and mix in 30% to 50% fresh compost, perlite, and organic fertilizer at the start of each new crop. A quality organic base can theoretically be refreshed and reused for years.
Should I wash my pots before adding the refreshed soil?
Yes. Scrub empty containers with a stiff brush and a 10% bleach-to-water solution before adding refreshed soil. This removes fungal spores and mineral salt crusts that build up on pot walls and can reinfect a clean batch of soil.
Can I reuse potting soil that had powdery mildew on the plant?
Powdery mildew mostly affects foliage rather than living in the soil long-term, so the mix itself is usually safe to reuse after solarizing. Focus your caution instead on soil-borne diseases like fusarium wilt or root rot, which do persist in the dirt.
Do I need to sterilize soil every single time I reuse it?
Not necessarily. If the previous crop was healthy and you’re just refreshing tired mix for a similar plant family, sifting and amending is often enough. Reserve full solarization for soil that grew a diseased plant or that you’re unsure about.
Conclusion
Learning how to reuse potting soil turns an annual expense into a one-time investment that pays off for years. As of the 2026 growing season, with mix prices still climbing, the sift-solarize-amend routine is worth the afternoon it takes.
Skip the reuse only when disease or heavy pest pressure showed up last year — that’s the one place shortcuts cost more than they save. Otherwise, your old dirt has more seasons left in it than you’d think.