
How to Refresh Potting Soil for a Second Season
Here’s how to refresh potting soil in four steps so you can reuse potting soil safely and skip buying a dozen new bags this spring.
I grow tomatoes, peppers, and basil in 14 containers on a small west-facing balcony in zone 6b. Every March I rebuild my mix instead of buying new, and it’s cut my soil bill roughly in half.
Done right, it’s cheap and it works. Done wrong, you spread blight to every pot you own. This guide covers what to keep, what to toss, and exactly how to rebuild it.
Table of Contents
The Financial and Ecological Benefits of Reusing Potting Soil
A 2-cubic-foot bag of decent potting mix costs about $18 to $25 as of spring 2026. Fill a dozen 5-gallon pots and you’ll buy roughly four bags, so $70 to $100 is gone before you’ve bought a single seedling.
Reusing your mix cuts that bill about in half. It’s also kinder to the planet, since most bagged mixes rely on peat moss, harvested from bogs that took thousands of years to form and still store huge amounts of carbon.
Oklahoma State Extension points out that replacing everything every year hits your wallet hard. If you want the full overview first, start with our guide on how to reuse potting soil.
Evaluating Your Old Dirt: When to Reuse and When to Toss
Dump each container onto a tarp and inspect it before you save anything. Good mix is dark, loose, and smells like a forest floor. Slimy, sour, or fuzzy-white soil is finished.
Two checks decide everything: disease history and hitchhiking pests. Fail either one and the soil goes. A $20 bag costs far less than a dead tomato crop.
Identifying Soil-Borne Diseases and Root Rot
Quick Answer: Discard any potting mix that grew plants with late blight, fusarium wilt, or severe root rot. These pathogens persist in soil and infect new plants. Bag it for the municipal green bin, not your home compost.
Signs that mean toss it:
- Mushy, brown roots with a sour smell (root rot)
- Yellowing lower leaves and brown streaks inside cut stems (fusarium wilt)
- Dark, greasy lesions that killed the plant fast (late blight)
I learned this the hard way in 2022. I refilled a pot that held wilted ‘Black Krim’ tomatoes with the same soil. The new plant yellowed by July. I saved $5 and lost a $6 transplant plus a whole summer.
Checking for Overwintering Pests and Weeds
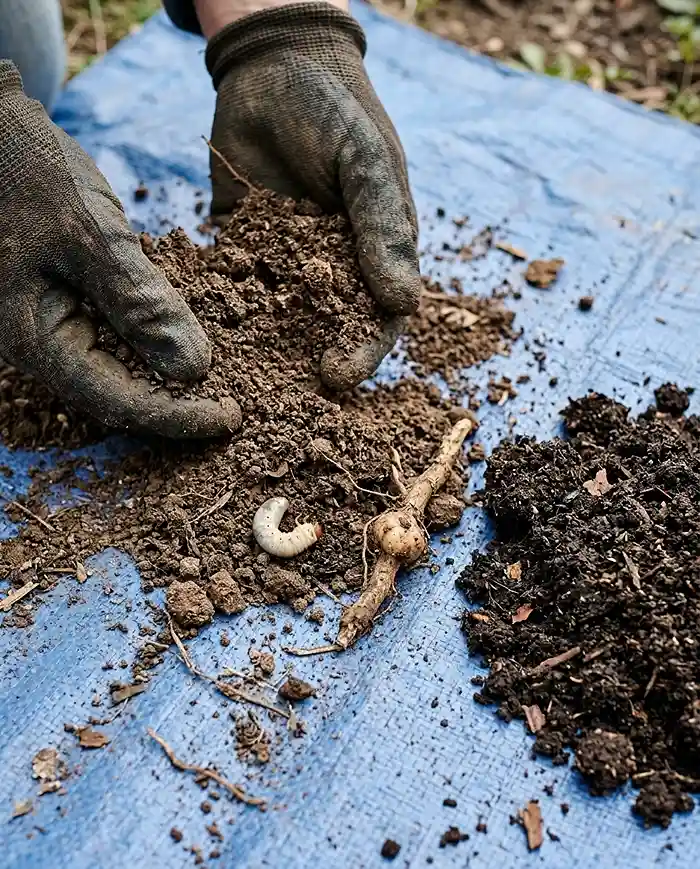
Sift the soil through your fingers a handful at a time, in good light. You’re hunting for C-shaped white grubs with tan heads, swollen galls on old roots (a sign of root-knot nematodes), and dense mats of weed seedlings.
A few grubs? Pick them out and move on. Galls or heavy weed seed loads call for heavy sterilization like Step 2 below, or disposal. I toss any soil with galls. Nematodes aren’t worth the gamble.
Essential Materials to Revitalize Dead Soil
Grab these before you start. Everything here is available at a garden center, and most of it you’ll use again next year.
- Fresh bagged potting mix, 2 gallons per 10-gallon batch
- Finished compost and worm castings
- Perlite or pumice, plus coco coir if your mix has dried out
- Slow-release organic fertilizer such as bone meal or crab meal
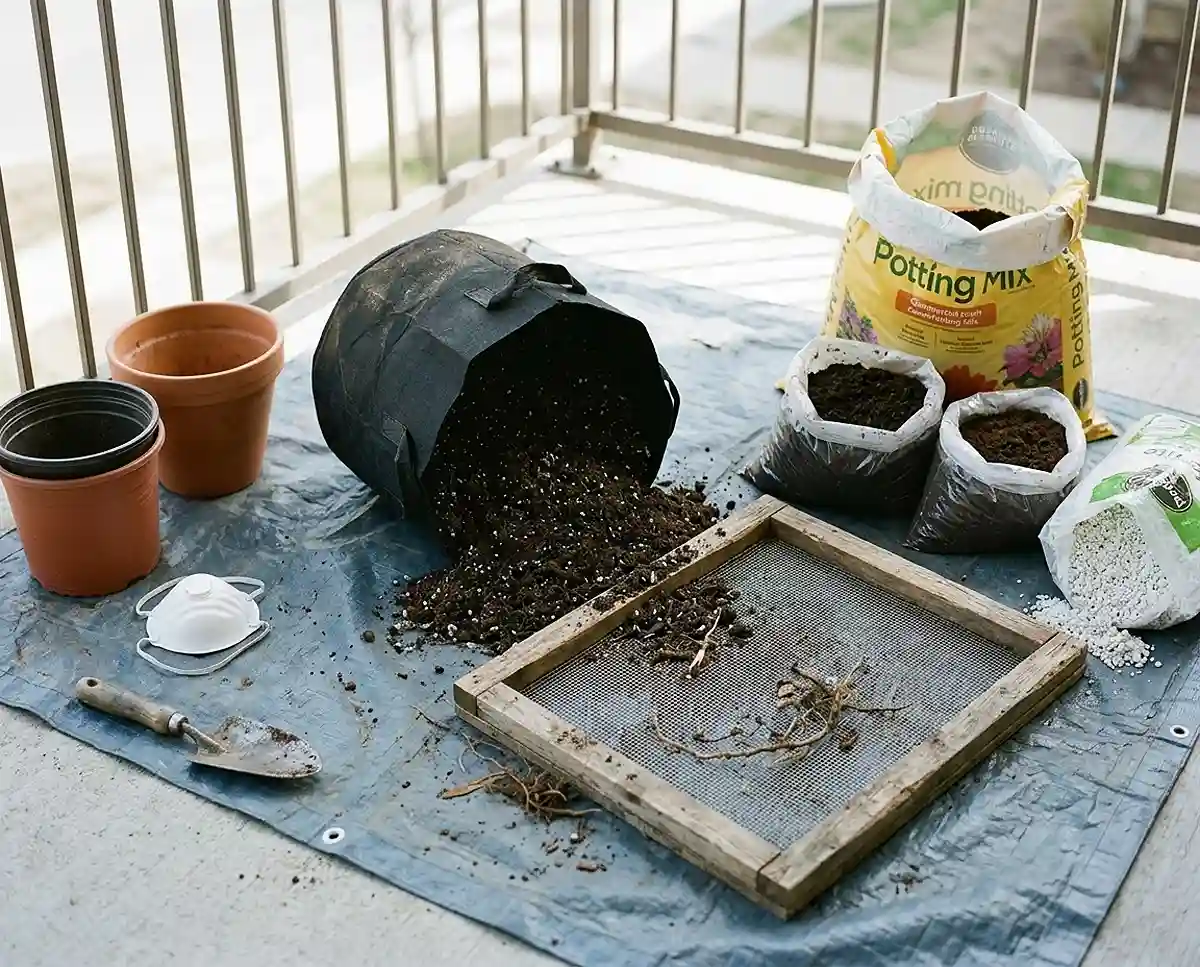
- A 1/4-inch hardware cloth screen, a tarp, and black contractor bags
Organic Amendments: Compost and Worm Castings
Quick Answer: Compost and worm castings replace the nutrients and microbial life a season of watering and root uptake drained from your mix. Together they should make up about 20 percent of the final blend by volume.
Compost supplies slow-release nitrogen, potassium, and trace minerals. Worm castings add gentle nutrients plus living microbes that help roots take them up.
Use finished, dark, crumbly compost only. Half-rotted compost keeps decomposing in the pot, which can tie up nitrogen and stunt seedlings.
Aeration Restorers: Perlite, Pumice, and Coco Coir
Old mix compacts because peat and coir fibers break down and the air pockets collapse. Water drains slowly, roots can’t breathe, and rot follows. Fresh aeration material reopens those pockets.
| Amendment | Best For | Watch Out For |
|---|---|---|
| Perlite | Cheap, light aeration for most pots | Floats to the surface and makes dust; wet it first |
| Pumice | Heavy tomato pots in windy spots | Costs more and is harder to find |
| Coco coir | Restoring moisture retention in dried-out mix | Can hold salts; buy rinsed or low-salt coir |
Pro Tip: I use perlite in spring for fast drainage, then bump up the coir share in July when my balcony pots dry out daily.
Step-by-Step Guide to Safely Refreshing Potting Mix
The whole process takes about an hour of hands-on work for a dozen pots, plus a two-to-four-week wait if you solarize. You’ll break up root-bound clumps, screen out debris, sterilize if needed, rewet the dust, then blend in fresh ingredients.
Work outdoors on a tarp and wear a dust mask when the mix is bone dry. Keep each container’s soil separate until you’ve inspected it, and do the steps in order.
Step 1: Root Sifting and De-Clumping the Old Soil
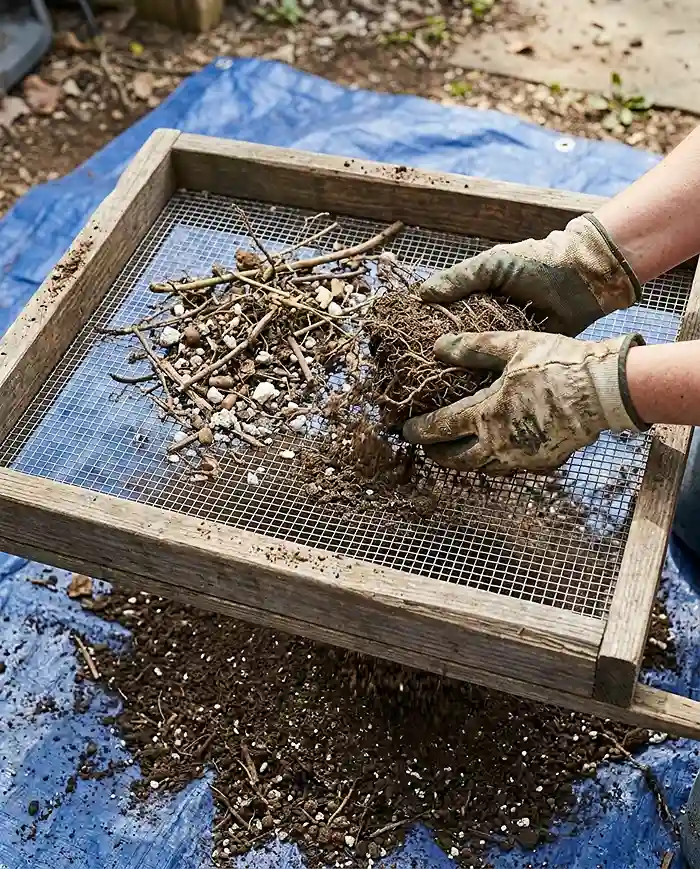
Quick Answer: Dump the soil onto a tarp or into a wheelbarrow, break clods apart by hand, and push everything through a 1/4-inch mesh screen. Remove roots, twigs, and stones before moving on.
Old roots rot and feed fungus gnats, so pull out as many as you can. Chop big rootballs with a hand trowel first. Healthy roots can go in your compost pile.
One of my favorite container gardening tips: shake each rootball over the screen, not the tarp. It catches debris right away and saves a second pass.
Step 2: Solarization for Natural Sterilization (Optional)
Skip this unless the soil grew weeds or had minor pest issues. Moisten the mix slightly, pack it two-thirds full into black contractor bags, seal them, and leave them in full sun for two to four weeks.
The target is 140°F (60°C) inside the bag, enough to kill most weed seeds and many pathogens. On the sunniest stretch of my balcony, a probe thermometer read 138°F after nine days, and nothing sprouted.
Solarization won’t rescue diseased soil. Use it for weeds and minor pests only.
Step 3: Rehydrating Hydrophobic Peat Moss
Quick Answer: Totally dried-out peat moss repels water. Rewet it slowly by misting while you turn the mix, or set the container in a tub with 3 inches of water until the top feels damp.
Dumping water on top just sends it down the pot walls. Add a quart at a time and fold it in with your hands.
Aim for the wrung-out sponge test: squeeze a handful and only a drop or two should appear. Any wetter and it turns to mud when you blend.
Step 4: The 50/50 Blending Ratio with New Ingredients
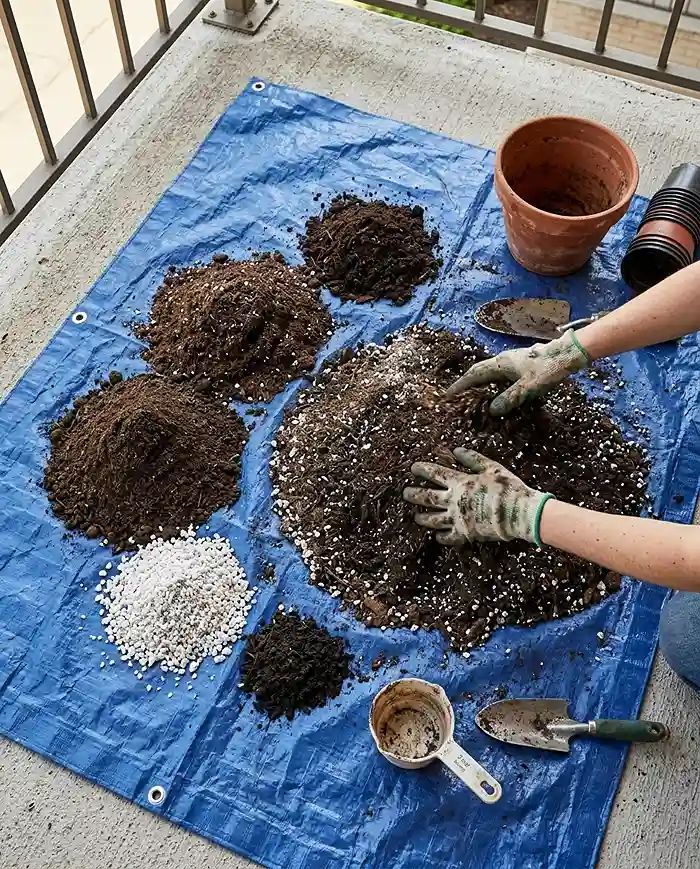
Quick Answer: Mix 50 percent cleaned old soil with 50 percent fresh ingredients: new potting mix, compost, worm castings, and perlite. This ratio restores nutrients and air space without wasting good soil.
| Ingredient (per 10 gallons) | Amount | Job |
|---|---|---|
| Screened old mix | 5 gallons | Base structure |
| Fresh potting mix | 2 gallons | New fertilizer charge and fiber |
| Finished compost | 1.5 gallons | Nutrients and microbes |
| Perlite or pumice | 1 gallon | Air space |
| Worm castings | 0.5 gallon | Beneficial microbes |
Mix on the tarp until the color is uniform. Don’t swap in garden dirt to stretch the batch, because potting mix and garden soil behave very differently in containers. Garden soil compacts fast.
Tailoring the Refreshed Mix to Specific Plant Families
One blend doesn’t suit every crop. Tomatoes and peppers burn through nutrients, while lettuce and basil sip. Tweak the refreshed mix based on what’s going into each pot.
It’s a five-minute adjustment after blending, and it prevents both nutrient burn and hungry plants.
Recharging for Heavy Feeders (Tomatoes and Peppers)
Fruiting plants need phosphorus and calcium. Mix a slow-release organic granular fertilizer into the blend. Bone meal and crab meal both work well, at about 1/2 cup per 5 gallons of refreshed soil.
This supports fruit set and helps prevent blossom end rot. Uneven watering is the more common culprit, though, so keep moisture steady or the calcium never reaches the fruit.
Prepping for Light Feeders (Leafy Greens and Herbs)
Leafy greens and herbs need little beyond the basic refresh. Fold in a couple of extra handfuls of nitrogen-rich worm castings or leaf mold per 5 gallons and you’re done.
Shallow-rooted, fast crops like ‘Black Seeded Simpson’ lettuce and ‘Genovese’ basil finish before rich soil matters, and too much fertilizer just pushes soft, pest-prone growth.
Common Problems & Solutions
Even a careful refresh can leave you with soil problems in pots a few weeks later. Two show up most often: slow drainage and fungus gnats. Both are fixable without replacing the whole batch.
Soil Compacting and Draining Too Slowly After Refreshing
Quick Answer: Water pooling on top or draining slowly means the refresh didn’t include enough aeration. Mix in an extra handful of perlite or coarse sand per gallon of soil, then rewater and recheck drainage.
For a planted container, loosen the top 2 inches with a fork and top-dress with a perlite-heavy mix. For an empty one, re-blend and repack lightly. Pressing the soil down hard recreates the same problem.
Fungus Gnats Hatching in the Revived Mix
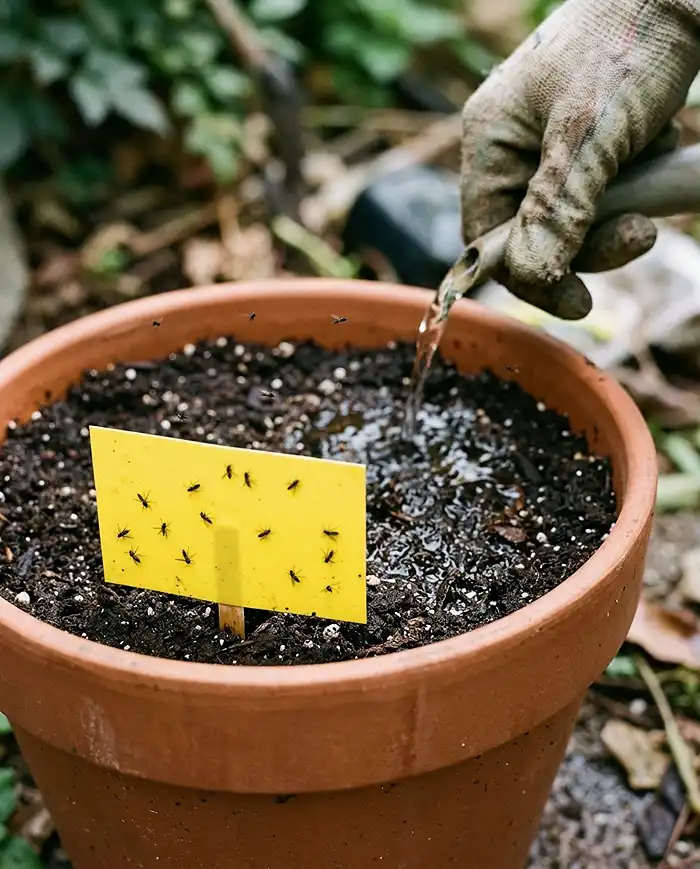
Quick Answer: Fungus gnats in refreshed soil are controlled with yellow sticky traps for the adults and a Bacillus thuringiensis israelensis (BTI) soil drench for the larvae. Use both at the same time.
Old mix can hide larvae all winter. Lay sticky traps at soil level, drench with BTI (Mosquito Bits steeped in water works, so follow the label), and let the top inch dry between waterings.
I had a gnat explosion in April 2024 after skipping the screening step on three pots. Traps plus two BTI drenches a week apart cleared it in about ten days.
how to refresh potting soil FAQs
Can I bake my potting soil in the oven to sterilize it?
Yes, for small batches. Bake moist soil in a covered pan at 180°F (82°C) for about 30 minutes to kill pests and weed seeds. It smells terrible, destroys beneficial microbes, and is impractical for large outdoor containers. For big batches, use solarization instead.
How many seasons can I keep reusing the same container soil?
With proper screening and the 50/50 amendment method, a base of potting soil can be reused for 3 to 4 years. After that, the peat or coir structure breaks down completely and no amount of perlite brings it back. Retire it to garden beds or compost.
Should I wash my pots before adding the refreshed soil?
Yes. Scrub containers with a 10 percent bleach solution (1 part bleach to 9 parts water) or white vinegar to kill lingering disease spores on the pot walls. Rinse well and let them dry before refilling with clean soil.
Key Takeaways
- Learning how to refresh potting soil takes about an hour and cuts your soil spending roughly in half.
- Toss any mix that grew plants with blight, fusarium wilt, severe root rot, or nematode galls.
- Screen, solarize if needed, rewet slowly, then blend 50/50 with fresh mix, compost, castings, and perlite.
- Add bone meal or crab meal for tomatoes and peppers; leafy greens and herbs only need worm castings.
- Scrub pots with a 10 percent bleach solution before refilling them.