

How to Refresh Potting Soil Between Crops
Learning how to refresh potting soil between crops saves real money and keeps your containers producing season after season instead of heading to the curb. Here’s the exact process I use on my own patio.
I grow vegetables in fifteen containers on a west-facing fire escape in Brooklyn, zone 7a. When I started, I tossed every bag of spent mix after one tomato season. That’s expensive, and honestly, it’s wasteful too.
Table of Contents
The Financial and Ecological Benefits of Refreshing Potting Soil
A 20-quart bag of quality potting mix runs $12 to $18 these days, and a fifteen-container setup like mine eats through six or seven bags a year if I start fresh every time. Refreshing instead of replacing cuts that cost by more than half.
Here’s the thing most gardeners miss: the mineral backbone of your old soil, the perlite, the sand, the bark fines, doesn’t wear out. What’s depleted is the biological life and the macronutrients your last crop pulled out through its roots.
Refreshing means restoring what’s missing rather than replacing what’s still working. It’s the same logic behind good balcony soil mixes for vegetables and herbs in the first place: structure plus nutrition, not just fresh bags.
Evaluating the Old Dirt: When to Reuse and When to Toss
Before you amend anything, you need to triage. This is the step that separates gardeners who save money from gardeners who accidentally reinfect their new seedlings with last season’s problems.
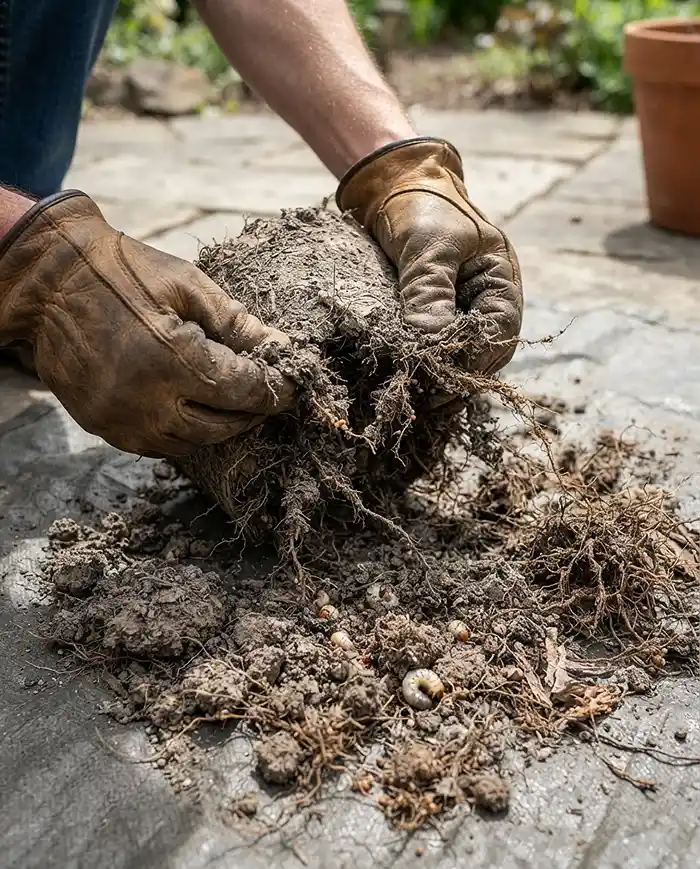
Dump the container onto a tarp and take a good look. You’re checking for three things: disease history, pests or weeds, and physical structure. Fail any of those and the soil goes in the yard waste bin, not back in a pot.
Identifying Soil-Borne Diseases and Pathogens
Quick Answer: If your previous plant had blight, root rot, or a severe fungal issue, throw the soil out. Don’t try to save it.
Pathogens like fusarium wilt and verticillium form resting structures that survive months in dry soil with no host plant present. They wait. Then your new seedling goes in, and within two or three weeks you’re looking at the same wilting, yellowing symptoms all over again.
- Yellowing that started at the bottom of the plant and moved up: possible fusarium or verticillium wilt
- White, cottony growth on the old root ball: likely a fungal pathogen, discard the soil
- Mushy, foul-smelling roots: classic root rot, do not reuse
Pro Tip: When in doubt, toss it. A bag of fresh mix costs less than a season of replanted, reinfected seedlings.
Checking for Pests, Weeds, and Severe Compaction
Quick Answer: Sift through the root ball by hand looking for grubs, root-knot nematode galls, or weed seed heads, and check whether the mix still crumbles or has turned into dense sludge.
Root-knot nematodes leave small, bead-like swellings along the roots that you can feel when you run the root ball through your fingers. Overwintering grub larvae show up as fat, C-shaped white bodies in the lower third of the pot.
Squeeze a handful of the old mix. If it forms a dense, greasy clump that doesn’t break apart, the organic matter has broken down past the point of usefulness for container vegetable gardening, and no amount of amending will fix drainage that far gone.
Essential Materials to Revitalize Dead Soil
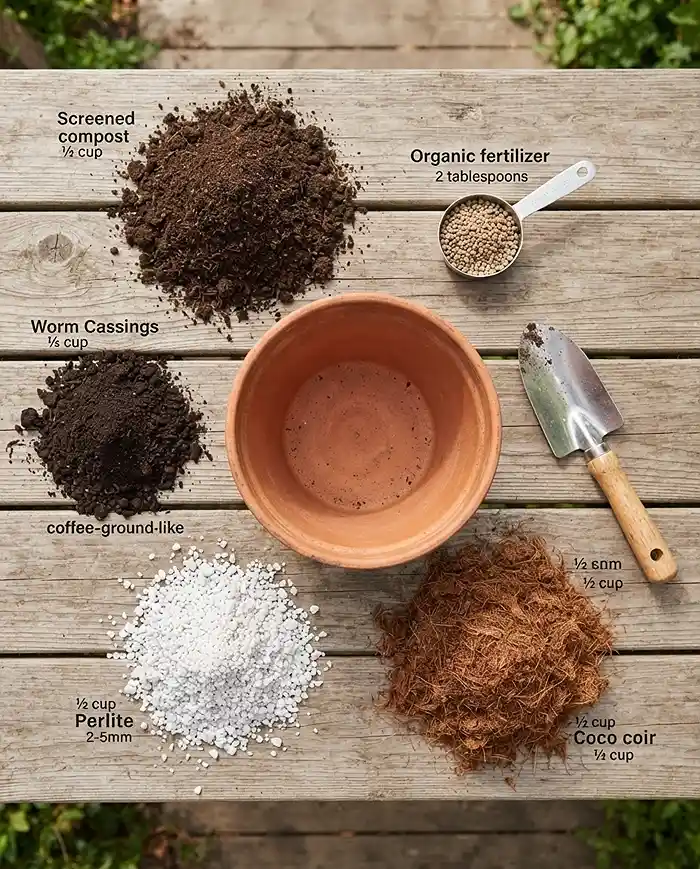
Quick Answer: You need organic compost, worm castings, perlite, coco coir, and a balanced organic granular fertilizer to rebuild both nutrition and structure.
- Screened compost, homemade or bagged, for nitrogen and microbial life
- Worm castings, roughly one part per eight parts mix, for slow-release nutrients
- Perlite, fresh, since old perlite compacts and loses its air pockets over time
- Coco coir, rehydrated, to restore moisture-holding sponginess
- A balanced organic granular fertilizer, something like a 4-4-4 or 5-5-5 blend
Organic Compost and Worm Castings for Nutrients
Quick Answer: A heavy-feeding container crop strips nitrogen, phosphorus, and potassium fast, so compost and worm castings need to go back in at real volume, not a token handful.
Last August, my second tomato crop in the same five-gallon pot came out stunted and pale despite regular watering. I’d added maybe a cup of compost and figured that was enough. It wasn’t. Tomatoes are heavy feeders, and one cup didn’t touch what they’d pulled out.
Now I mix in roughly two cups of finished compost and one cup of worm castings per five-gallon container before replanting anything after a heavy feeder. That fixed the pale-leaf problem the following season.
Perlite and Coco Coir for Restoring Aeration
Quick Answer: Old peat-based mixes compact and lose their air pockets, so fresh perlite and rehydrated coco coir bring back the light, fluffy texture roots need.
Peat moss, the base of most bagged mixes, breaks down into fine particles after a season of watering and root growth. What started as a fluffy medium turns dense and slow-draining.
I add about a quarter cup of perlite and a handful of rehydrated coco coir per gallon of old soil, which restores drainage without diluting the nutrients I just mixed in. This same ratio works for the DIY potting mix I build from scratch each spring.
The Step-by-Step Soil Refresh Method
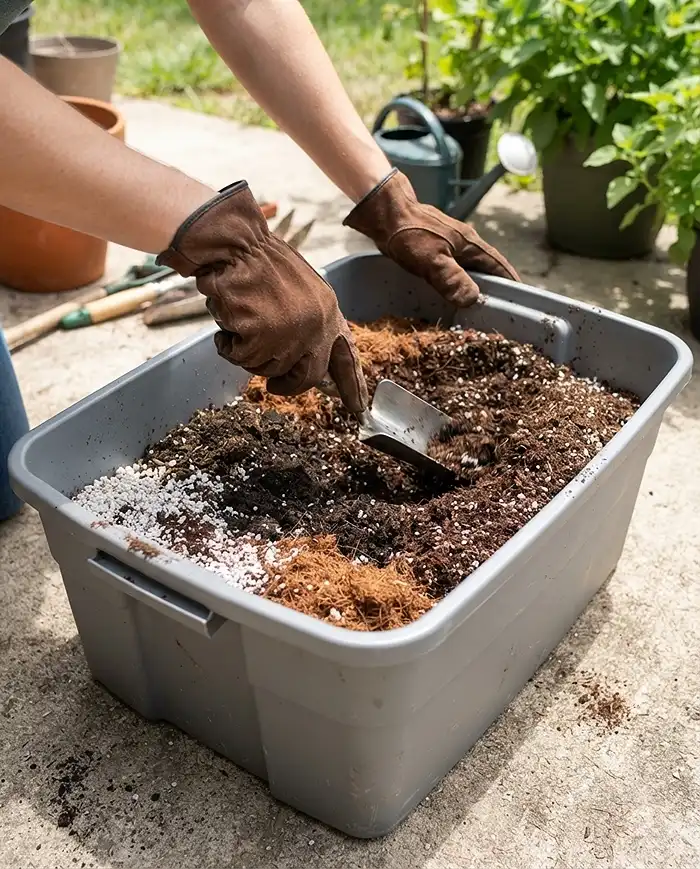
Do this in a large plastic tote, a wheelbarrow, or a tarp on the ground. A cramped balcony pot is the wrong place to try mixing amendments, you’ll end up with pockets of unmixed compost and dry spots of old dirt.
Step 1: Emptying, Sifting Roots, and Solarizing
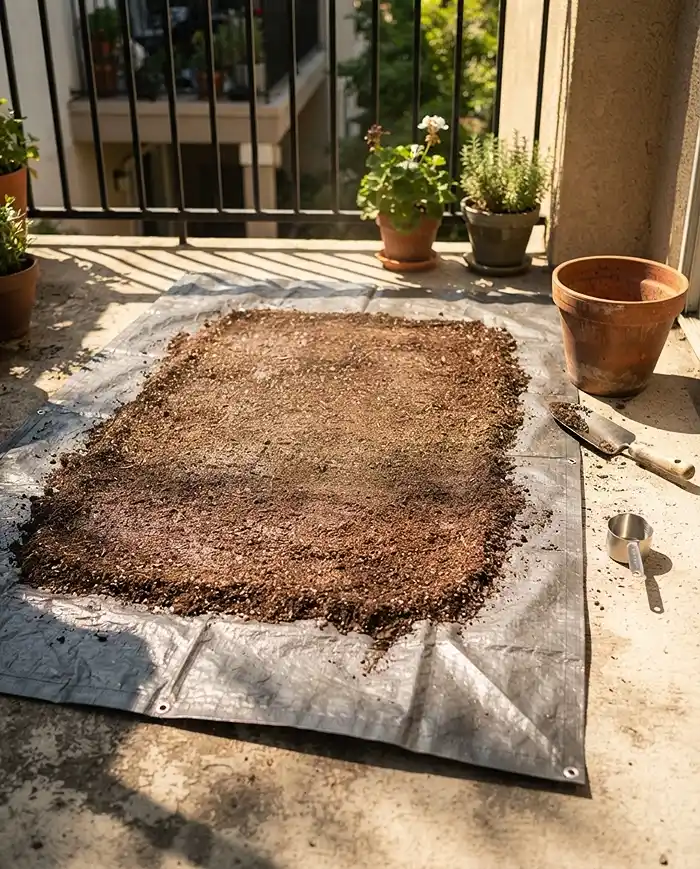
Quick Answer: Dump the pot onto a tarp, break up clumps by hand, pull out old roots, and let the sifted soil sit in direct sun for several days to kill lingering pest eggs.
I break up every clump with gloved hands rather than a trowel, since the trowel misses fine root threads that a trowel just chops through instead of removing. Old roots left behind can rot and attract fungus gnats later.
Spread the sifted soil in a thin layer on a dark tarp in full sun for three to five days during summer. This mimics the same principle behind formal soil solarization research from Oklahoma State University Extension, just scaled down for a container batch.
Step 2: The 50/50 Dilution and Amendment Blending
Quick Answer: Blend your sifted old soil with 30 to 50 percent fresh ingredients, compost, perlite, and a balanced organic fertilizer, to get a light, chemically balanced medium again.
For a five-gallon pot, that’s roughly two-and-a-half to three gallons of old soil mixed with one-and-a-half to two gallons of fresh compost, perlite, and coco coir combined. Add the granular fertilizer at the rate printed on the bag, usually one to two tablespoons per gallon of mix.
Turn the pile over with a shovel or your hands until the color is uniform, dark and even, with no dry pockets of old, pale soil left visible.
Step 3: Reinoculating with Beneficial Microbes and Fungi
Quick Answer: Water the freshly mixed soil with a liquid compost tea or a mycorrhizal fungi inoculant to rebuild the microbial life that breaks nutrients down for plant roots.
Solarizing and adding fresh compost kills off some of the biology along with the pathogens. A mycorrhizal inoculant, mixed into the watering can at planting time, reintroduces the fungal partners that help roots absorb phosphorus more efficiently.
Pro Tip: Apply the inoculant directly onto exposed roots at transplant time, not just as a soil drench, since direct root contact is what triggers the fungal colonization.
Tailoring the Refresh Ratio to Your Crop Rotation
Crop rotation matters even in a single pot on a balcony. What you grew last season determines exactly how aggressively you need to amend before planting something new.
| Previous Crop | Refresh Approach | Amendments Needed |
|---|---|---|
| Tomatoes, peppers, eggplant | Heavy recharge | Bone meal, gypsum, generous compost |
| Squash, cucumbers, melons | Moderate recharge | Compost, balanced granular fertilizer |
| Lettuce, spinach, salad greens | Light refresh | A few handfuls of compost and perlite |
| Bush beans, peas | Minimal, nitrogen-fixing | Perlite only, skip nitrogen fertilizer |
Recharging After Heavy Feeders Like Tomatoes and Peppers
Quick Answer: Nightshades pull heavy amounts of calcium and phosphorus from the pot, so recharge with bone meal, gypsum, and a generous dose of compost before planting anything else.
I lost a pepper crop to blossom end rot two summers ago after reusing tomato soil without adding calcium back. The soil looked fine. It wasn’t chemically fine.
Now I work in a tablespoon of gypsum and two tablespoons of bone meal per five-gallon pot any time I’m transitioning out of a nightshade crop, whether the next planting is another vegetable in a pot or an herb.
Prepping the Pot for Light Feeders Like Salad Greens
Quick Answer: Moving from a light feeder like lettuce into a nitrogen-fixing legume like bush beans only needs a light refresh, a few handfuls of compost and perlite.
Legumes actually add nitrogen to the soil through root nodules, so over-fertilizing before planting beans wastes amendments and can push excessive leaf growth at the expense of pods. Save the heavy compost dose for your next nightshade or squash crop instead.
Common Problems and Solutions
Two issues come up constantly when reusing container mix: soil that won’t absorb water, and fungus gnats that seem to appear out of nowhere. Both have quick fixes.
Hydrophobic Soil That Repels Water
Quick Answer: Bone-dry old peat becomes hydrophobic and beads water on the surface instead of absorbing it. A few drops of mild, biodegradable dish soap in a bucket of warm water breaks the surface tension and rehydrates it.
Mix roughly a quarter teaspoon of dish soap into a gallon of warm water, then soak the dry soil in that solution for twenty minutes before draining and using it. The soap acts as a wetting agent, nothing more.
Fungus Gnats Hatching in the Reused Mix
Quick Answer: Fungus gnats often hatch when old, consistently damp soil gets disturbed during a refresh. Soak Mosquito Bits, which contain BTI, in your watering can to kill the larvae safely.
I had a bad gnat outbreak after reusing basil soil that had been sitting damp in a shaded corner for two weeks before I got around to refreshing it. Letting sifted soil dry out fully before storage or reuse prevents most of this in the first place.
Frequently Asked Questions
Can I reuse potting soil if the previous plant died?
Yes, if the plant died from neglect like underwatering or sunburn, the soil is safe to refresh and reuse. If it died from a fungal disease, viral wilt, or a severe pest infestation, discard the soil instead.
Do I need to bake or microwave old potting soil to sterilize it?
No. Baking kills pathogens but also destroys beneficial microbes, creates a strong odor indoors, and leaves you with sterile, dead dirt that needs heavy reinoculation before it supports plants again.
How many times can I refresh and reuse the same container soil?
Indefinitely, in theory. Remove about 30 percent of the old material and mix in 30 percent fresh compost, perlite, and nutrients before each new crop to keep a quality organic base productive season after season.
What is the best soil for containers when refreshing an old mix?
A blend of screened compost, worm castings, perlite, and coco coir mixed at roughly 30 to 50 percent fresh material to 50 to 70 percent sifted old soil works well for most vegetables in pots.
Should I refresh soil differently for container garden tips involving herbs versus vegetables?
Herbs generally need lighter feeding than vegetables, so use a smaller compost dose, roughly half of what you’d add for a tomato or pepper pot, and skip the bone meal unless the herb previously showed nutrient deficiency.
Conclusion
Learning how to refresh potting soil turns an annual expense into a once-a-year top-up instead. The structure in your old mix is worth saving, it just needs its biology and nutrients rebuilt.
Triage first, amend based on what grew there last, and give the microbes a chance to reestablish before you plant. For more on picking crops suited to reused containers, check out this guide to the best vegetables for container gardening.
Key Takeaways
- Learning how to refresh potting soil saves money by rebuilding biology and nutrients instead of replacing the whole mix
- Always triage for disease, pests, and compaction before reusing any old container soil
- Blend in 30 to 50 percent fresh compost, perlite, and coco coir for a properly balanced refresh
- Match your amendment intensity to the previous crop, heavy feeders need more than light feeders
- Reinoculate with compost tea or mycorrhizal fungi to restore microbial life after solarizing