

Best Soil Mix for Container Vegetables
The best soil mix for container vegetables is the single biggest factor between a thriving summer harvest and a pot full of struggling plants. Get the mix wrong and heat, drought, and root stress will kill your crops fast.
Summer container gardening is unforgiving — pots heat up, dry out, and drain nutrients in days. But with the right blend, your vegetables in pots can outperform in-ground beds.
Table of Contents
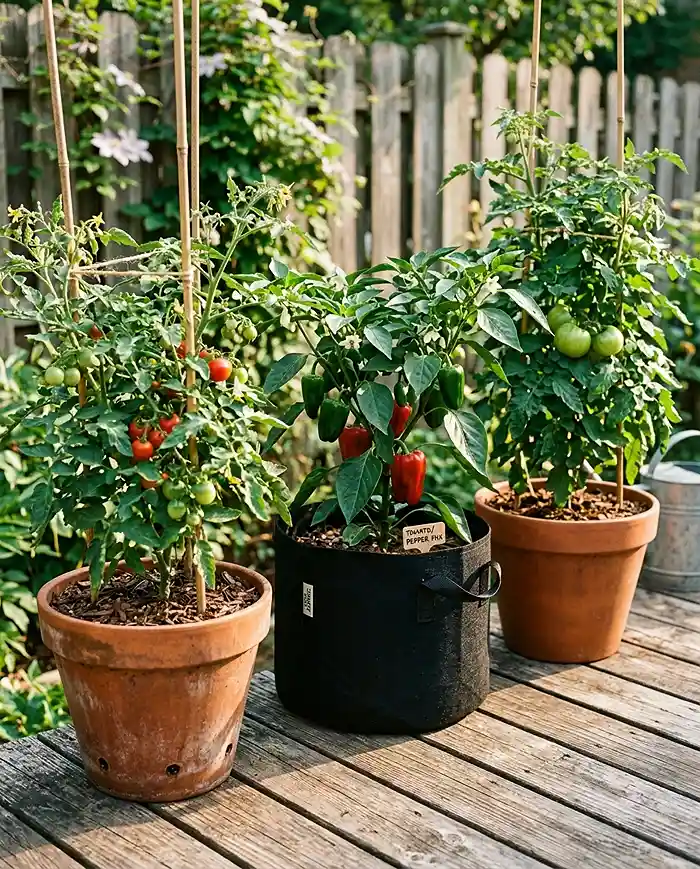
Why Soil Mix Matters More in Summer Containers
In-ground soil has a buffer. It’s deep, connected to groundwater, and thermally stable. A pot has none of that. In summer, a dark container sitting on a balcony or patio can hit 100°F+ at the root zone — even when air temps are mild.
Heat drives evaporation fast. A 5-gallon pot in July can dry out completely within 24 hours. Roots in a confined space have nowhere to chase moisture. That makes your container vegetable gardening mix the difference between daily harvests and daily heartbreak.
Standard bagged potting soil works in spring. In summer heat, it shrinks away from pot walls, cracks, and loses structure. You need a mix engineered for high-heat, high-water-loss conditions from day one.
What Makes a Great Container Vegetable Soil Mix
Every good container soil does three jobs at once: it drains excess water fast enough to prevent rot, holds enough moisture between waterings, and supplies nutrients steadily. These three goals are actually in tension — and that’s why off-the-shelf mixes often fall short.
The best soil mix for container vegetables balances drainage, moisture retention, and fertility. Lean too far toward drainage and you’re watering twice a day. Lean too far toward water retention and roots suffocate.
The key is structure. A well-built mix stays loose and airy even after weeks of daily watering. It doesn’t compact, crust, or shed water like a hydrophobic brick.
Why You Should Never Use Garden Soil in Pots
Garden soil seems like the free, obvious choice. It’s not. Native soil is designed for an open ecosystem — it compacts hard inside a confined container, cutting off oxygen to roots within a few waterings.
It also drains poorly in pots, creating waterlogged conditions that rot roots and invite fungal disease. Worse, you’re importing weed seeds, fungal spores, and soil-borne pests directly into your container vegetable garden.
Even “good” garden loam behaves badly in pots. Skip it entirely for summer container gardening.
Essential Ingredients and What Each One Does
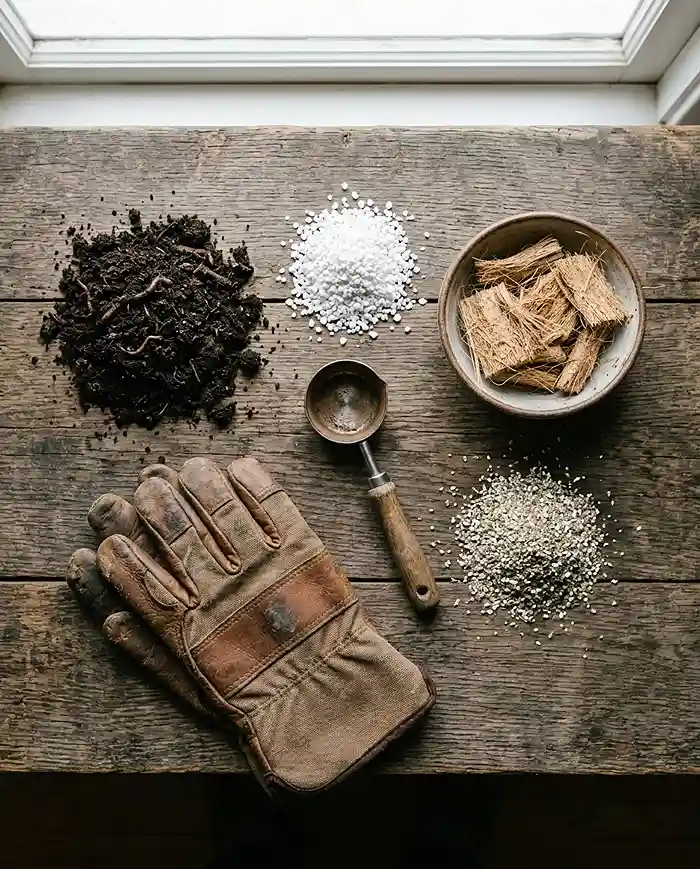
Understanding each ingredient lets you troubleshoot and adjust. You’re not just following a recipe — you’re building a living system. Here’s what goes into the best soil mix for container vegetables and why each piece earns its place.
| Ingredient | Primary Role | Watch Out For |
|---|---|---|
| Compost | Nutrients + microbial life | Too much causes compaction |
| Coco Coir | Moisture retention + structure | Low in nutrients on its own |
| Perlite | Drainage + aeration | Floats to top over time |
| Vermiculite | Moisture + nutrient holding | Can compact in heavy mixes |
| Slow-release fertilizer | Long-term nutrient supply | Can burn if overdosed |
Base Materials: Compost and Coco Coir or Peat
Compost is the engine of your mix. It feeds plants, supports beneficial microbes, and improves structure. Use mature, dark, crumbly compost — not fresh, chunky material that will rob nitrogen as it breaks down.
Coco coir (shredded coconut husk) holds moisture brilliantly while staying airy. It’s the sustainable upgrade over peat moss, which is mined from non-renewable bogs. Coir is pH-neutral, resists compaction, and is widely available in compressed bricks.
For summer container vegetable gardening, coir edges out peat because it rewets more easily after drying out — a real advantage during heat waves.
Drainage and Aeration: Perlite, Vermiculite, and Coarse Sand
Perlite is popped volcanic glass. Its primary job is to create air pockets and speed drainage. It doesn’t hold nutrients or water — it just keeps the mix from compacting.
Vermiculite is expanded mica. Unlike perlite, it absorbs water and nutrients, releasing them slowly. Use it when moisture retention is your priority — great for shallow-rooted crops like lettuce.
Coarse sand (not fine builder’s sand) adds weight and drainage. It’s worth including for pots exposed to wind on apartment balconies where lightweight mixes can tip over.
The Best Soil Mix Recipe for Summer Containers
Here’s a recipe that works. It’s been tested across multiple summers with tomatoes, peppers, cucumbers, and herbs. It drains fast, holds moisture between waterings, and doesn’t compact by August.
The ratios below are by volume, not weight. Use a bucket or measuring scoop — consistency matters more than perfection. Mix in a large tub or wheelbarrow so ingredients blend thoroughly.
This is the best soil mix for container vegetables for most summer conditions in USDA zones 5–10.
Standard All-Purpose Recipe
| Ingredient | Ratio | In a 5-Gallon Pot |
|---|---|---|
| Compost | 40% | ~8 cups |
| Coco Coir | 30% | ~6 cups |
| Perlite | 20% | ~4 cups |
| Vermiculite | 10% | ~2 cups |
| Slow-release granules | Per label | ~1 tbsp |
Real Example: Last July, I mixed this exact recipe for a 5-gallon bucket of cherry tomatoes on a south-facing patio. By week 10, I was picking 50+ tomatoes a week. The mix never compacted and only needed watering once daily even in 95°F heat. Check out more ideas for 5-gallon bucket container gardens to make the most of this setup.
Pro Tip: Pre-moisten your coco coir brick the night before mixing — dry coir repels water and won’t blend evenly into the mix.
Adjusting the Mix for Heavy Feeders vs. Light Feeders
Not all vegetables in pots eat the same. Tomatoes and peppers are heavy feeders — they need more compost and more fertilizer. Lettuce, herbs, and radishes are light feeders that can get by with less.
- Heavy feeders (tomatoes, peppers, squash): Increase compost to 50%, add an extra tablespoon of slow-release granules, top-dress with worm castings monthly
- Light feeders (lettuce, basil, radishes): Keep compost at 30–35%, replace some perlite with vermiculite for extra moisture retention
- Root vegetables (carrots, beets): Reduce compost to 30%, increase perlite to 25% for looser structure that roots can push through
Tools and Materials You’ll Need
Mixing soil doesn’t require much gear, but a few tools make it easier and less messy.
- Large mixing tub or wheelbarrow — something that holds at least 15 gallons
- Measuring bucket — a 1-gallon or 2-gallon bucket marked in cups works well
- Garden gloves — perlite dust can irritate lungs; wear a dust mask when pouring
- Garden trowel or hand shovel — for blending and filling pots
- Airtight storage bin — store leftover mix in a sealed container to prevent moisture loss and pest entry
Buy ingredients in bulk if you’re filling multiple containers. Per-quart pricing at garden centers is expensive — a compressed coir brick and a cubic foot bag of perlite will go much further.
Step-by-Step: Mixing and Filling Your Containers
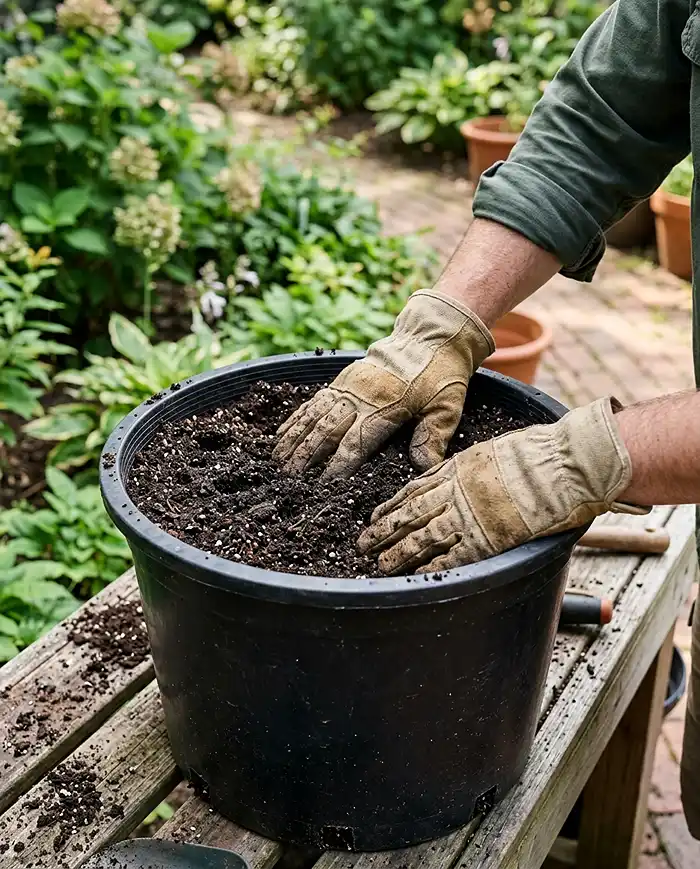
Sequence matters. Dry ingredients mixed first, then wet, then poured into containers in layers gives you even distribution and avoids air pockets.
- Hydrate coir first — soak the brick in water 30–60 minutes before mixing
- Measure all dry ingredients into your tub using your ratios
- Add coir and blend thoroughly until no clumps remain
- Add slow-release fertilizer and mix in evenly
- Pre-moisten the blend — add water slowly and mix until the soil feels like a wrung-out sponge (damp, not dripping)
- Fill containers in 3–4-inch layers, pressing gently — don’t pack hard
Avoid the temptation to fill the pot to the absolute brim. Soil settles after the first few waterings, and you need headspace for water to pool before absorbing.
How Deep to Fill and Leaving Headspace
Leave 1–2 inches of space between the soil surface and the rim of the pot. This gap holds water during irrigation, giving it time to soak in rather than running straight off the sides.
- Tomatoes and peppers need at least 12 inches of root depth — use pots 14 inches deep or more
- Lettuce and herbs thrive in 6–8 inches of mix
- Cucumbers and squash want at least 12 inches and a wide container
Boosting the Mix for Summer Heat
A standard mix works. An amended mix works all summer without extra intervention. These additions pay off fast in hot conditions.
- Water-retaining crystals (polyacrylamide granules): Add 1 tsp per gallon of mix — they absorb hundreds of times their weight in water and release it slowly
- Biochar: Add 5–10% by volume — improves nutrient retention and microbial activity in hot, heavily watered mixes
- Surface mulch: A 1-inch layer of straw or coco coir on top of the soil cuts evaporation by up to 30%
For a deeper guide on keeping summer container gardening plants alive through heat waves, read this detailed breakdown of watering container plants in hot weather.
Fertilizer and Feeding Schedule
Even with compost in the mix, containers need supplemental feeding. Every time you water, nutrients leach out the drainage holes. By week 3–4, your compost is largely depleted of available nitrogen.
- Weeks 1–2: Slow-release granules in the mix handle feeding
- Weeks 3–4: Begin liquid fertilizer (balanced 10-10-10 or tomato formula) every 7–10 days
- Peak summer: Feed heavy feeders every 7 days; light feeders every 14 days
- Midseason boost: Side-dress with a handful of worm castings around the base monthly
Pro Tip: Use a diluted liquid seaweed solution every two weeks alongside your regular fertilizer — it boosts stress tolerance and heat resilience without burning roots.
Maintaining Soil Health Through the Season
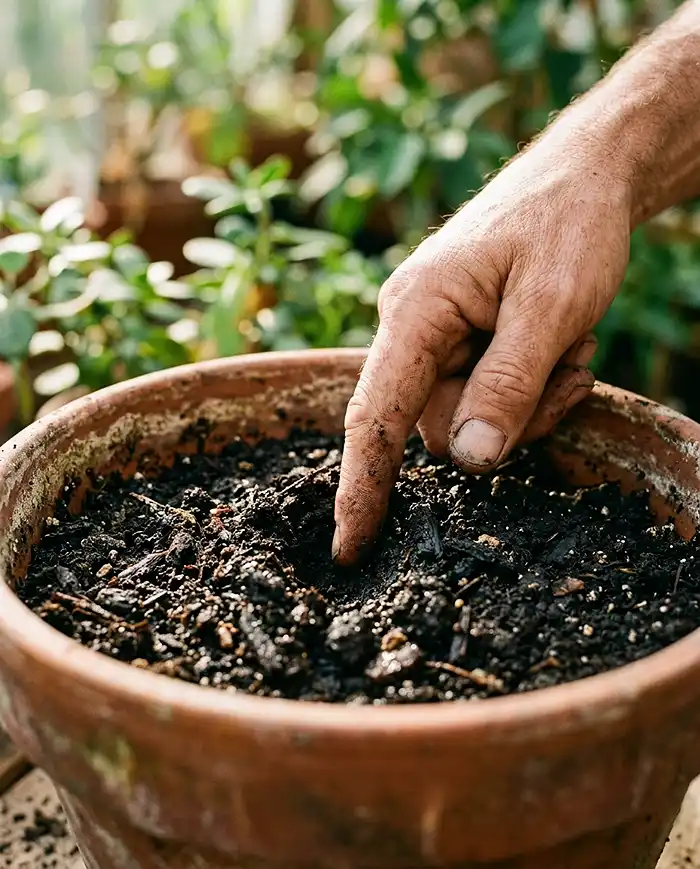
Good container vegetable gardening doesn’t stop at planting. Soil degrades over summer — it compacts, loses nutrients, and can develop a crust that sheds water instead of absorbing it.
Every 4–6 weeks, scratch the top inch of soil gently with a fork to break up any surface crust. Then top-dress with a thin layer (half an inch) of fresh compost or worm castings.
Check soil moisture with the finger test daily in peak heat: push your finger 2 inches into the soil. If it’s dry at that depth, water now. If it’s damp, wait. Don’t rely on surface appearance alone — the top dries fast even when deeper layers still hold moisture.
Common Problems and Solutions
Soil Drying Out Too Fast
Quick Answer: Increase coco coir content, add a mulch layer on top, or consider a self-watering pot insert.
Fast drying usually comes from one of three causes: the pot is too small, it’s made of terracotta or a thin material, or your perlite ratio is too high.
- Boost coir to 40% of your mix for better moisture retention
- Add water-retaining crystals at 1 tsp per gallon
- Move pots to afternoon shade during peak heat hours
- Use self-watering inserts with a water reservoir at the base
Waterlogged, Soggy Soil
Quick Answer: Check drainage holes first, then add perlite to correct a mix that’s holding too much water.
If the soil stays wet for more than 48 hours after watering, you have a drainage problem. Blocked drainage holes are the most common culprit — clear them immediately.
- Drill additional drainage holes if needed (at least 4–6 for a 5-gallon pot)
- Repot into a fresh mix with perlite increased to 25–30%
- Never let pots sit in standing water — empty saucers after rain
Yellowing Leaves and Stunted Growth
Quick Answer: Yellowing usually means nitrogen deficiency or compacted soil blocking root uptake. Test and correct both.
If lower leaves yellow first, it’s almost always nitrogen loss from heavy watering. Start liquid feeding immediately at half strength, building to full strength over two weeks.
- Check if soil has compacted — scratch the surface and look for hard, dense layers
- If compacted, aerate with a skewer or fork and top-dress with fresh compost
- Yellow leaves across the whole plant (not just lower) may indicate overwatering — check drainage first
Regional and Climate Considerations
The standard recipe works well in moderate climates. Adjust for extremes.
| Climate Type | Mix Adjustment | Key Extra Step |
|---|---|---|
| Hot and dry (Southwest US, zones 8–10) | Increase coir to 40%, add water crystals | Mulch surface, water twice daily at peak heat |
| Hot and humid (Southeast US, zones 7–9) | Increase perlite to 25%, reduce vermiculite | Ensure excellent drainage to prevent root rot |
| Short season (zones 3–5) | Standard recipe works well | Use dark containers to absorb heat and extend season |
For humid climates, air circulation around pots matters as much as soil mix. Spacing containers so air moves between them reduces fungal pressure significantly in summer container gardening.
best soil mix for container vegetables FAQs
Can I reuse last year’s container soil for summer vegetables?
Yes, but refresh it first. Remove old roots, break up compacted chunks, and add 20-30% fresh compost plus a handful of perlite per gallon of old mix. If the soil smells sour or shows white mold, discard it — soil that’s gone anaerobic won’t recover well enough to support vegetables.
What is the best soil mix for tomatoes in containers?
Tomatoes need the richest mix of any container vegetable. Use the standard recipe but increase compost to 50% and add slow-release granules at 1.5x the label rate. Adding a tablespoon of crushed eggshells or garden lime at planting prevents blossom end rot by supplying calcium.
Do I need to add fertilizer if my mix has compost?
Yes. Compost supplies nutrients, but those nutrients leach out fast with frequent summer watering. By week 3-4, available nitrogen is largely gone. Begin liquid feeding at week 3 regardless of how much compost is in your mix — heavy feeders like tomatoes need it every 7 days by midsummer.
How often should I water container vegetables in summer?
In peak summer heat (above 85 degrees F), most containers need watering once or twice daily. Use the finger test: push your finger 2 inches into the soil — if it’s dry at that depth, water deeply until it drains from the bottom. Small pots (under 3 gallons) dry out faster than large ones.
Key Takeaways
- The best soil mix for container vegetables in summer combines 40% compost, 30% coco coir, 20% perlite, and 10% vermiculite — never use garden soil in pots
- Summer heat makes drainage and moisture retention more critical than in spring; amend your mix with water crystals and surface mulch for extreme heat
- Heavy feeders like tomatoes need compost boosted to 50% and liquid feeding every 7 days by midsummer
- Rehydrate coco coir before mixing, pre-moisten your blend, and always leave 1–2 inches of headspace at the top of containers
- Check soil moisture daily with the finger test — summer container gardening success is more about consistent attention than perfect conditions