

small space garden layout for summer heat
Your small space garden layout for summer heat is either working for you or silently killing your plants. Most compact gardens — patios, balconies, raised beds — trap heat 10–20°F above air temperature. Here’s how to fix that before summer hits.
Table of Contents
Why Summer Heat Is the Silent Killer of Small Space Gardens
Quick Answer: Confined spaces amplify heat far more than open gardens. Without a deliberate layout, you’re setting your plants up to bolt, wilt, and fail by July — no matter how well you water.
Open-ground gardens release heat through surrounding soil and airflow. Small spaces can’t do that. Hard surfaces absorb radiant energy all day, then re-radiate it directly onto your plants overnight.
The result? Root zones stay dangerously hot around the clock, soil moisture evaporates in hours, and cool-season crops bolt weeks early. Layout design isn’t optional — it’s survival strategy.
How Small Spaces Create Dangerous Microclimates
Quick Answer: Hard surfaces like concrete, brick, and dark containers absorb heat all day and push soil temperatures 10–20°F above ambient air. Your plants feel it even when the air feels manageable.
This is the micro-scale version of the urban heat island effect. A black plastic pot sitting on dark pavement in Zone 7 can have a root-zone temperature of 100°F+ when air temperature reads 85°F.
Plant roots begin to suffer above 85°F. Above 95°F, most vegetable roots stop functioning properly. That’s not a watering problem — it’s a layout and surface problem.
Pro Tip: Press the back of your hand against your container sidewall at 2 PM. If you can’t hold it there for 5 seconds, your roots are cooking.
Signs Your Current Layout Is Making the Heat Problem Worse
Quick Answer: If your plants wilt before noon despite wet soil, your layout is the problem — not your watering schedule.
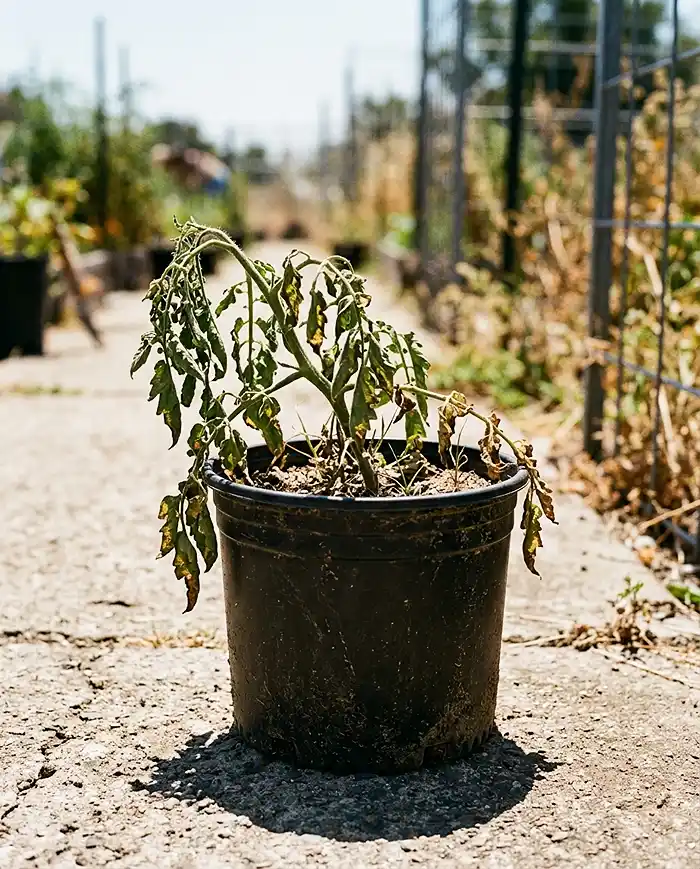
- Wilting before 11 AM even after morning watering
- Soil surface cracking dry within 3–4 hours of watering
- Leaf scorch on outer edges of south- or west-facing plants
- Container sidewalls too hot to touch after midday
- Lettuce or cilantro bolting [sending up a flower stalk] by early June
Last summer, my 6-inch basil on a west-facing concrete balcony wilted daily by 10 AM. I moved the pot, added a 2-inch gravel buffer underneath, and the wilting stopped within two days.
Planning Your Cool Summer Garden Layout — Before You Plant a Single Seed
Quick Answer: Spend 30 minutes mapping your space in spring. That single session prevents months of plant losses, overwatering, and frustration.
Most gardeners react to heat problems in July. Smart gardeners design against them in March. Planning is the highest-leverage hour you’ll spend in your entire growing season.
Mapping Sun Exposure and Heat Zones in Your Small Space
Quick Answer: Check your space at 8 AM, 12 PM, and 4 PM on a clear day. Sketch what’s in sun each time. That map tells you everything about where heat collects.
- 8 AM: Mark zones with gentle east-facing morning light — ideal for heat-sensitive crops
- 12 PM: Mark overhead sun zones — suitable for heat-tolerant crops with mulch protection
- 4 PM: Mark west-facing zones receiving brutal late afternoon sun — these need structural shade
Free apps like SunCalc overlay sun angles on your actual location. Ten minutes with this tool is worth more than a month of guessing.
Pro Tip: The 4 PM sun position is your most dangerous zone — afternoon heat compounds all-day surface absorption. Block it first.
Understanding Your USDA Hardiness Zone vs. Your Summer Heat Zone
Quick Answer: USDA zones tell you about winter cold. AHS Plant Heat Zones tell you about summer stress. You need both numbers to plan a smart summer layout.
A Zone 6 USDA gardener in St. Louis faces 60+ days above 86°F annually — the same heat stress as many Zone 8 gardens. The AHS Heat Zone Map gives you your real summer heat profile.
| AHS Heat Zone | Days Above 86°F | Layout Intensity Needed |
|---|---|---|
| Zone 1–3 | Under 14 days | Basic mulch + moveable pots |
| Zone 4–6 | 14–90 days | Shade structures + cluster grouping |
| Zone 7–9 | 90–150 days | Full layout redesign + 40–50% shade cloth |
| Zone 10–12 | 150+ days | Desert-adapted layout with ollas + ceramic pots |
Choosing the Right Layout Style for Your Space Size
Quick Answer: Match your layout style to your square footage. The wrong layout style wastes space and traps heat in a small garden.
| Layout Style | Best Space Size | Summer Heat Advantage | Watch Out For |
|---|---|---|---|
| Square Foot Grid | 50–150 sq ft | Dense planting shades soil | Trapped airflow if overcrowded |
| Linear Fence Row | Under 50 sq ft | Fence provides afternoon shade | One-directional only |
| Tiered Vertical Tower | Under 50 sq ft | Maximizes vertical shade creation | Top tiers dry out fast |
| Hub-and-Spoke Cluster | 150–300 sq ft | Creates humidity microclimate | Needs careful spacing for airflow |
Tools and Materials You’ll Need for a Heat-Smart Garden Layout
Quick Answer: Gather these before you start. Missing one tool mid-setup is how good plans stall out and heat damage sneaks in.
Essential Planning Tools
- Measuring tape: Know exact dimensions before buying shade structures or trellises
- Soil thermometer: The single most important diagnostic tool for summer heat management — check root zones at 2 PM
- Sun-tracking app (SunCalc or Lumos): Maps sun angles specific to your GPS coordinates
- Moisture meter: Distinguishes heat wilt from drought wilt — essential for accurate diagnosis
- Graph paper or GrowVeg planner: Digital or paper, draw your layout to scale before moving a single pot
Heat-Mitigation Materials and Structures
- 30–40% shade cloth: Lowers leaf surface temperature by up to 15°F on vegetables; 40–50% for desert zones
- Light-colored or glazed ceramic containers: Reflect rather than absorb radiant heat
- Straw or wood chip mulch (2–3 inches): Reduces soil surface temperature by 8–10°F
- Drip irrigation line or soaker hose: Delivers water to roots before it evaporates off hot soil surfaces
- Ollas [unglazed clay subsurface watering vessels]: Slowly seep water directly to root zones — game-changing in dry heat
- Light-colored gravel between containers: Reflects heat upward rather than absorbing it into the ground
- Insulating container sleeves or double-pot setup: Creates an air-gap insulation layer around root zones
For help choosing the right containers, check out this guide on the best pots for balcony gardens — it covers heat performance by material type.
Step-by-Step: Designing Your Cool Summer Small Space Garden Layout
Quick Answer: Follow these six steps in order. Each one builds on the last. Skip one and you’ll feel it in August.
Step 1 — Audit and Declutter Your Existing Space
Remove every dark-colored pot you own. Pull containers away from walls where hot air pools. If two pots are touching with zero gap, separate them immediately.
Poor airflow between crowded containers raises both humidity and foliage temperature at once. That dual stress is harder on plants than either factor alone.
Pro Tip: White or light grey containers aren’t just aesthetic — they can reduce container wall temperature by 20°F compared to black plastic in full sun.
Step 2 — Position Your Tallest Elements to Create Natural Shade Corridors
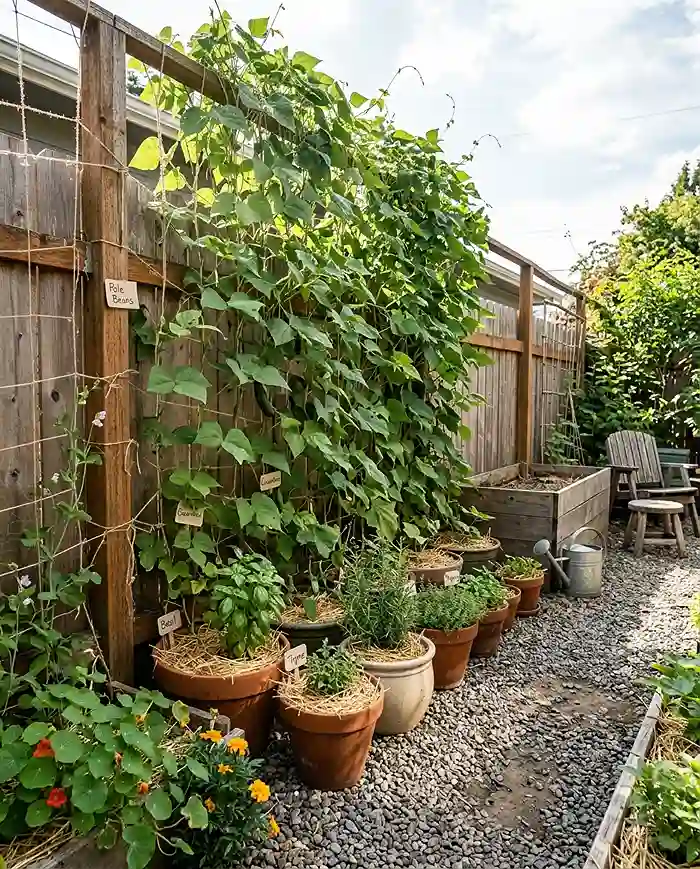
Place your tallest plants — trellised tomatoes, pole beans, sunflowers — on the western or southwestern edge of your layout. They’ll cast afternoon shade exactly where shorter crops need it most.
Think of it as a “tall-to-short, west-to-east” stacking system. Your basil, lettuce, and herbs live in the shadow of your taller plants during the brutal 2–5 PM window.
- West/southwest edge: tomatoes, trellised cucumbers, pole beans (5–7 ft tall)
- Middle zone: peppers, eggplant, zucchini (2–4 ft tall)
- East edge: lettuce, spinach, herbs (under 18 inches)
Step 3 — Cluster Containers to Create a Humidity Microclimate
Group 3–5 containers together so their leaves overlap slightly in the air above. Plant transpiration [moisture released through leaves] from neighboring plants creates a shared humid microclimate that significantly reduces heat stress.
A single isolated pot on a hot patio loses moisture rapidly and has no buffer. A cluster of five pots essentially creates its own mini weather system.
Keep 6–8 inch gaps between 10–14 inch containers. Larger pots (16+ inches) need 10–12 inch gaps for airflow while still sharing humidity.
Step 4 — Incorporate Vertical Structures as Living Shade Screens
A trellis with cucumbers or pole beans running up it isn’t just a space-saver. It’s a living shade screen that lowers the temperature of everything behind it by blocking direct radiation.
Pole beans reach trellis-covering density in 4–5 weeks. Cucumbers cover an A-frame in 3–4 weeks. Nasturtiums fill gaps fast and double as a pest deterrent.
For more ideas on maximizing vertical space on hot outdoor areas, see these small balcony garden ideas for hot weather.
Step 5 — Pave, Mulch, and Surface Strategically
Apply 2–3 inches of light straw or wood chip mulch to every container top and every exposed soil surface. This is non-negotiable for summer container gardening. It cuts soil moisture loss by up to 70%.
Between containers, swap dark stones or black rubber mulch for light-colored pea gravel or decomposed granite. Where possible, replace dark pavers with creeping thyme — it’s a living mulch that actively cools through transpiration.
Step 6 — Plan Your Watering Infrastructure Into the Layout
Drip lines and soaker hoses need to be part of your layout drawing — not an afterthought. Decide where your water source is first, then build the container arrangement around it.
Self-watering containers should anchor your layout in the hottest zones. They maintain consistent moisture at root level even when the surface dries out within hours.
Water between 5–8 AM. That’s your entire summer watering strategy in one sentence.
The Best Plants for a Cool Small Space Garden Layout
Quick Answer: Perfect layout design still fails if you’re growing the wrong plants. Match your plants to your heat zone and container size before anything else.
Heat-Tolerant Vegetables and Herbs for Small Spaces
| Plant | Min. Container Size | AHS Heat Zones |
|---|---|---|
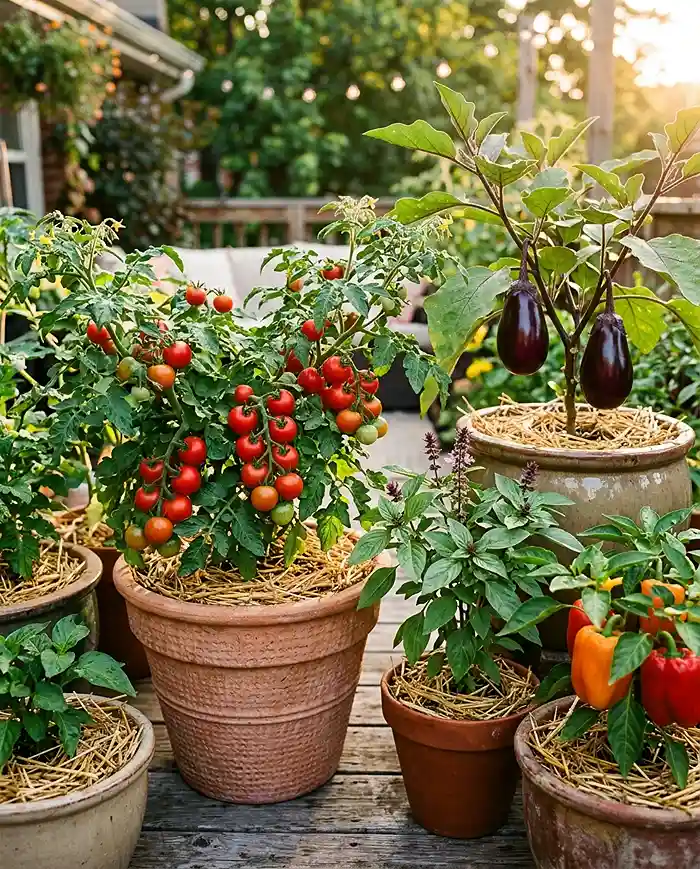
| Cherry tomatoes | 5 gallons | 4–9 |
| Sweet peppers | 3 gallons | 5–10 |
| Basil | 6 inches | 5–10 |
| Eggplant | 5 gallons | 6–10 |
| Armenian cucumber | 5 gallons + trellis | 6–10 |
| Malabar spinach | 3 gallons | 7–12 |
| Okra | 5 gallons | 7–11 |
| Thai basil | 6 inches | 6–10 |
| Zucchini | 10 gallons | 4–8 |
| Sweet potato | 10 gallons | 7–11 |
| Lemongrass | 5 gallons | 8–12 |
Cool-Season Crops You Can Still Grow with Smart Shade Placement
Quick Answer: Put lettuce, spinach, and cilantro in your east-side shade corridors. They’ll survive into July with 4–5 hours of direct sun maximum.
Use succession planting [sowing new seeds every 2–3 weeks] in your shade zones to extend the cool-season harvest by 4–6 weeks past what most gardeners achieve.
- Lettuce: tolerates shade well, bolts above 75°F in full sun but holds in 40% shade
- Cilantro: sow every 3 weeks in east-side shade; harvest before it reaches 8 inches
- Spinach: use ‘Malabar’ in full sun, standard spinach only in shade corridors
Flowers and Ornamentals That Double as Heat-Reducing Ground Covers
Low-growing ornamentals between and around containers act as living mulch. They lower soil surface temperature by up to 10°F compared to bare soil or dark stone.
- Creeping thyme: Handles foot traffic, spreads between pots, releases heat through transpiration
- Portulaca: Thrives in brutal heat, closes in afternoon to conserve moisture
- Silver dusty miller: Reflects light back upward, reducing heat absorption around containers
- Alyssum: Low-growing, cools soil, attracts beneficial insects
- Sedum: Extremely drought-tolerant, holds moisture in soil beneath it
Seasonal Timing — When to Plan, Plant, and Pivot Your Layout
Quick Answer: A cool-summer layout isn’t a one-time setup. It has three phases: spring prep, peak summer management, and late-summer reset. Miss a phase and you lose the season.
Spring Prep Timeline (March–May): Setting Up for Summer Success
- March: Complete sun mapping, order shade cloth and trellises, audit containers for color and size
- April: Install trellis structures, set up drip irrigation or soaker hose layout, test all watering infrastructure
- May: Transplant heat-tolerant crops, apply mulch to all containers and beds, position container clusters
Structures must be in place before heat arrives — not installed during a July heat emergency while plants are already stressed.
Pro Tip: Buy shade cloth in March. By June, the good densities sell out everywhere online and in stores.
Peak Summer Management (June–August): Protecting What You’ve Built
- Switch to 40–50% shade cloth if temperatures exceed 95°F for more than 3 consecutive days
- Water daily at 5–8 AM; check soil moisture with a meter at 2 PM — not by touch alone
- During heat waves above 105°F, move containers to temporary shade between noon and 5 PM
- Stop all high-nitrogen fertilizing above 90°F — it pushes soft growth that scorches easily
If you notice yellowing or unusual leaf patterns during summer stress, check this guide on plant nutrient deficiency symptoms — heat stress and nutrient deficiency often look identical.
Late Summer Reset (August–September): Transitioning to Fall
August is your strategic reset window. Pull exhausted tomatoes and zucchini. Refresh mulch. Move containers back to full-sun positions as heat intensity drops.
Use your existing shade structures to protect fall seedlings from lingering August heat. Kale, Swiss chard, and arugula can germinate in the partial shade your summer trellis still provides.
Regional Variations — Tailoring Your Layout to Your Climate
Quick Answer: “Summer heat” isn’t the same in Phoenix as it is in Portland. One layout strategy doesn’t fit all. Here’s how to adapt yours.
Arid Southwest and Desert Climates (Zones 9–11)
Dry heat plus intense UV radiation requires the most aggressive layout changes. Use unglazed ceramic or thick terracotta containers only — they insulate roots far better than plastic in dry heat.
- Install ollas directly into containers for subsurface drip irrigation
- Use 40–50% shade cloth as a permanent canopy, not just a heat-wave measure
- Surround food crops with xeric ornamentals like agave, salvia, or desert marigold as a wind and sun buffer
- Water before sunrise — even 5 AM can mean losing water to evaporation in Phoenix in July
Humid Southeast and Gulf Coast Climates (Zones 8–10)
Heat plus humidity creates a fungal disease risk that compounds heat stress. Airflow between containers is non-negotiable here — don’t cluster as tightly as you would in a dry climate.
- Elevate all containers at least 2 inches off the ground for underside airflow
- Use wide-weave trellis netting instead of solid panels — air must pass through freely
- Choose fungal-resistant varieties: ‘Celebrity’ tomato, ‘Marketmore’ cucumber, ‘Genovese’ basil
- Prune lower leaves on all plants to keep foliage off hot, humid soil surfaces
Temperate Northern Climates (Zones 4–6) with Short Hot Spells
Northern gardeners don’t need permanent shade infrastructure — they need flexible, moveable setups. Dark containers that help in May become a problem in a July heat spike.
Keep a few light-colored container sleeves on hand. When a heat wave is forecast, slip them over your dark pots before temperatures peak. Thirty seconds of work can save a plant.
Common Problems and Solutions
My Plants Are Wilting Every Afternoon Even After Watering
Quick Answer: This is almost always a root-zone heat problem, not a water shortage. Check soil temperature first — above 85°F and water can’t help.
- Push a soil thermometer 3 inches deep at 2 PM — above 85°F means root stress
- Deploy shade cloth immediately — same day, not tomorrow
- Paint dark container exteriors white with exterior latex paint as an emergency fix
- Apply 3 inches of straw mulch to container tops within the hour
My Containers Are Drying Out Within Hours of Watering
Quick Answer: Clay and thin plastic pots lose 50–70% of their moisture within 6 hours in direct summer sun. Switch containers or insulate them.
- Double-pot: place your growing pot inside a larger decorative pot with a 1-inch air gap
- Add 25% coco coir or perlite to your potting mix — both dramatically improve moisture retention
- Switch to self-watering containers in your hottest zones
- Top-dress with 2 inches of straw mulch every week during peak summer
My Shaded Plants Are Leggy and Not Producing
Quick Answer: You’ve over-corrected. Most fruiting vegetables need a minimum of 4 hours direct sun. Etiolation [stretched, pale growth from insufficient light] means they’re not getting it.
Reduce shade cloth from 50% to 30% density. Or reposition the structure to block only afternoon sun while letting morning light through freely. Leggy plants with pale leaves and zero flowers are telling you exactly what they need.
My Vertical Trellis Is Creating Too Much Wind Resistance and Toppling Containers
Freestanding trellises in containers act like sails in summer storms. Anchor every vertical structure to a wall, fence, or railing — never rely on container weight alone above 4 feet.
Choose open-weave mesh trellis over solid bamboo screens. Wind passes through mesh; solid panels catch it. That difference determines whether your trellis stays up in a storm.
My Patio or Balcony Gets So Hot the Concrete Burns My Plants
Quick Answer: Concrete surfaces reach 140°F+ in full summer sun. Any container sitting directly on it is roasting from the bottom up.
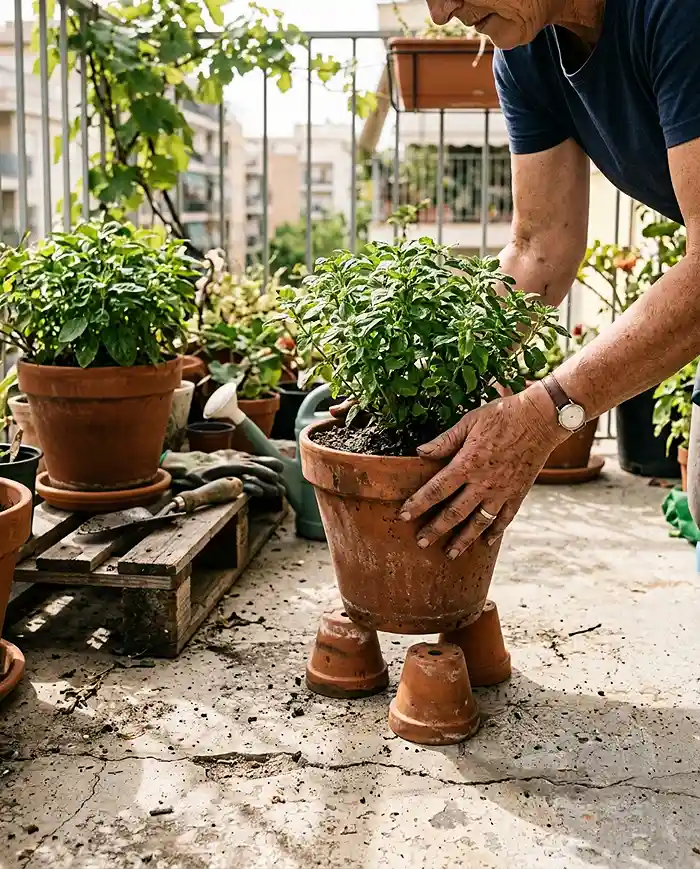
- Raise all containers on wooden pallets, pot feet, or wire shelving racks
- Even a 2–4 inch air gap reduces container bottom temperature by 20–30°F
- Place light-colored outdoor rugs or interlocking foam tiles under pot clusters as insulation
small space garden layout for summer heat FAQs
What is the best layout for a small vegetable garden in hot weather?
A tiered, west-to-east layout works best for most small garden spaces. Place tall heat-tolerant crops — tomatoes, trellised beans — on the western edge so they cast afternoon shade eastward onto shorter, heat-sensitive plants. The exact orientation depends on your specific sun direction.
How do I keep my raised bed cool in summer?
Use a four-part approach: apply 3 inches of straw mulch to the soil surface, install 30–40% shade cloth during peak hours (11 AM–4 PM), plant tall crops on the west side for natural shade, and water deeply between 5–8 AM every morning.
Can I grow vegetables in a small space if I only have a hot, south-facing patio?
Yes — a south-facing patio is actually ideal for heat-lovers like tomatoes, peppers, basil, and eggplant. Use light-colored containers, raise them off hot pavement, and add a simple afternoon shade canopy. The goal is productive heat, not damaging heat.
How far apart should containers be in a small garden to prevent overheating?
Keep 6–8 inch gaps between medium containers (10–14 inch pots). Larger containers (16+ inches) need 10–12 inch gaps. Close enough to share transpiration humidity — far enough for air to circulate and prevent fungal buildup.
What time of day should I water my small space garden in summer to keep it cool?
Water between 5–8 AM every day during summer. Morning watering penetrates deeply before evaporation peaks, keeps foliage dry to reduce fungal risk, and stabilizes root-zone temperature before midday heat arrives. Evening watering leaves foliage wet overnight — a direct invitation to fungal disease.
Key Takeaways
- Your small space garden layout for summer heat starts with a sun-mapping exercise in spring — not a reaction to wilting plants in July
- Root-zone temperature, not air temperature, is what kills container plants; a soil thermometer is your most important summer tool
- Position tallest plants on the western edge, cluster containers 6–8 inches apart, and raise everything off hot pavement
- Apply 2–3 inches of straw mulch, use 30–40% shade cloth, and water between 5–8 AM — these three habits solve 80% of summer heat problems
- Adapt your layout to your AHS Heat Zone, not just your USDA zone — a Zone 6 gardener can face the same summer stress as a Zone 8