
How to Store Grow Bags for Winter
How to store grow bags for winter: dry-brush, soak, sun-dry, seal. Six soaked bags came out mold-free after 4 months. Grow bags for vegetables last longer too.
Here’s my setup. Zone 8b, a south-facing concrete patio, and 12 fabric bags from 5 to 20 gallons. First frost hit November 14, 2025. Bags stayed in storage until March 2026.
Six bags got a 30-minute peroxide soak. Six got a dry brush only. As of the 2026 season, I soak any bag that grew tomatoes or peppers.
Table of Contents
Why Winterizing Grow Bags Matters More Than You Think
Verdict: Winterizing takes about 2 hours for 12 bags. It adds roughly 2 seasons to their life. Skip it and mildew, mice, and rot will finish them early.
Fabric rots when it stays damp. Mold spores (tiny fungal seeds) hide in leftover soil and fibers all winter. Mice love dark folds.
I learned this the hard way. In December 2024, I stored two 10-gallon bags damp in my garage. They had grown ‘Sun Gold’ cherry tomatoes in 2024. By February, both had gray mildew and a musty smell.
Likely cause: the seams still held about a cup of water. I retired both bags.
Do this: Clean and dry bags within two weeks of pulling plants.
For the cost math, see whether fabric grow bags are worth it.
Evaluating Your Grow Bags at the End of the Season
Verdict: Inspect every bag before you clean it. A bag with a split seam or brittle fabric isn’t worth the wash time. Retire it.
Inspecting for Root Tears and Material Degradation
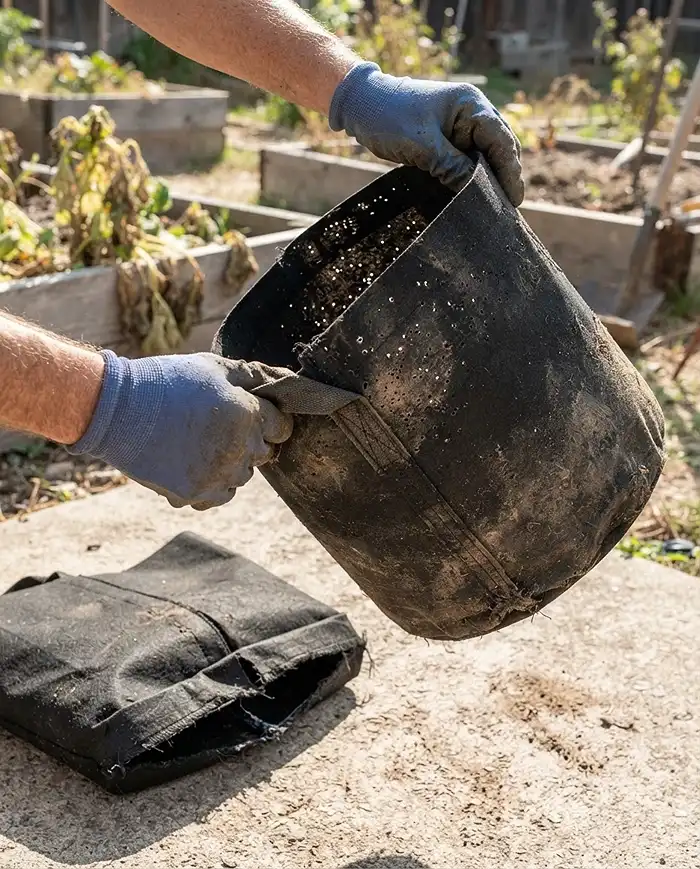
Flip the bag and press the bottom seam. Pull each handle hard. Hold the fabric up to the sun and look for pinholes.
In August 2025, a fourth-season 5-gallon bag split at the bottom seam. It held ‘Jimmy Nardello’ peppers and about 25 pounds of wet soil. I lost one plant and a lot of soil.
- Keep: Tight seams, handles that hold 25 pounds, no light through the weave.
- Toss: Stitching that pulls apart, brittle fabric, or holes bigger than a pencil dot.
Mistake to avoid: Washing a bag you’ll retire anyway. Test the seams first, then clean only the keepers.
Diagnosing Soil-Borne Diseases and Pests
Dig through the old soil before you dump it. Swollen, knotted roots mean root-knot nematodes (microscopic worms that cause galls on roots). Dark, greasy lesions on old tomato stems point to late blight (a fast-spreading plant disease).
In May 2025, late blight took three of four ‘Cherokee Purple’ plants in my 20-gallon bags within 10 days. Those bags got a 30-minute peroxide soak and three days of sun. They grew clean ‘Cherokee Purple’ again in spring 2026.
The University of Missouri Extension root-knot nematode guide shows what galls look like. It also says infected roots shouldn’t go in the compost pile.
Tools for Cleaning and Sanitizing Fabric Pots
Verdict: You need six cheap items and no chlorine bleach. Peroxide sanitizes without the fumes or fading.
- Stiff nylon brush (not wire)
- 3% hydrogen peroxide, 1 cup per gallon of water
- White vinegar, 5% acidity
- Mild, unscented dish soap
- A 20-gallon tub or clean wheelbarrow
- Rubber gloves
Mistake to avoid: Wire brushes. One pulled loops out of a 10-gallon bag on my first try. Switch to nylon.
Mild Detergents, Hydrogen Peroxide, and Scrub Brushes
Use 1 tablespoon of dish soap per gallon for a first wash. Use 3% hydrogen peroxide (the brown drugstore bottle) at 1 cup per gallon to sanitize.
Skip perfumed soaps. Residue lingers in the weave.
Step-by-Step Guide to Cleaning and Storing Grow Bags
Verdict: Five steps: empty, dry-brush, soak, sun-dry, seal. Each one blocks a specific winter failure. Skip the sun-drying and you’ll undo the rest.
Plan on 2 hours of work and 3 days of drying for 12 bags. Sort bags by size as you go. This guide to grow bag sizes for vegetables shows which crops fit which volume.
Step 1: Emptying and Managing Old Potting Soil
Dump each bag onto a tarp. Sift out roots with a 1/4-inch screen. Healthy soil goes into a lidded bin for spring.
I test reused soil with a $10 pH kit. Healthy soil read 6.4, which is fine. I refresh it with one-third new mix and compost before planting.
Diseased or nematode soil goes in the trash. Don’t compost it. Bag it, tie it, and move on.
Step 2: Dry Brushing Out Stubborn Root Systems
Let each empty bag dry in shade for 24 to 48 hours first. Wet roots smear into the fibers. Dry roots flake off.
Turn the bag inside out. Scrub firmly, about 2 minutes per 10-gallon bag. Tap it on the concrete to shake out fine roots.
Step 3: Washing and Sanitizing to Kill Pathogens
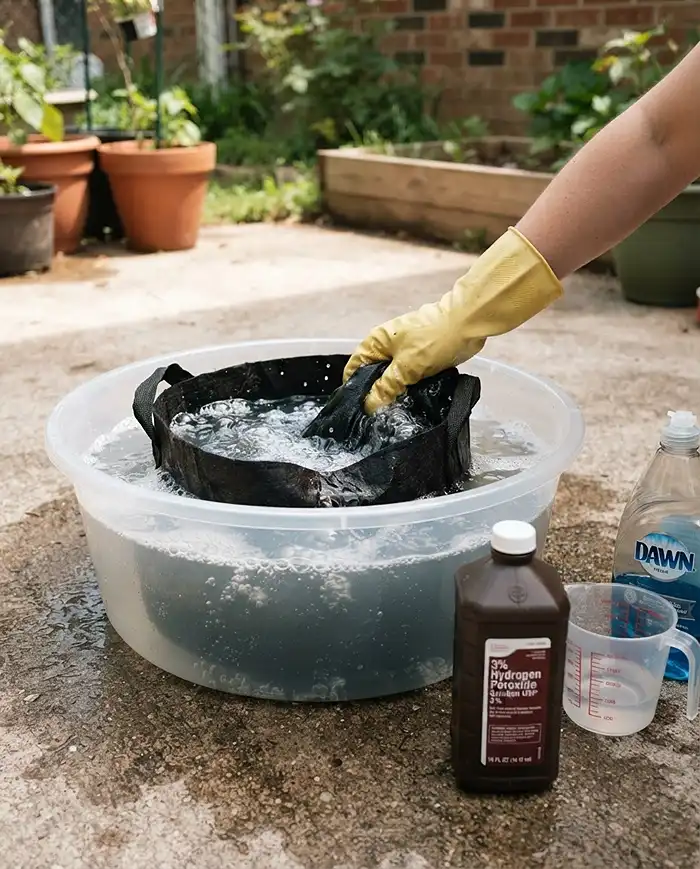
Fill a tub with 1 gallon of water, 1 cup of 3% peroxide, and 1 tablespoon of dish soap.
Submerge the bag for 30 minutes. Stir once at 15 minutes. Rinse twice with clean water.
| Method | Mix per gallon of water | Soak time | Best for |
|---|---|---|---|
| Soap wash | 1 tbsp mild soap | 10 min | Clean years, beans, greens |
| Peroxide soak | 1 cup 3% peroxide + 1 tbsp soap | 30 min | Tomatoes, peppers, blight history |
| Vinegar soak | 1:1 white vinegar to water | 20 min | Salt crust, mineral buildup |
| Oxygen bleach | 1 tbsp sodium percarbonate, warm water | 30 min | Mildew rescue |
In March 2026, I opened all 12 bags. None of the six soaked bags showed mold. One brush-only 10-gallon bag, last used for ‘Provider’ bush beans, had gray fuzz in a seam.
Step 4: Complete Sun Drying to Prevent Mold
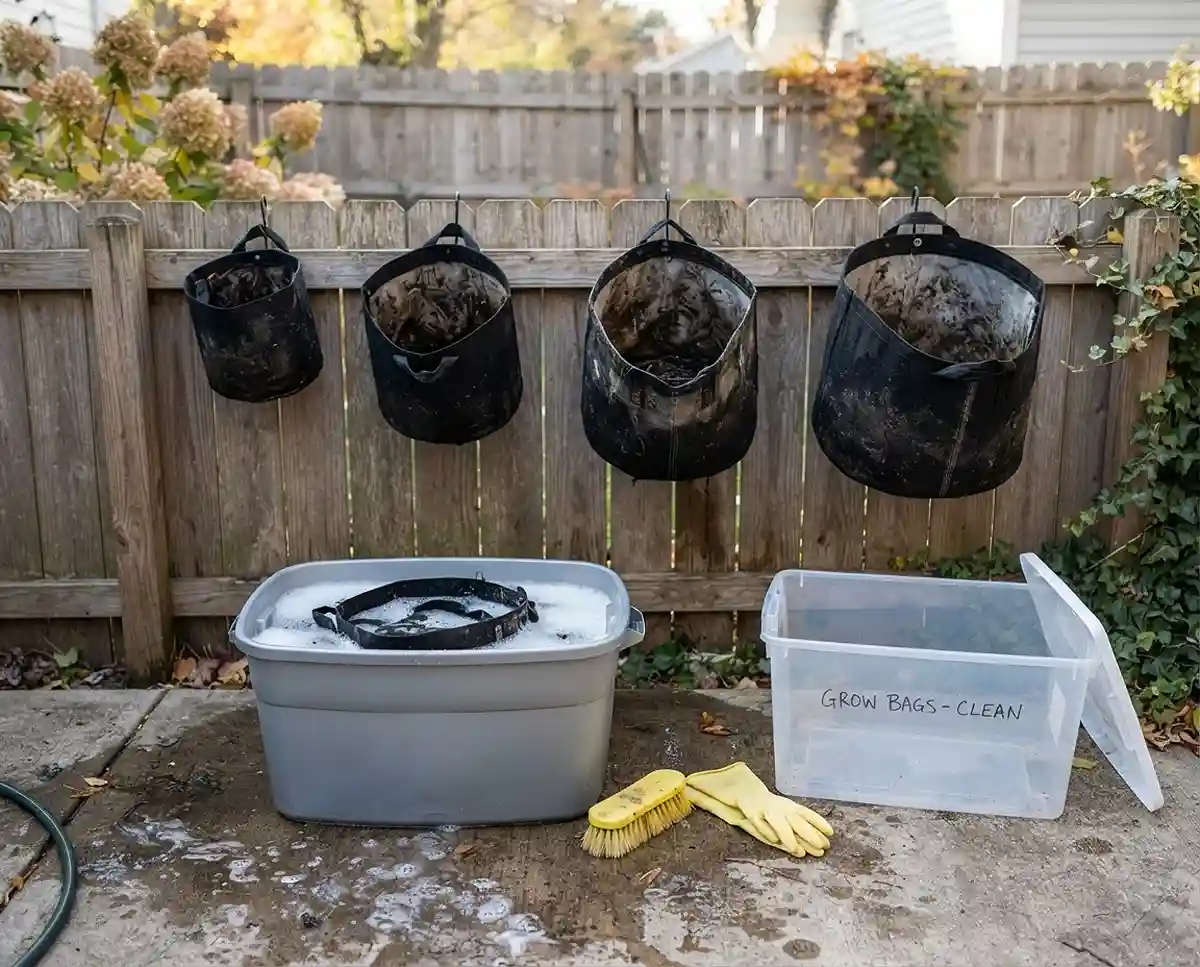
Hang bags on a fence or lay them flat on the concrete. Start inside out, then flip. In November, my bags dried in 2 days. Thick seams took 3.
Squeeze every seam. Any cool or clammy spot means water is still inside. Sun also knocks back leftover spores.
Mistake to avoid: Rushing this step. My two mildewed ‘Sun Gold’ bags in 2024 were the proof. Wait another day.
Step 5: How to Store Grow Bags for Winter Without Rodent Damage
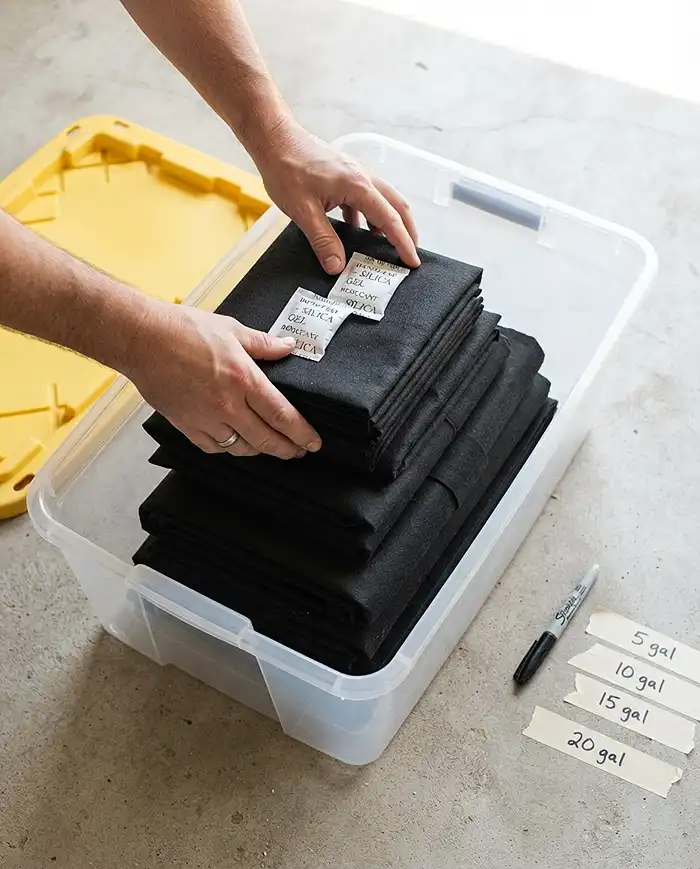
Fold each dry bag flat and stack them about 2 inches thick. Seal them in a lidded plastic tote. A 27-gallon tote holds about 12 bags from 5 to 15 gallons.
In winter 2023, mice chewed four bags on an open shelf. Totes fixed that. Label each tote by size. In spring, match crops with this grow bag size for tomatoes, peppers, and cucumbers chart.
Seasonal and Regional Storage Variations
Verdict: Cool and dry wins every time. Indoor closets need nothing extra. Garages and sheds need two silica packets per tote.
Winter garden storage depends on local humidity. I stored four bags in each spot, November 2025 to March 2026.
| Location | Typical humidity | Desiccant | Result (4 bags each) |
|---|---|---|---|
| Interior closet | 35 to 45% | None | 0 mold |
| Garage | 60 to 70% | Two 50 g silica packs per tote | 0 mold |
| Unheated shed | 70 to 80% | Two 50 g silica packs per tote | 1 bag with seam fuzz |
Humid Winter Climates vs. Dry Basements
My garage sits at 60 to 70% relative humidity (how much water the air holds). A silica packet (moisture-absorbing beads) in each tote keeps bags dry.
A basement under 50% needs no desiccant. Check with a $12 hygrometer. Dry out the packs every fall.
Common Problems & Solutions
Verdict: Most storage problems are fixable with one more soak and one more sunny day. Holes bigger than an inch aren’t worth patching.
Container gardening tips rarely cover rescue jobs. These two problems show up every year.
Stubborn White Algae and Salt Crusts on the Fabric
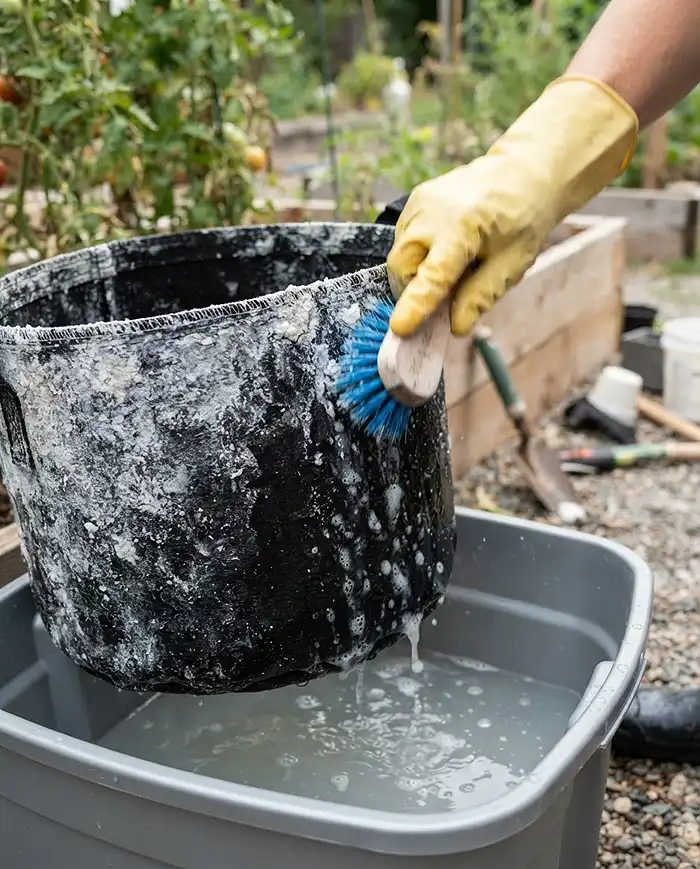
White crust is usually fertilizer salt, not algae. My weekly 20-20-20 liquid feed built a thick crust by August. Green or slimy patches are algae.
Soak the bag in 1:1 white vinegar and water for 20 to 30 minutes. Scrub, then rinse twice. If crust returns after two soaks, the fabric is clogged. Retire it.
Never mix vinegar and peroxide in one tub. Together they form peracetic acid, which irritates skin and lungs.
Mildew or Rodent Damage Developing During Storage
If a bag smells musty, re-wash it. Use 1 tablespoon of sodium percarbonate (oxygen bleach) per gallon of warm water. Soak 30 minutes, rinse twice, then sun-dry for 2 days.
Patch mouse holes under 1 inch with heavy-duty fabric repair tape, inside and out. Anything bigger fails under wet soil weight. Retire it and buy a new bag.
People Also Ask
Can I wash fabric grow bags in the washing machine?
Yes, but only empty, brushed bags. Use a mesh laundry bag, cold water, and a gentle cycle. A top-loader split the stitching on one 15-gallon bag in 2024. Hand soaking for 30 minutes is safer.
Can I leave soil in my grow bags outside over winter?
You can, but I don’t. Wet soil freezes and expands, which stresses seams in freezing zones. Three months of rain also leaches fertilizer, so you’ll refeed in spring anyway.
How many seasons do fabric grow bags last?
Plan on 3 to 5 seasons. Thick bags (about 300 GSM, grams per square meter) lasted 4 to 5 seasons with winter storage. Thin 150 GSM bags gave me 2 to 3.
Do I need to sanitize my grow bags every year?
Only after tomatoes, peppers, or any disease. For bush beans in a clean year, a soap wash and 2 days of sun is enough. After blight or nematodes, do the full 30-minute peroxide soak.
How long should grow bags dry before winter storage?
Give them 2 to 3 days of full sun in November. Squeeze the thick seams, since they dry last. Any cool or damp spot means they need another day.
The Short Version
- How to store grow bags for winter: dry-brush, soak 30 minutes, sun-dry 2 to 3 days, seal in a tote.
- Test seams and handles first. Retire any bag that fails before you waste time cleaning it.
- Soak tomato bags, pepper bags, and any diseased bag in 1 cup of 3% peroxide per gallon.
- Keep totes cool and dry. In a humid garage, add two silica packets per tote.