
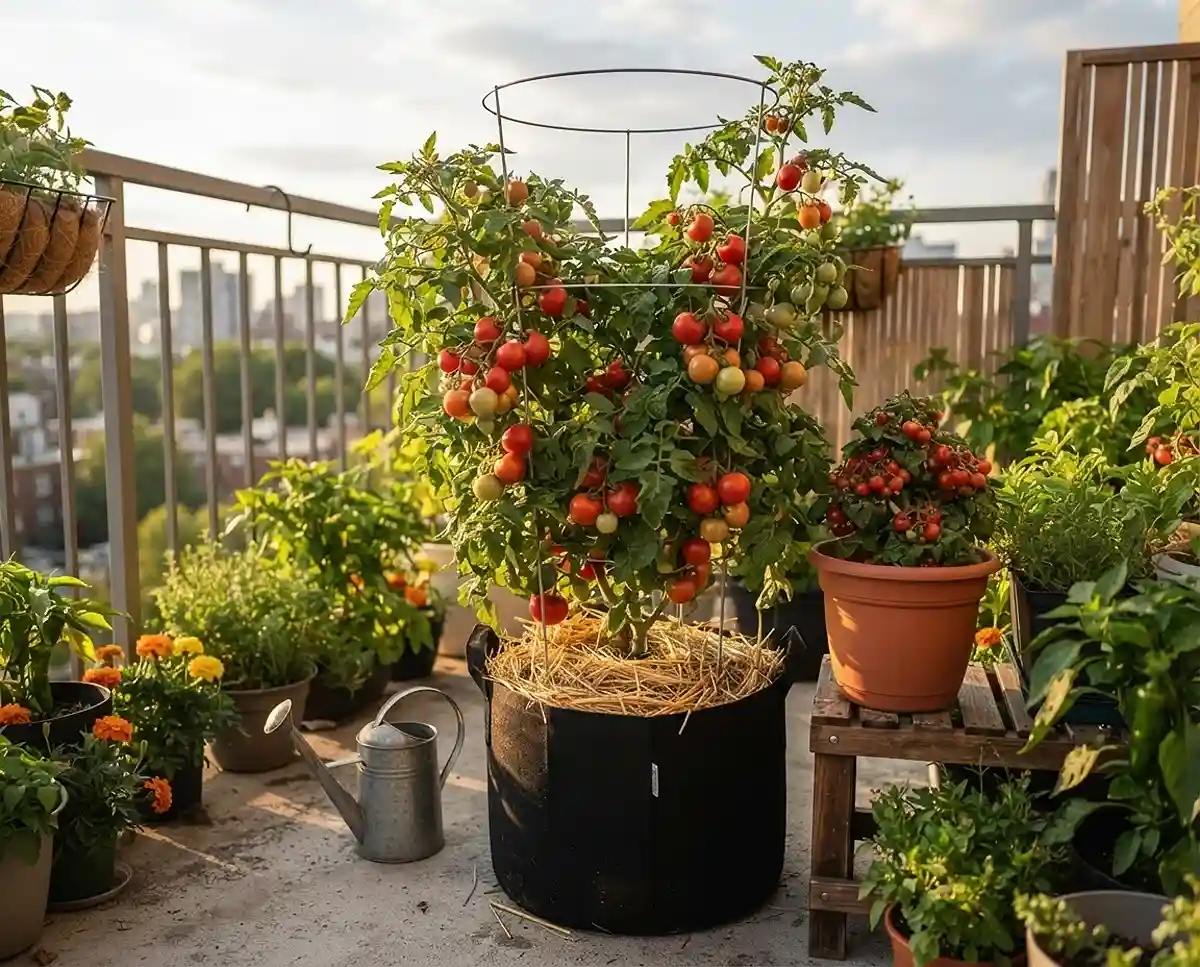
How to Grow Tomatoes in Pots From Seed to Harvest
Learn how to grow tomatoes in pots from seed and turn your balcony vegetable garden into a summer harvest, with a step-by-step plan from sowing to picking.
Here’s my timeline on a south-facing balcony in USDA zone 6b: seeds in mid-March, plants outside in mid-May, first ripe fruit by mid-July. Every step below comes from that routine, including the mistakes.
Table of Contents
The Magic of Growing Tomatoes in Pots From Seed
Nursery transplants are easy, but they’re a tiny slice of what exists. Seeds open up hundreds of heirloom, dwarf, and space-saving varieties you’ll never find in a garden center six-pack.
One packet costs about the same as a single transplant and holds 25 or more seeds. That’s the real appeal of container vegetable gardening: a few dollars of seed becomes a heavy-fruiting summer centerpiece.
Want the short version first? Our tomatoes in containers guide covers the basics.
Choosing the Right Tomato Varieties for Containers
Genetics decide everything here. A standard field tomato can top 8 feet and will overwhelm a balcony pot by July. Knowing how to grow tomatoes on a patio starts with varieties bred for confined roots.
Determinate vs. Indeterminate Genetics
Quick Answer: Determinate tomatoes are bush-style plants that stop at 3 to 4 feet and ripen most fruit within a few weeks. Indeterminate tomatoes vine until frost and need big pots, pruning, and sturdy trellising.
Determinates suit small pots and quick harvests. Indeterminates like ‘Sungold’ give more total fruit but demand 15-gallon pots, weekly pruning, and a 6-foot trellis.
Want fruit until frost? Try these late-season tomatoes for containers.
Top Container Cultivars to Start from Seed
| Cultivar | Type | Pot Size | Days From Transplant |
|---|---|---|---|
| Micro Tom | Dwarf determinate cherry | 3 gallons | 60-75 |
| Tiny Tim | Dwarf determinate cherry | 3 gallons | 55-65 |
| Patio Princess | Determinate slicer | 5-10 gallons | 65-75 |
| Bush Goliath | Determinate slicer | 5-10 gallons | 68-75 |
Last summer, my ‘Patio Princess’ in a 10-gallon grow bag gave me roughly 4 pounds of fruit. The first tomato ripened in mid-July.
Essential Gear for Seed-to-Harvest Success
Good gear prevents most beginner failures. Here’s the checklist I’d buy again:
- Shallow 72-cell plastic seed trays with a humidity dome
- Sterile seed-starting mix, never garden soil
- Full-spectrum LED grow light with adjustable chains
- Horticultural seedling heat mat
- 4-inch nursery pots for up-potting
- Fabric grow bags or double-walled resin pots, 10 to 15 gallons
- Heavy-duty tomato cages
Seed Starting Trays and Grow Lights
Skip the windowsill. Even a bright spring window gives seedlings a fraction of the light they need, and cloudy weeks make it worse.
I learned this the hard way. My first ‘Black Krim’ seedlings stretched to 9 inches in two weeks, pale and floppy. None recovered. A basic full-spectrum LED costs about what six store-bought transplants do.
Sizing the Final Container
Quick Answer: Standard patio tomatoes need 10 to 15 gallons of soil. Bush varieties can manage in 5 gallons, but bigger pots hold moisture longer and give the taproot room to reach steady water.
Fabric grow bags breathe but dry fast in July. Double-walled resin pots insulate roots from heat. For more detail, see the best pot size for tomatoes, peppers, and cucumbers.
Phase 1: Indoor Seed Sowing and Germination
Start seeds indoors 6 to 8 weeks before your average last spring frost. Find your date with the Old Farmer’s Almanac frost date tool.
Then confirm your zone on the USDA Plant Hardiness Zone Map. In zone 6b, I sow around March 15.
Sowing Depths and Heat Mats
Quick Answer: Plant two seeds per cell, exactly one-quarter inch deep, in moist seed-starting mix. Set the tray on a heat mat holding soil at 75°F to 80°F, and most seeds sprout in 5 to 10 days.
Once both seeds emerge, snip the weaker seedling at the soil line. Pulling it disturbs the roots of the keeper. Unplug the heat mat after germination, since warm soil under growing seedlings encourages stretching.
Preventing Leggy Seedlings
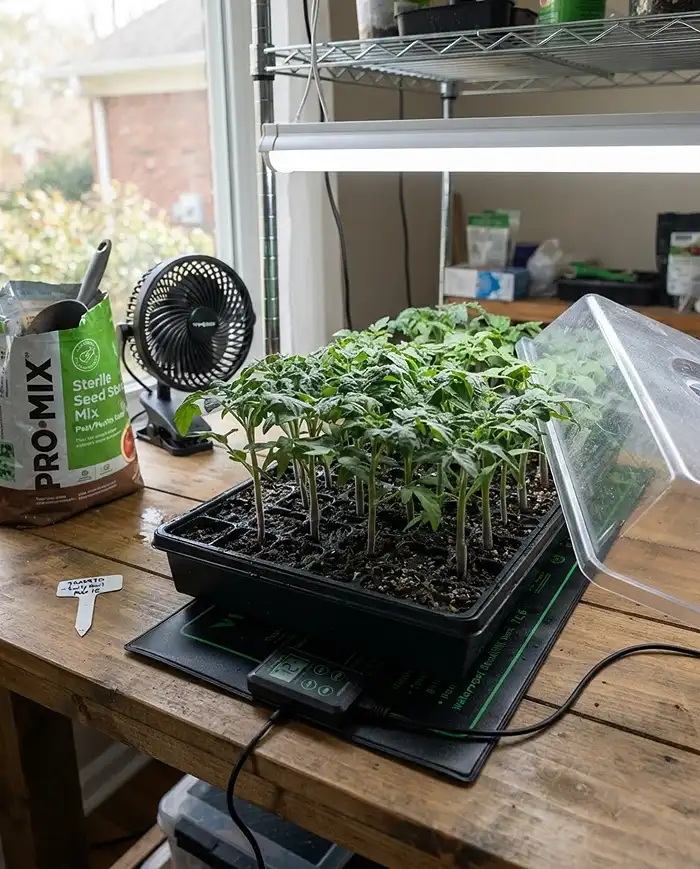
Etiolation [pale, stretching stems] happens when seedlings reach for light. Lower your LED so it sits two inches above the leaves the moment green shoots emerge. Run it 14 to 16 hours daily and raise it as plants grow.
Pro Tip: A small fan on low for an hour a day thickens stems and makes seedlings sturdier.
Phase 2: Up-Potting and Hardening Off
Between the tray and the balcony sits a two-step bridge. First you give roots more room, then you toughen leaves for sun and wind. Skip either step and plants stall or scorch.
Transplanting to Intermediate Pots
Quick Answer: Up-pot seedlings into 4-inch pots once they have two sets of true leaves, about 3 to 4 weeks after sowing. Bury the stem slightly deeper so it grows extra roots along the buried section.
Those extra roots are called adventitious roots [roots that sprout from the stem]. Handle seedlings by the leaves, never the stem, because a crushed leaf regrows but a crushed stem doesn’t.
The 7-Day Hardening Off Protocol
Hardening off [gradually exposing plants to outdoor conditions] prevents transplant shock and sunburn. Plan on 7 to 10 days, following this schedule:
| Day | Outdoor Exposure |
|---|---|
| 1-2 | 1 to 2 hours in full shade, out of the wind |
| 3-4 | 3 to 4 hours of morning sun |
| 5-6 | About 6 hours, mostly sun |
| 7-8 | All day in sun, back inside at night |
| 9-10 | Outside overnight if lows stay above 50°F |
Phase 3: The Final Container Transplant
This is the permanent home. Whatever you build now feeds the plant through the heaviest fruiting stretch of summer, so mix the soil properly and plant deep. Move plants out after your last frost, once nights stay above 50°F.
Formulating a Calcium-Rich Soil Mix
Plain potting mix runs short on calcium, and calcium prevents blossom end rot later. Blend this recipe:
- 60% premium organic potting mix
- 30% perlite for drainage
- 10% worm castings for slow-release nutrients
- About 1/4 cup agricultural gypsum or bone meal per 5 gallons of mix
Deep Planting and Installing Trellises
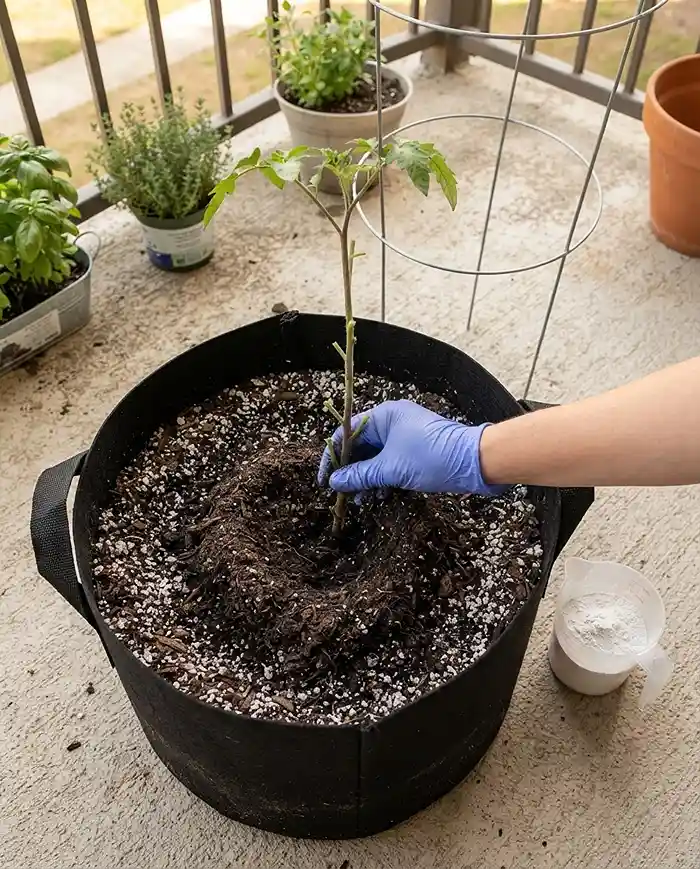
Remove the bottom leaves and bury the stem up to its neck. Install a heavy-duty cage or trellis the same day, because adding one later can spear the roots.
Pro Tip: Transplant in late afternoon so plants recover overnight before facing full sun.
Phase 4: Peak Summer Care and Harvesting
Once fruit sets, a container tomato drinks and eats far more than a garden one. Adjust your routine as the plant grows, and pick fruit when it shows full color and gives slightly to a gentle squeeze.
Deep Watering Routines
Quick Answer: Water deeply every morning until water runs out of the drainage holes. In August heat, most containers need water daily, and large plants on windy balconies may need it twice.
Letting the pot dry out, then flooding it, makes ripening fruit swell too fast and split. A 2-inch layer of straw mulch slows evaporation and keeps moisture steadier.
Fertilizing and Pruning Suckers
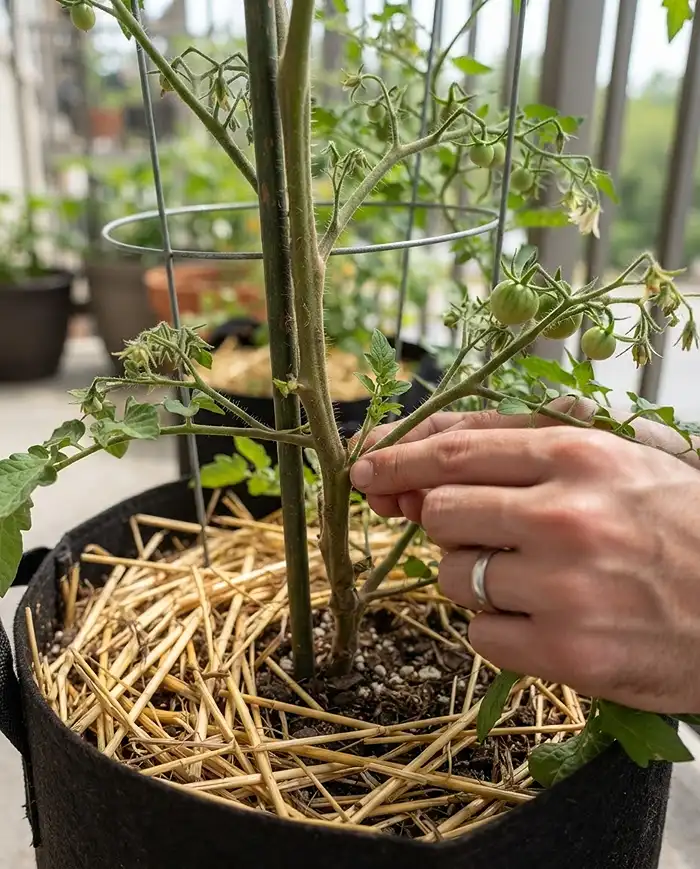
Once blossoms appear, feed a high-phosphorus liquid organic fertilizer every 14 days. On indeterminate varieties, pinch out suckers [shoots growing at a 45-degree angle between stem and branch] while they’re under 2 inches. This improves airflow and sends energy into fruit.
Pro Tip: Never prune suckers on determinate varieties. You’ll cut the fruit they’d have produced.
Common Problems & Solutions
Two problems cause most losses in pots. One is environmental, the other biological. Both are fixable if you catch them early.
Blossom End Rot
Quick Answer: Blossom end rot is a black, sunken patch on the fruit’s bottom. It happens when uneven watering blocks calcium uptake. Water on a steady schedule and apply a liquid calcium-magnesium foliar spray.
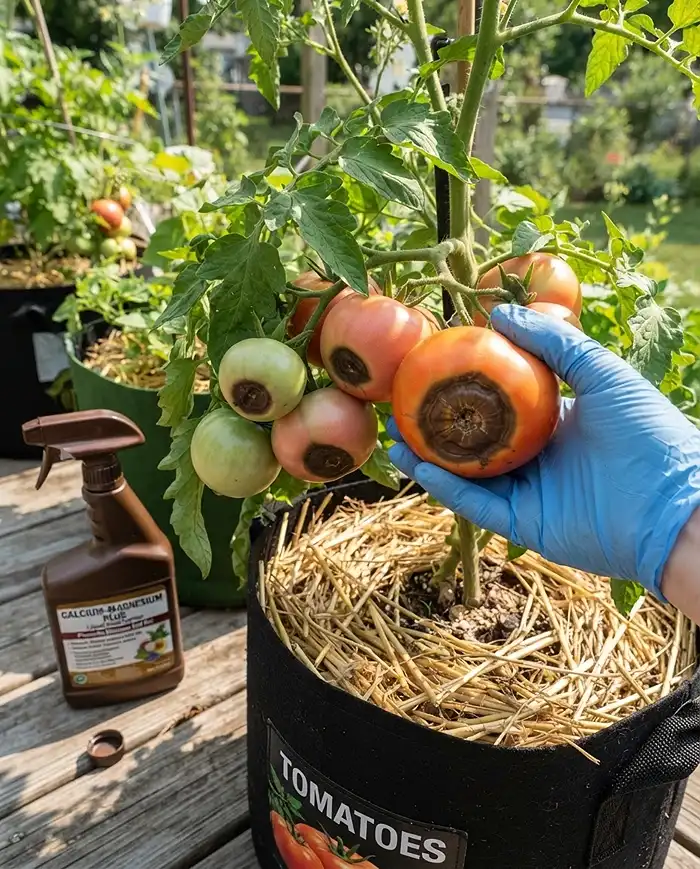
In July, I left my ‘Bush Goliath’ in a 5-gallon pot unwatered for two days during a heat wave. The next fruits blackened. I removed them, restored daily watering, and later fruit stayed clean.
Tomato Hornworms and Aphids
- Hornworms: Green caterpillars up to 4 inches long that strip leaves overnight. Pick them off daily and drop them in soapy water.
- Aphids: Tiny insects clustered on new growth, leaving sticky residue. Spray insecticidal soap at dusk to protect pollinators and avoid leaf burn.
grow tomatoes in pots FAQs
How long from seed to harvest for potted tomatoes?
Expect 6 to 8 weeks indoors from seed to transplant size, plus 55 to 80 days outdoors until the first ripe fruit, depending on the cultivar’s days to maturity. That’s roughly 14 to 19 weeks in total.
Can I direct sow tomato seeds outside in the pot?
Only in frost-free tropical climates, USDA zone 10 and above. Elsewhere, tomatoes need a long, hot season, and sowing outdoors in spring pushes harvest into autumn, when frost kills the plant.
Why are my tomato flowers dropping off?
Blossom drop is usually a stress response. Heat above 90°F, nights below 55°F, or poor bumblebee pollination on a high balcony can make unfertilized flowers fall. Tap the flower clusters gently at midday to help pollination.
How much sun do tomatoes in containers need?
Container tomatoes need 6 to 8 hours of direct sun daily. On a shadier balcony, choose cherry types like ‘Tiny Tim’ and expect smaller harvests.
When can I move tomato seedlings outside?
Move hardened-off seedlings outside after your last frost date, once nights stay above 50°F. In USDA zone 6b, that usually means mid-May.
Key Takeaways
- Learning how to grow tomatoes in pots from seed means starting indoors 6 to 8 weeks before your last frost.
- Keep an LED light two inches above seedlings to prevent leggy stems.
- Choose determinate or dwarf cultivars for small pots, and give indeterminates 15 gallons.
- Harden off for 7 to 10 days, then plant deep in a calcium-rich mix.
- Water deeply and consistently every morning to prevent blossom end rot and split fruit.