

Crop Rotation in Containers
Crop rotation in containers is the single most effective way to prevent soil-borne disease and stop potting mix from burning out — and most small-space gardeners never do it. If you’ve watched a second-year tomato collapse from Fusarium wilt or seen pepper seedlings stall for no obvious reason, this is why.
I grow food on a north-facing balcony in zone 6b, and rotating crops through eight containers taught me more about soil health than any single book. Here’s exactly how to do it, even if you’re working with three pots and a fire escape.
Table of Contents
Why Crop Rotation Is Crucial for Container Gardens
Traditional crop rotation is a farm-scale practice, but tiny garden ideas can borrow its core logic: never let the same plant family occupy the same soil two seasons in a row.
In the ground, pathogens and nutrient imbalances spread slowly. In a container, there’s nowhere for them to go. A single pot of depleted soil can wipe out an entire season’s harvest. Rotating plant families between pots — or through the same pot over different seasons — breaks disease cycles, prevents nutrient lockout, and saves you from buying fresh potting mix every spring.
This is small space gardening working smarter, not harder.
The Science of Soil Health and Plant Families
Every plant family extracts a specific set of nutrients and leaves behind unique root exudates and pathogens. Tomatoes don’t just deplete nitrogen — they leave behind compounds that suppress competing plants and harbor Fusarium spores.
This means you can’t rotate by vegetable name alone. You have to think in plant families. A pepper following a tomato is not a rotation — they’re both nightshades, and the soil pathogens won’t know the difference.
Identifying the 4 Major Container Plant Families
For urban gardening in containers, four families cover the vast majority of balcony crops:
- Nightshades (Solanaceae): Tomatoes, peppers, eggplants, tomatillos. Heavy feeders that leave behind Fusarium and early blight spores.
- Brassicas (Brassicaceae): Kale, cabbage, radishes, arugula, mustard greens. Prone to clubroot and cabbage root fly if repeated.
- Legumes (Fabaceae): Bush beans, peas, lentils. Nitrogen fixers that actively repair soil between heavy-feeding seasons.
- Umbellifers and Root Crops: Carrots, onions, garlic, parsley, fennel. Light feeders that scavenge leftover minerals without stripping the profile.
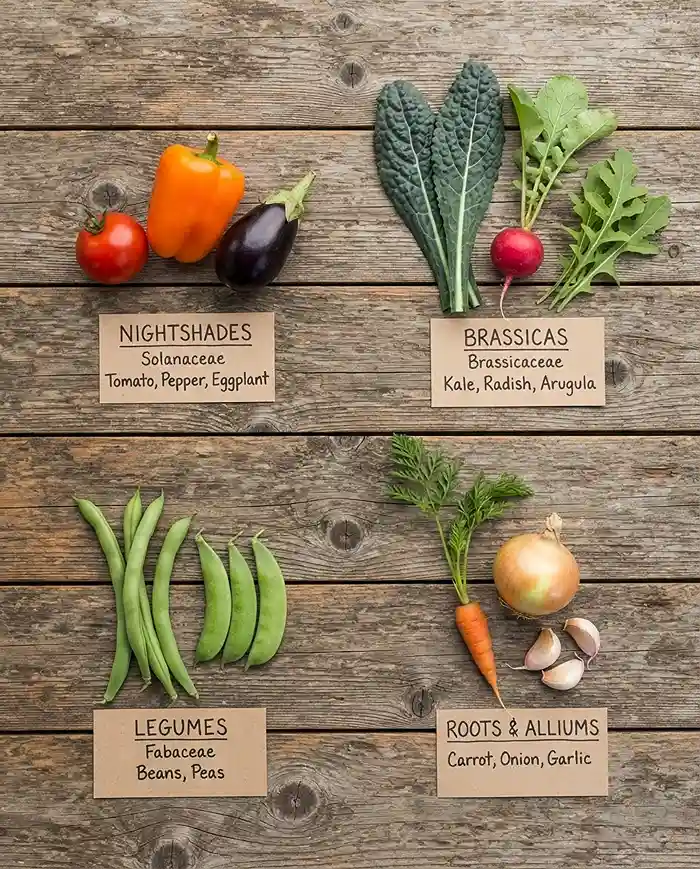
The hard rule: never follow a plant with another member of the same family. That’s it. Everything else is optimization.
Need help choosing containers that suit each family’s root depth? The City Cultivator guide to choosing containers for small-space gardening breaks down sizes by crop type.
Heavy Feeders, Light Feeders, and Nitrogen Fixers
Beyond family identity, each crop plays a nutritional role in your rotation sequence.
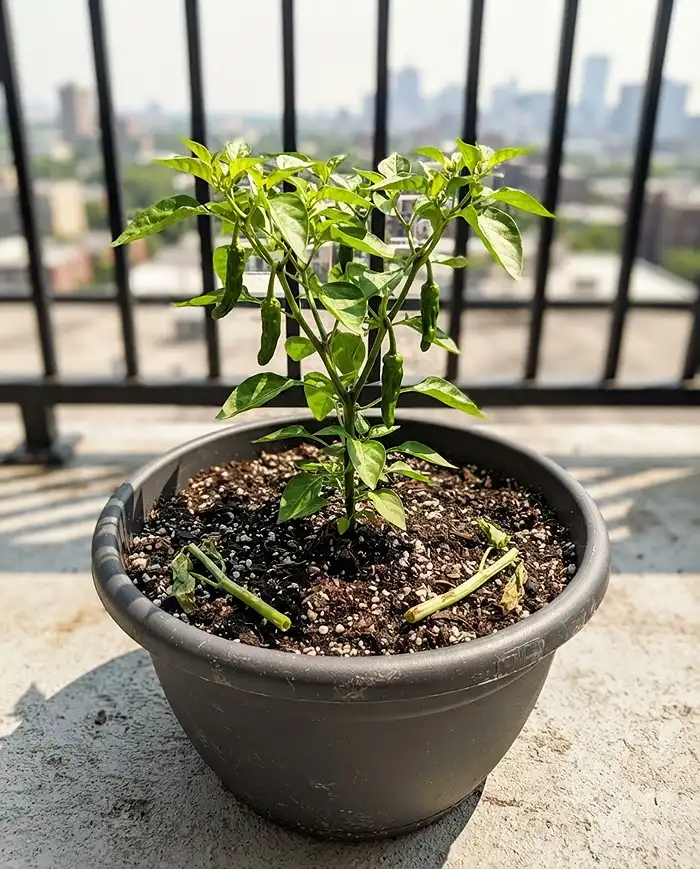
Heavy feeders — tomatoes, peppers, squash — strip nitrogen and phosphorus aggressively. After a heavy feeder, the soil is depleted and pathogen-rich. You can’t just drop another heavy feeder in.
Light feeders — radishes, carrots, onions, garlic — scavenge trace minerals left behind. They don’t need a replenished soil profile to thrive, making them the perfect clean-up crew after a demanding summer crop.
Nitrogen fixers — peas, beans, clover — host Rhizobium bacteria on their roots that pull atmospheric nitrogen into the soil. Running legumes before a heavy feeder is nature’s slow-release fertilizer. I grew ‘Sugar Snap’ peas in spring 2023 and then planted ‘Shishito’ peppers into the same pot that July. The peppers outperformed every other container I had without a single nitrogen top-dress.
Planning Your Tiny Space Rotation Strategy
The goal is a multi-season calendar that keeps each container in active production while cycling through the four plant families. For most urban gardening setups, three seasons per pot — spring, summer, and autumn — is the practical rhythm.
Map each container on paper or a simple spreadsheet before you plant anything. Assign a family to each pot for each season, and make sure no family repeats in the same container until at least two other families have cycled through.
The 3-Season Container Rotation Blueprint
Quick Answer: For a single pot in a temperate climate, run nitrogen-fixing legumes in spring, a heavy-feeding nightshade or pepper in summer, and a light-feeding root crop or brassica in autumn. This three-stage sequence covers all nutritional roles and breaks the major disease cycles.
| Season | Plant Family | Example Crops | Nutritional Role |
|---|---|---|---|
| Spring | Legumes | ‘Sugar Snap’ peas, bush beans | Nitrogen fixer — builds soil |
| Summer | Nightshades | ‘Shishito’ peppers, ‘Tumbling Tom’ tomatoes | Heavy feeder — depletes nitrogen |
| Autumn | Root crops / Brassicas | ‘Cherry Belle’ radish, garlic, kale | Light feeder — scavenges minerals |
Pro Tip: Plant garlic in the final autumn slot — it has mild antifungal properties that help sanitize the soil before winter dormancy.
Mapping Sunlight and Seasonal Shifts
Sun angles shift dramatically between June and October. On most balconies, summer provides 6-8 hours of direct light, while autumn drops to 3-4 hours as the sun tracks lower.
This is actually your ally in a rotation plan. Place your heavy-feeding summer crops — peppers, tomatoes — in the sunniest position during peak season. As you transition to cool-season light feeders like radishes or kale, those crops can handle the reduced light and will actually bolt less in the lower-intensity autumn sun.
For more on optimizing your balcony sun exposure, see this guide on light and space for small-space gardening. Tracking your specific sun windows by season is one of the highest-leverage adjustments a container gardener can make.
Essential Supplies for Reusing Container Soil
Crop rotation is only half the system. Between each planting phase, you need to physically rehabilitate the soil inside the container. A depleted, compacted pot won’t support the next crop regardless of which family you plant.
The good news: you don’t need much. A bag of worm castings, a bag of perlite, and some coco coir will carry you through a full season of rotations.
Organic Amendments: Compost and Worm Castings
After pulling a heavy feeder, the top two inches of soil are usually visibly exhausted — dark, tight, and often crusted. The fix is a 1-inch top-dress of quality worm castings worked into the top 4 inches of the existing mix.
Worm castings re-introduce beneficial microbial life alongside slow-release nitrogen. I use about half a cup per gallon of pot volume. Follow that with a thin layer of finished compost — not bagged garden soil — and your macro-nutrient profile is back in range without synthetic inputs.
Skip low-grade bagged compost. The microbial diversity is what matters, and cheap bags often have neither. The University of Maryland Extension’s soil amendment guide is a solid free reference for understanding amendment quality.
Aeration Materials: Perlite and Coco Coir
Peat-based potting mix breaks down over a single growing season. Roots compress it, watering cycles compact it further, and by autumn it’s holding water poorly and draining even worse.
Between rotations, remove about 20% of the old mix and replace it with a blend of fresh perlite (1 part) and coco coir (1 part). Perlite restores air pockets in the root zone; coco coir improves moisture retention without compaction.
This keeps your base potting mix structurally viable for three to four seasons, which is the whole point of the rotation system — soil you don’t have to replace every year.
Step-by-Step Guide to Rotating Crops in a Single Pot
The transition between crops is where most tiny garden ideas break down. Gardeners pull the old plant, drop a new one in, and wonder why the second crop underperforms. The soil prep between phases is non-negotiable.
- Pull the full root ball cleanly. Don’t snap the stem and leave roots in the soil. Decaying root systems harbor fungal pathogens and attract fungus gnats. Grip at the base and extract the entire mass.
- Break up compressed soil clumps. Use your fingers or a small hand fork to loosen the remaining soil to a consistent texture. Compacted pockets will prevent new root penetration.
- Mix in amendments. Add worm castings, compost, and fresh perlite/coco coir as described above. Work them into the top 6 inches thoroughly.
- Water and rest for 48 hours. Let the amended soil settle and rehydrate before planting. This gives beneficial microbes time to colonize the fresh inputs.
- Transplant gently. Set the new seedling at the same depth it was growing in its starter cell. Firm the soil around it without compressing. Water immediately with a diluted seaweed solution to reduce transplant shock.
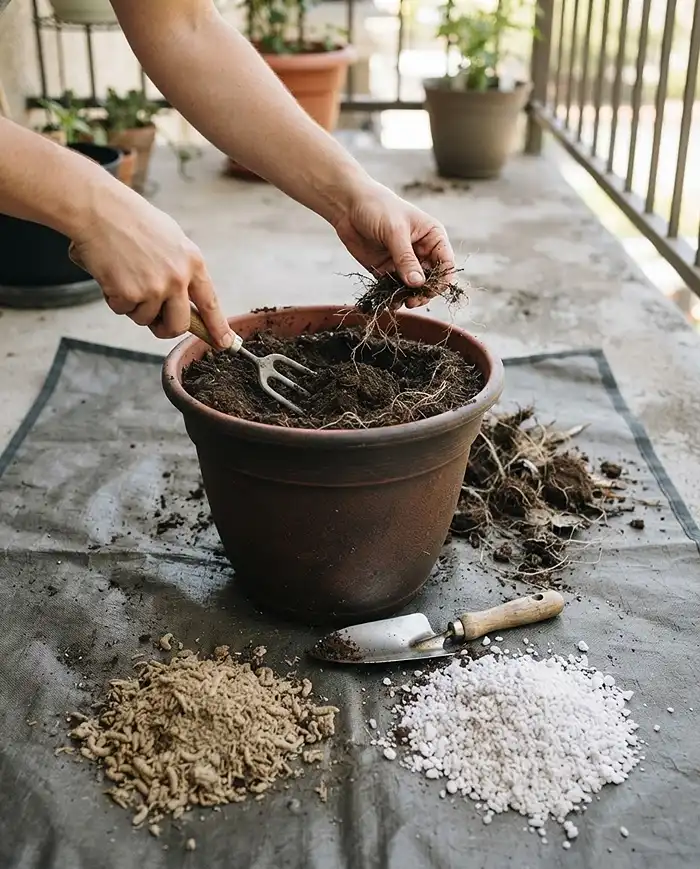
I made the mistake of skipping the 48-hour rest period after swapping my spring peas for summer ‘Jimmy Nardello’ peppers in 2022. The peppers sulked for two weeks before taking off. Rest time isn’t optional.
Maintenance and Soil Rehabilitation Between Crops
The window when a container is empty — even if it’s just 48-72 hours — is your best opportunity to reset the soil biology. Don’t waste it by planting immediately.
Two specific tasks done during this window will significantly improve your next crop’s success: solarizing the exposed soil and flushing out accumulated fertilizer salts.
Removing Old Root Systems and Solarizing
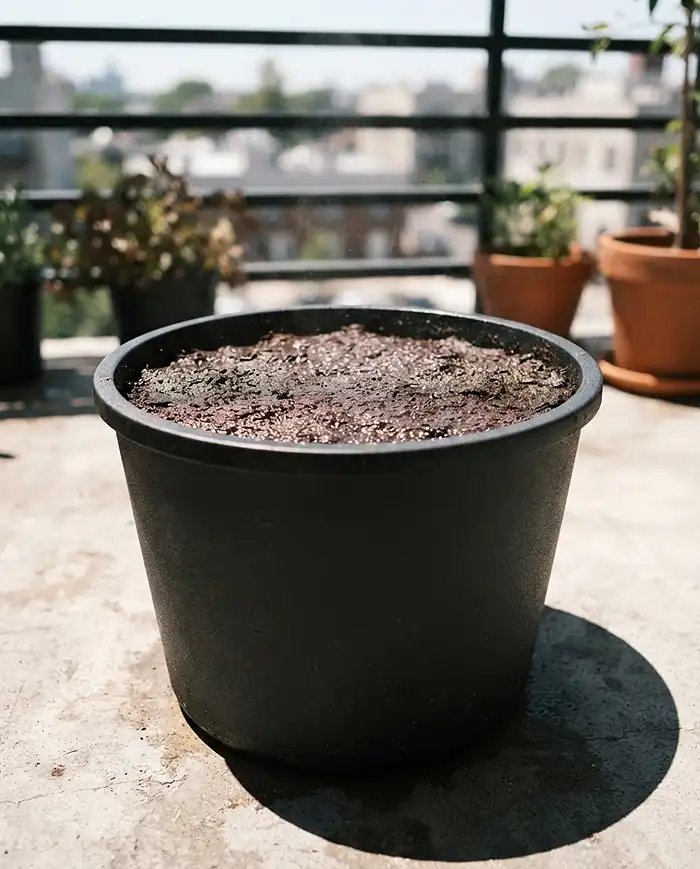
After extracting the main root ball, sift through the remaining soil with your fingers to pull out any fibrous root remnants. A mesh kitchen sieve works well for smaller pots — pass the soil through it and discard anything organic that comes out.
Then leave the pot in direct sun with the soil damp and exposed for 48 hours. This passive solarization heats the top 2-3 inches of soil to temperatures that kill fungus gnat eggs, aphid pupae, and dormant fungal spores. In summer, a dark-colored pot in full sun can reach 120-140°F at the surface — hot enough to sanitize without chemicals.
This step matters most after nightshades, which are the most pathogen-heavy family in the rotation.
Flushing Toxic Salt Buildup
Synthetic fertilizers leave behind soluble salts — the white crust you see on the rim and soil surface of containers that have been heavily fed. These salts raise the soil’s electrical conductivity and can chemically burn new roots.
Before your next planting, run clean water slowly through the container for five full minutes. Use a gentle, steady stream — not a blast. Let it drain completely between passes. This flushes salt ions down and out through the drainage holes.
You’ll know it worked when the water running out the bottom is clear rather than cloudy or faintly colored. For containers used with heavy synthetic feeding schedules, do this flush twice before the transition.
Common Problems and Solutions
Even with a solid rotation plan, two problems will eventually find you. Here’s how to handle them without losing the whole season.
Persistent Soil-Borne Fungal Blights
Quick Answer: If a tomato or pepper died of early blight, Fusarium wilt, or Verticillium wilt, the soil in that container cannot be rotated — it must be discarded entirely. No amendment will reliably eliminate those spore loads in a small, closed soil volume.
Bag the contaminated soil in sealed plastic bags and dispose of it in the trash — not compost. Fusarium spores survive composting temperatures in home bins. Wash the container with a diluted bleach solution (1 tablespoon per gallon of water), rinse thoroughly, and start fresh with new potting mix before resuming your rotation schedule.
Hydrophobic Soil in the Second Season
Hydrophobic soil is easy to identify: you water the container and the water immediately runs down the sides between the soil and the pot wall, draining out without absorbing. The soil surface stays dry even after watering.
The fix is a 30-minute bottom-soak. Set the container in a basin or tray filled with water and add one drop of organic, unscented dish soap per gallon of soaking water. The surfactant breaks the waxy surface tension that’s developed on the peat particles.
After 30 minutes, lift the pot and let it drain fully. The soil will have re-wetted evenly. Then blend in fresh coco coir — which doesn’t become hydrophobic the way peat does — at 20% of the total soil volume to prevent recurrence.
crop rotation in containers FAQs
Can I plant tomatoes in the same pot two years in a row?
No. Consecutive nightshade plantings guarantee a buildup of Fusarium and early blight spores, plus severe calcium depletion that causes blossom end rot. Always cycle at least two other plant families through the pot before returning to tomatoes or any other nightshade.
What is the best cover crop for a winter balcony container?
Crimson Clover or Hairy Vetch are both excellent choices. Both are frost-tolerant legumes that fix atmospheric nitrogen directly into the soil during winter dormancy, creating a biologically enriched foundation for heavy spring feeders. Sow them in September or October in zones 5-7.
Do I need to replace all my potting soil every year?
No. By practicing consistent crop rotation and replacing 20-30% of the existing soil with fresh compost and perlite at each seasonal transition, a quality organic potting base stays productive indefinitely. Full soil replacement is only necessary after a confirmed case of soil-borne disease.
How many containers do I need to rotate effectively?
You can run a complete rotation in a single container across three seasons. More containers give you more flexibility — with four pots, you can grow all four plant families simultaneously and rotate them forward each season like a living calendar.
Can I use the same potting mix for both food crops and ornamentals?
Yes, but track what ornamentals are in the same plant families as your food crops. Petunias are nightshades — planting them before tomatoes is no different than planting one tomato after another. The rotation tracks biology, not edibility.
Key Takeaways
- Crop rotation in containers prevents soil-borne disease and nutrient depletion without replacing potting mix every season — it’s the cornerstone of productive small space gardening.
- Rotate by plant family, not by vegetable name. Peppers following tomatoes is not a rotation — both are nightshades.
- The 3-season blueprint — spring legumes, summer heavy feeders, autumn light feeders — covers all nutritional roles in a single pot.
- Between crops, solarize the exposed soil for 48 hours and flush salt buildup with clean water for 5 minutes before amending and replanting.
- Replace only 20-30% of soil volume per transition with fresh worm castings, compost, and perlite — a healthy base lasts indefinitely with proper rotation.