
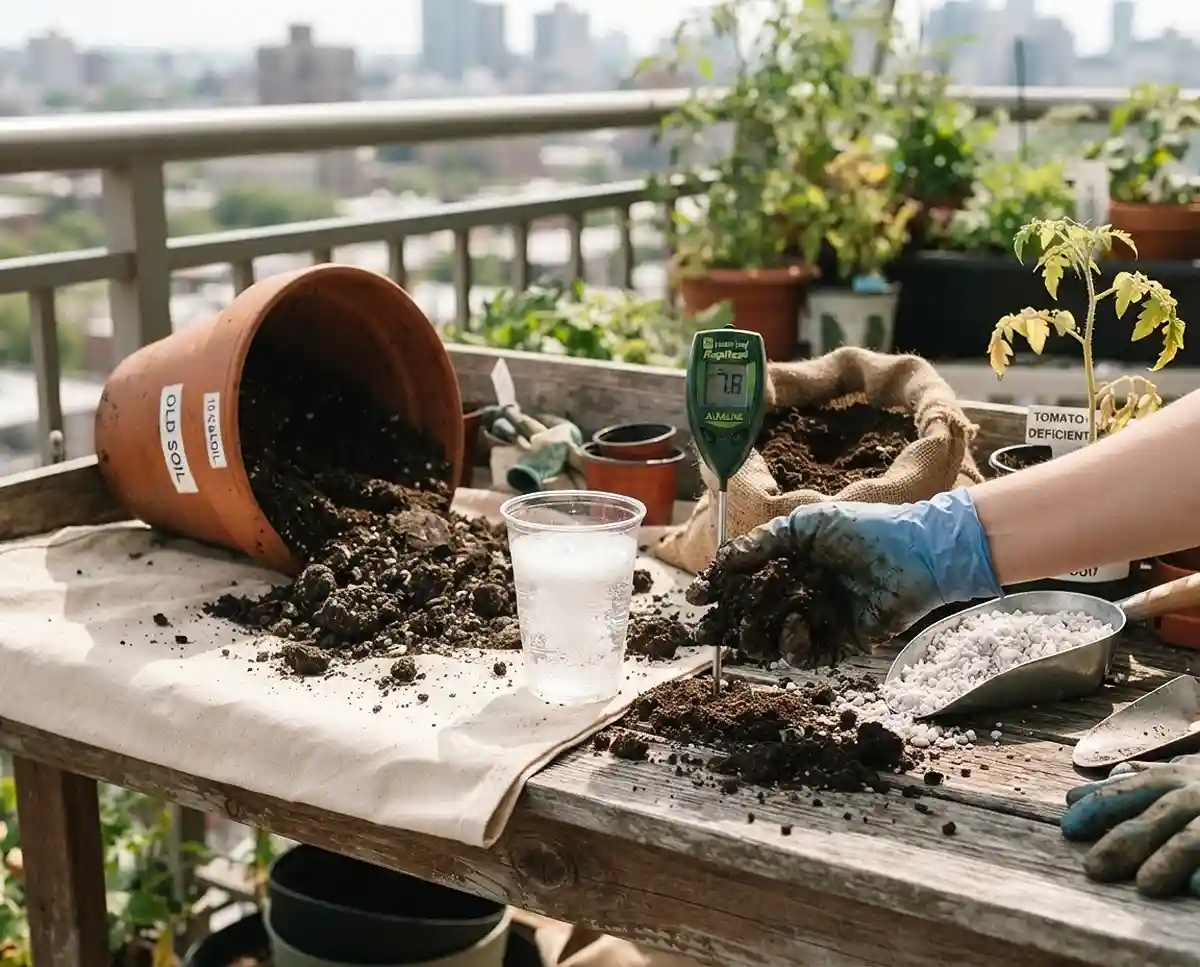
How to Tell If Potting Soil Is Bad
Knowing how to tell if potting soil is bad before you plant a single seedling could be the difference between a thriving container garden and a total wipeout. Old mix hides real threats — compaction, pathogens, and nutrient crashes — that kill plants fast.
Table of Contents
The Hidden Dangers of Reusing Old Potting Soil
I made the mistake of reusing exhausted soil in spring 2022. I dropped six ‘Sun Gold’ tomato starts into pots I hadn’t refreshed in two seasons. Every single one stalled by week three.
The soil looked fine. It wasn’t. The peat had collapsed, the pH had tanked from two years of synthetic fertilizer, and a lingering fusarium infection finished the job.
Reusing old potting mix without auditing it first is expensive. New transplants aren’t cheap. Neither is the time you lose waiting on plants that were doomed from day one.
The good news: a proper assessment takes about 20 minutes and saves you from all of it. You’re checking three things — physical structure, biological health, and chemical balance. Work through them in order.
The Physical Assessment: Texture and Compaction
Before you test anything chemically, use your hands. Structural failure in potting mix is the most common reason container plants underperform, and it’s completely invisible until you dig in.
Good potting mix should feel loose, springy, and slightly gritty. Spent mix feels dense, silty, and flat — like wet newspaper. Two quick tests will tell you exactly where yours falls.
The “Squeeze Test” for Aeration
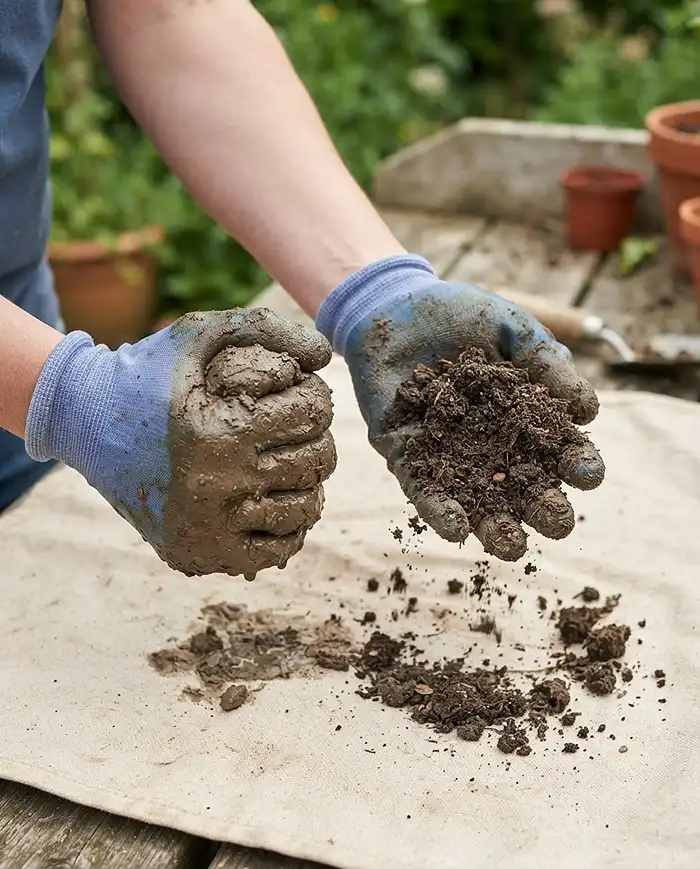
Quick Answer: Grab a damp handful and squeeze firmly. Good soil crumbles apart when you open your fist. Bad soil holds a solid, wet brick shape — a sign the peat has collapsed and roots will suffocate.
Peat moss is the structural backbone of most commercial potting mixes. Over a growing season, it breaks down and compresses under watering pressure.
Once it collapses, water can no longer move freely through the mix, and oxygen — which roots need just as much as water — gets cut off.
If your soil forms a dense brick that holds its shape for more than a few seconds, it’s severely compacted. You can rescue it, but only with significant amendment.
Mix it with at least 30% coarse perlite by volume before reusing. For vegetables in pots, I’d go even higher — 40% perlite — since most crops need excellent drainage to produce well.
Pro Tip: Test the soil damp, not bone dry — dry peat crumbles regardless of its condition and will give you a false pass.
Identifying Hydrophobic Soil
Quick Answer: Pour a slow stream of water over the soil surface. If it instantly beads up, pools, and runs down the sides of the pot without soaking in, the soil has turned hydrophobic and is actively repelling moisture.
Hydrophobia happens when peat dries out completely and develops a waxy coating that water can’t penetrate. It’s surprisingly common after a hot summer or if pots were left dry for more than two weeks.
The danger is deceptive: you water, the water runs out the drainage holes, and the plant still dies of drought because the rootzone never got wet.
To fix it, mix a few drops of plain dish soap (a DIY surfactant) into a watering can and drench the soil slowly, stopping to let it absorb in cycles.
Repeat twice over 24 hours. Then re-test. If water still won’t absorb after two treatments, the peat is too far gone and the mix needs to be blended with 50% fresh compost before planting.
Pro Tip: Yucca-based wetting agents (sold at nurseries) work better than dish soap for chronic hydrophobia and don’t risk harming seedling roots.
The Biological Assessment: Pests, Weeds, and Fungi
Physical structure tells you whether roots can breathe. But a biologically contaminated mix can kill plants even if the texture is perfect. Take 10 minutes to do a forensic check of the old root ball and the surrounding soil before you reuse anything.
Spotting Root-Knot Nematodes and Grubs
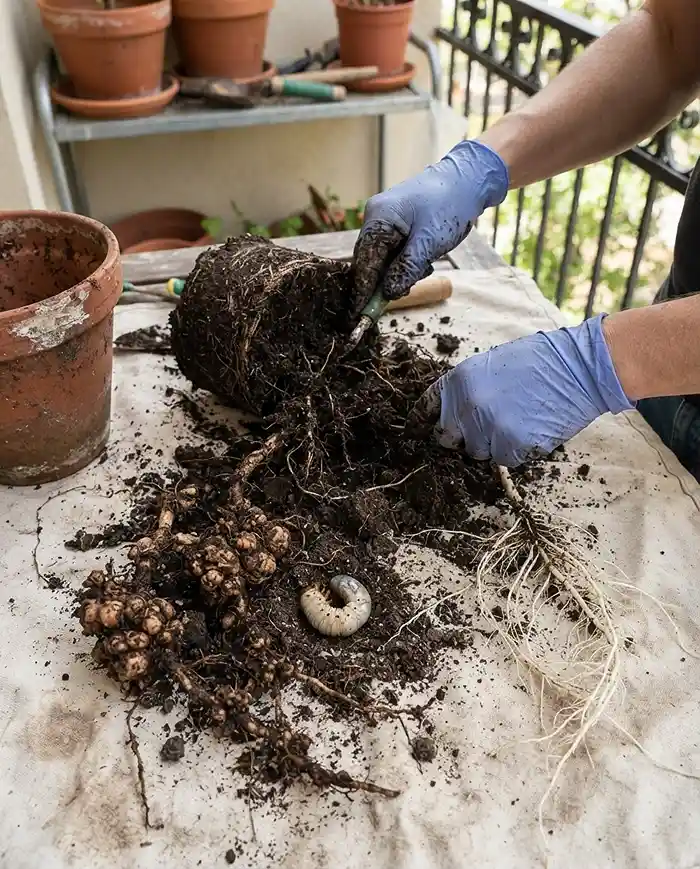
Quick Answer: Empty the pot and physically sift through the soil with gloved hands. You’re looking for white C-shaped grub larvae and swollen, knotty nodules on dead root tissue — both are immediate discard triggers.
Root-knot nematodes are microscopic roundworms that cause characteristic galls [swollen knots] to form on roots. Pull out the old root ball and examine the roots closely.
Healthy roots are smooth and white or tan. Nematode-infected roots look like a string of small beads or warty lumps. If you see this, the soil goes in the trash — not the compost bin, not the garden bed.
Grub larvae (often Japanese beetle or June bug larvae) overwinter in container soil and shred roots the moment new growth starts in spring. They’re easy to spot — cream-colored, curled, about the size of your thumbnail.
One or two grubs: remove by hand and you may still be able to use the soil after solarizing. A dozen or more: bag it and toss it.
Pro Tip: Do this check over a light-colored tarp so larvae are easy to see against a pale background.
Differentiating Good Mycorrhizae from Bad Blight
Quick Answer: Fine, white, cobweb-like threads running through the soil are almost always beneficial mycorrhizal fungi — leave them alone. Fuzzy gray or black patches, a rotting smell, or dark slimy areas mean harmful mold or rot. Discard immediately.
Mycorrhizal fungi form a symbiotic relationship with plant roots, extending their reach and improving nutrient uptake. They look like delicate white threads woven through the soil — almost like a thin spider web. This is a sign of healthy biology.
Harmful fungi look completely different. Gray fuzzy mold (often Botrytis) sits on the surface in patches. Pythium and Phytophthora rot produces dark, slimy areas that smell sour or swampy.
Fusarium wilt leaves reddish-brown streaks inside stem tissue and causes a general collapse of the plant. If your previous crop showed any of these symptoms, don’t sniff-test the soil — just bin it.
Pro Tip: A sour, swampy, or rotten-egg smell on its own (even without visible mold) is a hard discard signal. Healthy soil smells earthy, not foul.
The Chemical Assessment: Nutrients and pH Levels
A mix can pass the physical and biological tests and still be chemically dead. After one full growing season, the macronutrients that power plant growth are often entirely depleted — especially if you grew heavy feeders.
You need to assess two things: what the previous crop took, and whether your fertilizer routine has pushed the pH outside a usable range.
Auditing Previous Crop Demands
Quick Answer: If your last crop was a tomato, pepper, eggplant, or other nightshade, assume the soil is stripped of nitrogen, calcium, and phosphorus. These are among the most nutrient-demanding plants you can grow in containers.
Heavy feeders pull enormous quantities of nutrients from a fixed volume of potting mix. A single tomato plant in a 5-gallon container can exhaust available nitrogen within 6-8 weeks of fruiting.
Lighter crops — herbs, lettuces, radishes — are far less damaging. Soil that hosted a season of basil or leaf lettuce is often refreshable with just a compost top-dress. This is a key container garden tip that can save you the cost of full soil replacement.
Think of it as a rotation system: nightshade soil gets discarded or heavily amended; brassica and herb soil gets refreshed; root vegetable soil lands somewhere in the middle.
If you grow root vegetables in containers, pay special attention to phosphorus depletion — it’s critical for root development and disappears fast in small volumes of soil.
Pro Tip: Keep a simple garden log. Noting what grew in each pot last season takes 30 seconds and saves you from guessing every spring.
Conducting a DIY Soil pH Test
Quick Answer: Place two tablespoons of soil in a cup. Add a splash of white vinegar. Fizzing means the soil is alkaline (above 7.0). No reaction? Add baking soda and water instead — fizzing then means it’s acidic (below 6.0). No reaction to either means pH is near neutral.
Most container vegetable gardening crops perform best between pH 6.0 and 7.0. Repeated use of synthetic granular fertilizers acidifies soil over time as ammonium-based compounds break down.
Acidic soil locks out calcium and magnesium, causes nutrient deficiencies even when nutrients are present, and promotes root-rot fungi. If your baking soda test causes strong fizzing, the soil is likely below pH 5.5.
For a more precise reading, an inexpensive pH meter from any nursery or garden center (usually $10-20) gives you an actual number. As of spring 2025, most digital soil pH meters are accurate to within 0.2 points — close enough for practical gardening decisions.
If the soil reads below 6.0, add agricultural lime at the package rate and retest after two weeks. If it reads above 7.5, incorporate sulfur or acidic compost to bring it down before planting.
Pro Tip: For the most accurate DIY test, use distilled water when mixing your soil sample — tap water in many cities has a pH above 7.5 and will skew your results.
The Final Verdict: Reuse, Refresh, or Discard?
Once you’ve worked through all three assessments, the decision is usually clear. Use these rules as a hard framework — you shouldn’t need to second-guess yourself if you’ve done the tests honestly.
- Reuse as-is: Soil that hosted light feeders, passes all three tests, and has neutral pH can go straight back into pots with a top-dress of compost.
- Refresh: Physically degraded but disease-free soil gets blended with fresh compost and perlite (see below).
- Discard: Any soil with nematodes, pest larvae, harmful fungi, or a history of disease gets bagged and thrown in the trash.
When to Throw Potting Soil Away
Quick Answer: Permanently discard any soil that previously hosted a plant killed by viral mosaic, late blight, or fusarium wilt. These pathogens survive in dry soil for years and will strike again immediately.
Do not try to sterilize this soil at home. Do not add it to your compost pile. Bag it in sealed plastic bags and put it in your regular trash. I know it feels wasteful — I’ve tossed full 10-gallon pots of soil that looked perfectly healthy. It’s the right call.
Late blight (Phytophthora infestans) killed my entire patio tomato crop in late August 2023. The following spring, I tested a small amount of that leftover soil in a 4-inch pot as an experiment. New transplant showed blight symptoms within three weeks. The pathogen was alive and waiting.
Other non-negotiable discard situations: soil with grub infestations over 10 per gallon, soil that smells of active rot after the sun-solarizing test, and any soil from a pot where a plant wilted and died with no obvious cause.
Pro Tip: Never add diseased potting soil to a raised bed or in-ground garden either — you risk establishing the pathogen in a much larger growing area.
How to Refresh Approved Soil
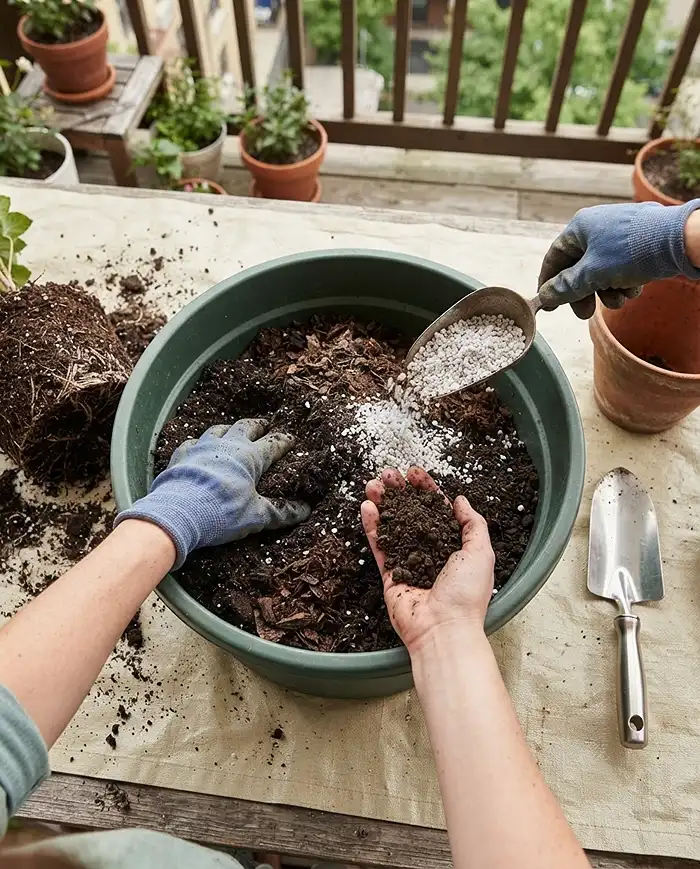
Quick Answer: Remove the old root ball entirely, then blend the remaining soil 50/50 with fresh organic compost. Add 20-30% coarse perlite to restore drainage, and a scoop of worm castings to reinoculate beneficial biology.
This is the approach I use every season for pots that hosted herbs, lettuces, or flowers. It cuts my annual potting mix cost by roughly half while keeping soil structure and biology healthy.
The old root ball itself can go in your compost if the plant was healthy. What stays in the pot is the existing soil minus large root debris, refreshed with new organic matter to replace what last season’s crop consumed.
For pots that will host heavy feeders like peppers or fast-growing container vegetables, I also work in a slow-release organic fertilizer at this stage so the nutrients are available right from transplant.
| Previous Crop | Soil Verdict | Refresh Ratio |
|---|---|---|
| Tomatoes / Peppers / Eggplant | Heavy refresh or discard | 50% new compost + 30% perlite |
| Cucumbers / Squash | Moderate refresh | 30% new compost + 20% perlite |
| Herbs / Lettuce / Spinach | Light refresh | 20% compost top-dress only |
| Root Vegetables | Moderate refresh | 30% compost + worm castings |
| Flowers (annuals) | Light to moderate | 20-30% compost blend |
Pro Tip: Add mycorrhizal inoculant powder when refreshing soil — it’s inexpensive, takes five seconds to apply at transplant, and can meaningfully boost root establishment in rebuilt mixes.
Common Problems and Solutions
Two specific issues often surface during a soil audit that don’t fit neatly into the three main assessment categories. Both are fixable if you catch them early.
Foul, Swampy Smells (Anaerobic Bacteria)
Quick Answer: A rotten-egg or sulfur smell signals anaerobic bacteria — microbes that thrive when oxygen is cut off by chronic overwatering or blocked drainage. The soil isn’t automatically trash, but it needs to be re-oxygenated before planting.
Spread the smelly soil out in a thin, 1-2 inch layer on a dark tarp in full sun. Leave it for two to three days, turning it once or twice. Heat and air exposure kill the anaerobic bacteria and allow aerobic, beneficial microbes to repopulate.
If the smell is still present after three days of solarizing, or if the soil is visibly slimy or dark throughout, discard it. Some anaerobic situations go too deep to reverse with surface solarizing alone.
To prevent this from happening again, check that every pot has clear drainage holes and that saucers aren’t holding standing water under pots for more than 24 hours after watering.
White Mineral Crusts on the Soil Surface
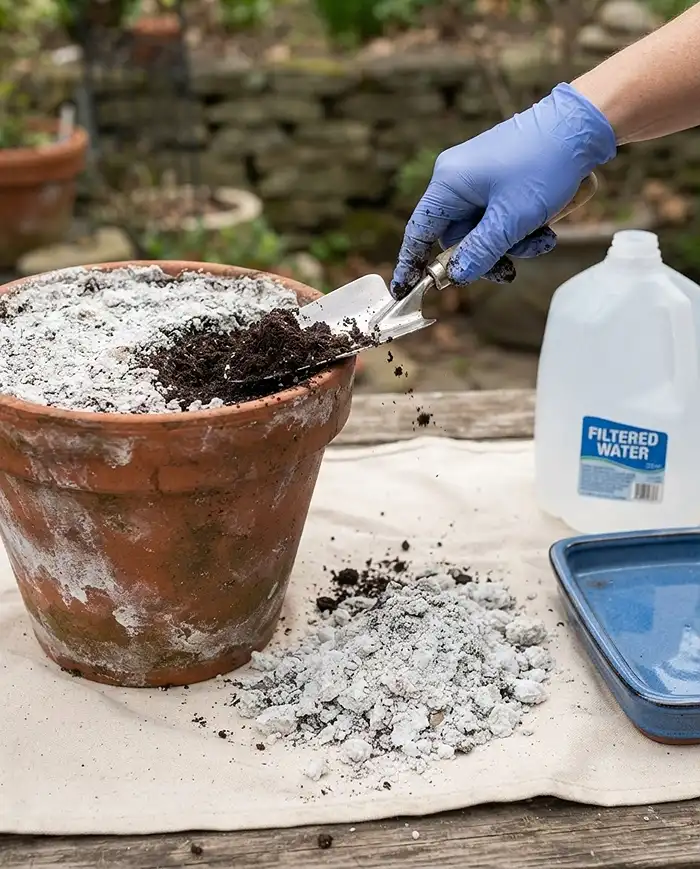
Quick Answer: A hard white crust on old potting mix is accumulated fertilizer salts and calcium deposits from tap water. Scrape off the top 2 inches and discard them, then heavily flush the remaining soil before reuse.
This crust is common in pots that were fed frequently with synthetic fertilizers or watered with hard tap water all season. The minerals accumulate in the top layer as water evaporates and leaves them behind.
At high concentrations, these salts draw moisture out of roots through osmosis — essentially burning them from the outside in. Plants show brown leaf tips, wilting despite moist soil, and stunted growth.
After scraping the top layer, flush the remaining soil by pouring three to four full pot-volumes of water slowly through it. This leaches the salt buildup out through the drainage holes. Let it drain completely before amending and replanting.
Switching to rainwater or filtered water for at least part of your watering routine significantly slows salt buildup in future seasons. It’s one of those small container garden tips that compounds over time.
Frequently Asked Questions
Does unopened, bagged potting soil expire?
The mineral components like perlite and sand never expire, but the peat moss in an unopened bag degrades and dries out over 1-2 years. Synthetic starter fertilizers mixed into the bag also slowly lose potency. Use bagged mix within one growing season for best results, and rehydrate dry peat thoroughly before planting.
Can I bake old potting soil to sterilize it?
It’s strongly advisable to skip this approach. Baking soil in a kitchen oven kills pathogens, but it also destroys all beneficial microbes, creates a genuinely unbearable smell, and leaves you with biologically dead dirt that requires extensive reinoculation. For diseased soil, disposal is faster and more reliable.
Is it safe to put diseased potting soil in my compost bin?
No. Never add blighted or pest-infested potting soil to a home compost pile. Backyard compost rarely sustains the 140 degrees Fahrenheit temperatures needed to destroy aggressive fungal spores and weed seeds. Bag diseased soil in sealed plastic and put it in your regular household trash.
How do I know if potting soil is too old to refresh?
If soil compacts into a dense, non-draining brick and won’t rehydrate even after surfactant treatment, the peat structure is beyond repair. Any mix more than three seasons old — regardless of appearance — should be replaced rather than refreshed, as its water-holding and nutrient-exchange capacity will be severely compromised.
Can I mix old potting soil into a raised bed?
You can add disease-free, pest-free old potting mix to a raised bed in small quantities, up to about 20% of the total volume. Avoid adding it if the previous container crop showed any signs of disease or pest infestation. Never add soil that has hosted blight-infected or nematode-infected plants to a raised bed.
Key Takeaways
- Learning how to tell if potting soil is bad before planting protects your investment in seedlings and your entire growing season.
- Run all three assessments in order — physical, biological, chemical — before deciding to reuse, refresh, or discard.
- Discard any soil with nematodes, pest larvae, or a history of disease; no home sterilization method is reliable enough to make it safe again.
- To refresh potting soil that passes all tests, blend it 50/50 with fresh compost, add 20-30% perlite, and include worm castings to restore biology.
- A 20-minute audit each season is the single best investment you can make for container vegetable gardening — it costs nothing and prevents the failures that cost everything.