
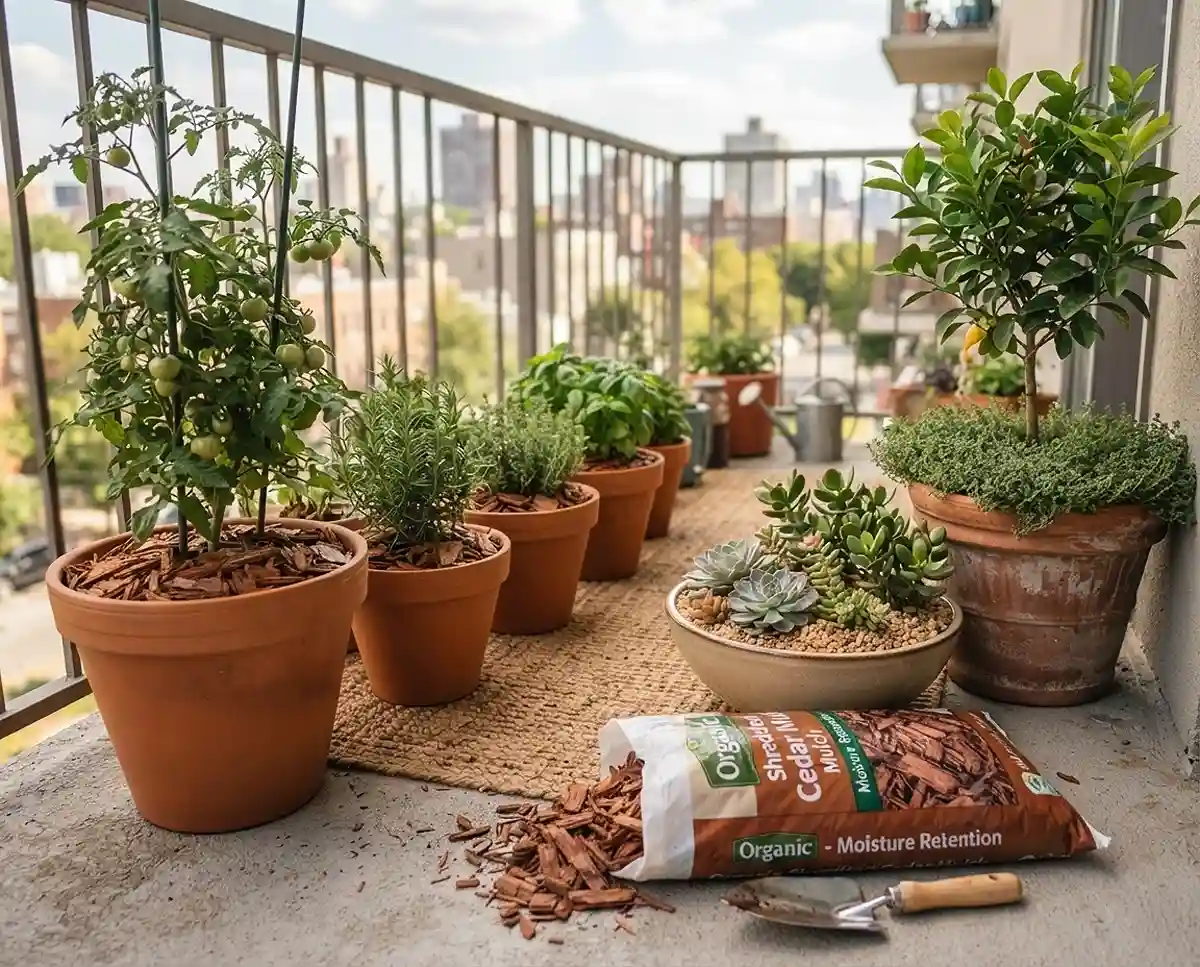
Mulching Potted Plants: How to Use Mulch in Pots
Mulching potted plants is the balcony gardening trick most people skip, and it’s the one that cuts your watering chores in half. Here’s exactly how to do it right, season by season.
Table of Contents
The Secret Weapon for Balcony Gardens: Mulching Potted Plants
I grow tomatoes, herbs, and a stubborn fig tree on a south-facing balcony in zone 7a, and for my first two summers I watered every single day. Container soil dries out fast because there’s no surrounding earth to buffer it, and the whole pot gets hit by sun and wind from every side.
Then a neighbor with 20 years of rooftop gardening under her belt told me to mulch my pots the same way you’d mulch a backyard bed. I was skeptical. It felt like a landscaping trick, not something for a 14-inch container.
It changed everything. Mulching potted plants is standard practice for in-ground beds, but on a balcony, where roots are more exposed to temperature swings, it’s not optional decoration. It’s protection.
The Year-Round Benefits of Mulching Balcony Pots
A pot has way less insulating soil mass than open ground, so the root zone swings between extremes fast. A layer of mulch acts as a buffer between your soil and whatever the sky is doing that day, whether that’s a 95°F heatwave or a hard January freeze.
Summer Heat Protection and Moisture Retention
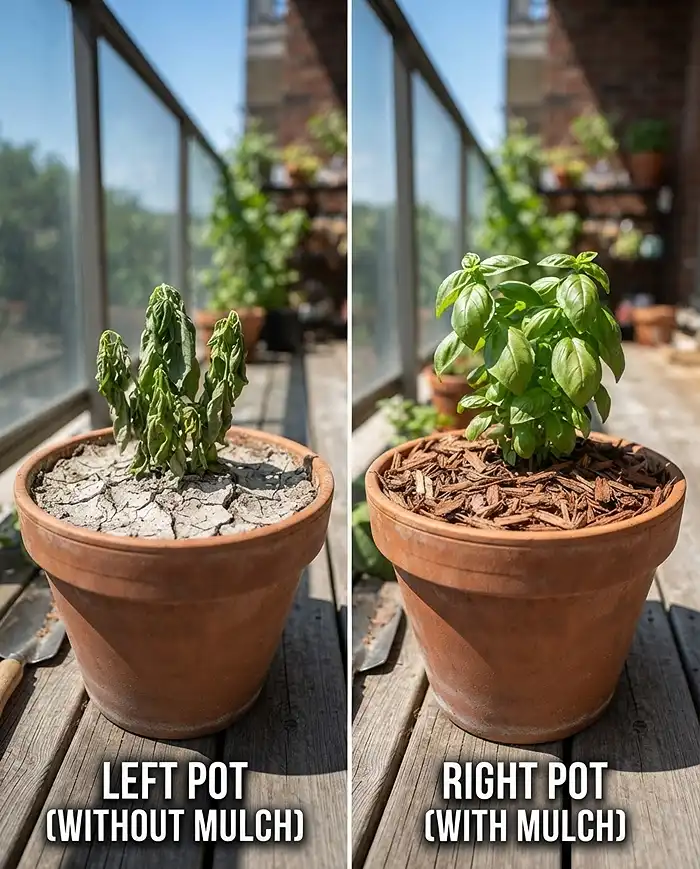
Quick Answer: A 2-inch layer of mulch can cut surface evaporation from container soil by roughly 25 to 50%, keeping roots cooler and reducing how often you need to water during heatwaves.
Bare potted soil left in direct August sun can hit 100°F+ at the surface, which stresses roots even in heat-tolerant plants. Mulch blocks that direct UV exposure and slows how fast moisture escapes through evaporation.
This matters most for small space gardening, where every pot is usually exposed on all sides instead of shaded by neighboring plants like an in-ground bed would be.
Real Example: Last July in a stretch of 98°F days, my unmulched basil pot needed water twice daily and still wilted by 3 p.m. The mulched pot next to it, same size, same basil variety, needed water once a day and never drooped.
Pro Tip: Water your mulched pots slightly less often, but water deeper each time, since the mulch is trapping moisture at the surface where a quick sprinkle would normally evaporate before reaching roots.
Winter Insulation and Root Protection
Quick Answer: Applying a 3-inch layer of mulch in late autumn traps residual soil warmth and shields perennial roots from freezing winds, which is critical since container roots have far less insulation than roots in the ground.
In-ground roots sit below the frost line most of the time. Potted roots don’t have that luxury; the whole container is exposed to ambient air on every side, so a hard freeze can chill roots straight through.
A thick mulch layer works like a blanket, slowing heat loss from the soil and buffering the root ball against sudden temperature drops and drying winter winds.
Real Example: I lost a potted rosemary to root freeze my first winter in zone 7a. The next year I mulched the same variety with 3 inches of shredded bark before the first hard freeze, and it sailed through an identical cold snap.
Pro Tip: Move mulched pots against a wall or in a corner before winter; the mulch handles root insulation, but wind exposure still stresses the above-soil parts of the plant.
Choosing the Right Mulch for Small Containers
Quick Answer: The best mulch for pots depends on your plants: organic mulches like bark or straw suit vegetables and herbs, inorganic mulches like pebbles suit succulents, and living mulch works for ornamental combos.
A tiny garden ideas mistake I made early on was using the same heavy landscape mulch on every pot. In a restricted container, weight, pH, and pest risk matter more than they would in open ground.
| Mulch Type | Best For | Watch Out For |
|---|---|---|
| Shredded bark | Vegetables, herbs, shrubs | Can float in overwatered pots |
| Straw | Vegetable containers, raised pots | Attracts pests if too fresh |
| Coco coir | Moisture-loving herbs | Breaks down faster, needs refreshing |
| Pea gravel | Succulents, drought-tolerant plants | Adds weight, no soil enrichment |
| Living groundcover | Ornamental focal pots | Competes for water and nutrients |
Organic Mulches: Straw, Bark, and Coco Coir
Quick Answer: Shredded cedar bark, straw, and coco coir are the best mulch for pots growing vegetables and herbs, since they break down slowly and add organic matter without weighing down the container.
These materials feed the soil as they decompose, releasing humic compounds that improve texture over time. That’s a real bonus in containers, where soil compacts and depletes faster than garden beds.
- Shredded cedar bark: lasts 6 to 12 months, naturally pest-resistant
- Straw: lightweight, ideal for vegetable pots, but source pesticide-free bales
- Coco coir: excellent moisture retention, needs replacing every few months
Real Example: I switched my patio tomato pots to coco coir mulch two seasons ago after reading about it in one of my apartment gardening tips, and my watering frequency dropped from daily to every other day.
Pro Tip: Buy straw specifically labeled weed-free; regular bales can smuggle in grass and weed seeds that sprout right through your mulch layer.
Inorganic and Aesthetic Mulches: Pebbles and Glass
Quick Answer: Polished river stones, pea gravel, and tumbled sea glass are ideal for drought-tolerant succulents, since they never decompose, never attract fungus gnats, and give pots a clean, modern look.
Inorganic mulch doesn’t feed the soil, but for plants that prefer lean, fast-draining conditions, that’s actually the point. It also means zero mold risk in humid climates.
- Pea gravel: cheap, widely available, good drainage support
- River stones: heavier, great for top-heavy plants that need ballast
- Sea glass or crushed glass mulch: decorative, reflects light back onto low growers
Real Example: My echeveria pots sat in bare soil for a year and kept getting fungus gnats. Topping them with a half-inch of pea gravel solved it within two weeks; the gnats had nowhere damp and exposed to lay eggs.
Pro Tip: Rinse pea gravel before use. Bagged gravel is often dusty, and that dust can cake the soil surface and block airflow.
Living Mulch: Underplanting with Creeping Groundcovers
Quick Answer: Living mulch means underplanting a tall focal plant with shallow-rooted trailing plants like creeping thyme, sweet alyssum, or sedum, which shade the soil naturally and suppress weeds without any material mulch at all.
This is the most advanced technique on this list, and it doubles as a design move for anyone chasing tiny garden ideas that look intentional, not just functional.
Real Example: I underplanted a potted dwarf citrus with creeping thyme this spring, and by June the thyme had filled in enough that I stopped seeing bare soil, and stopped seeing weeds too.
Pro Tip: Choose a living mulch with shallower roots than your main plant so they’re not competing hard for the same root zone and nutrients.
Step-by-Step Guide to Mulching Potted Plants
Quick Answer: Weed and clean the soil surface, add a slow-release fertilizer, then apply a 1 to 2-inch mulch layer while keeping a 1-inch gap around the stem to prevent rot.
Prepping the Soil and Removing Debris
Pull any weeds and clear away dead or decaying foliage sitting on the soil surface before you add anything. Trapping dead leaves under mulch invites mold.
This is also your window to apply a slow-release granular fertilizer, since you won’t be able to work it into the topsoil easily once it’s covered.
Applying the Mulch: Depth and Spacing Rules
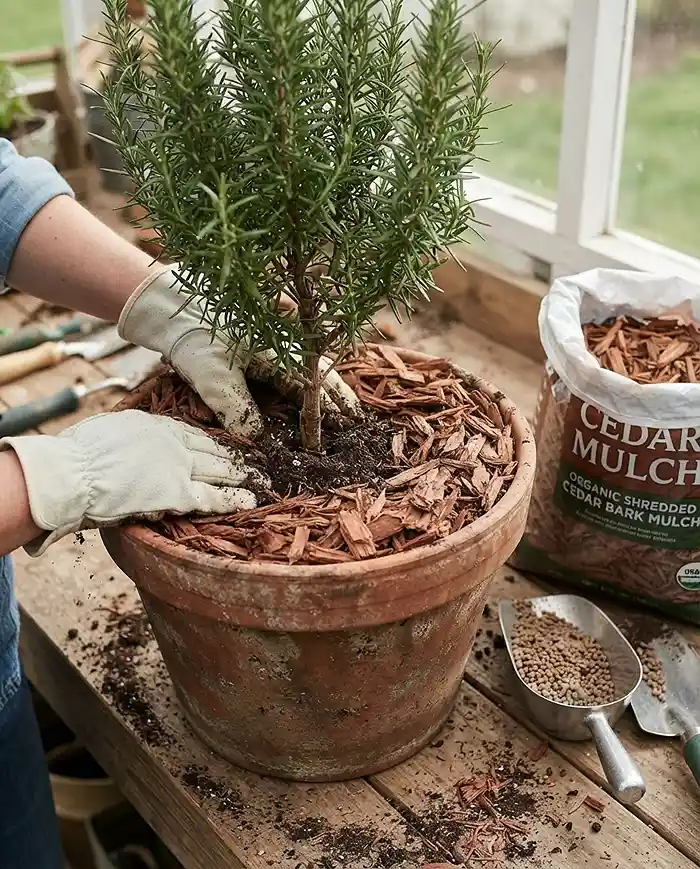
Spread a uniform 1 to 2-inch layer across the entire soil surface. This is the golden rule for mulching potted plants, and getting the depth wrong in either direction causes problems.
Leave a 1-inch bare ring directly around the main stem. Piling mulch against the stem traps moisture against living tissue and invites rot, which is the single most common mistake beginners make.
Seasonal Maintenance and Mulch Management
Covered soil behaves differently than bare soil, so your watering and feeding routine needs to shift once mulch goes down, especially across seasons.
Spring and Summer Watering Adjustments
Quick Answer: Always check soil moisture by pushing a finger past the mulch layer and into the actual soil before watering, since mulch hides how wet the soil underneath really is.
Mulch slows evaporation so effectively that the surface can look dry while the root zone underneath is still saturated. Watering on a schedule instead of by feel is the fastest way to drown your roots.
Real Example: I overwatered a mulched pepper plant my first mulching season because I was watering on my old unmulched schedule. Yellowing leaves told me before root rot set in, but it was close.
Pro Tip: Set a reminder to finger-test rather than eyeball the mulch surface; it’s the one habit that prevents most summer overwatering mistakes.
Fall and Winter Refreshing Routines
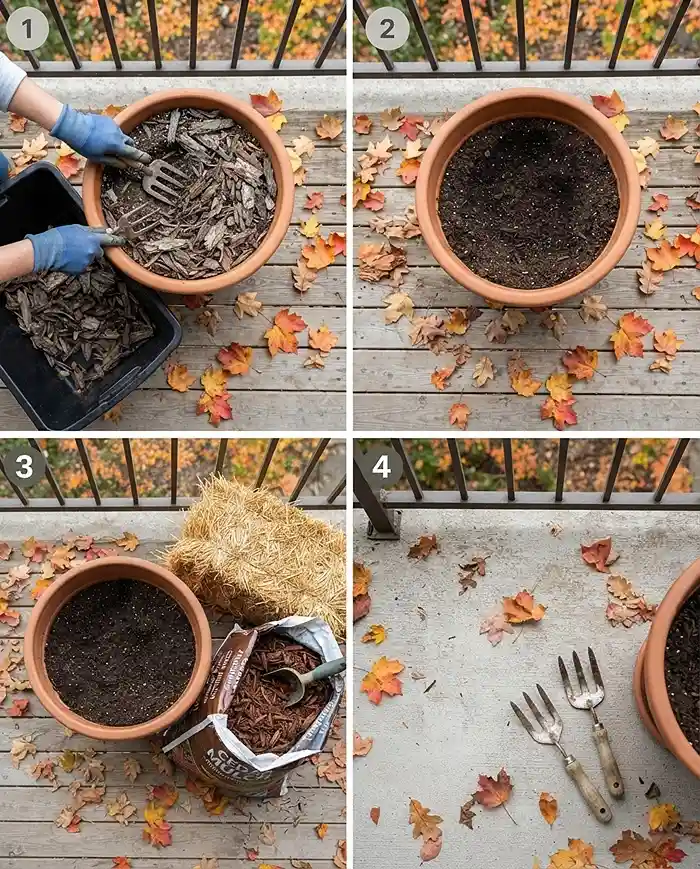
Quick Answer: Remove old, degraded summer mulch in autumn, since it can harbor fungal spores, then replace it with a fresh, thick layer of straw or bark before the first hard freeze hits.
Old organic mulch that’s broken down over a hot, humid summer isn’t doing much insulating anymore, and it’s more likely to carry mold spores into winter.
Real Example: I now do a full mulch swap every October as part of my small balcony garden routine, right before nighttime temps start dropping into the 40s.
Pro Tip: Apply the fresh winter layer slightly thicker than your summer layer, since insulation matters more than evaporation control once temperatures drop.
Common Problems and Solutions
Most mulching failures in containers come down to two mistakes: applying it too thick, or piling it against the stem. Both are easy to fix once you spot them.
Fungus Gnats and Mold Under the Mulch
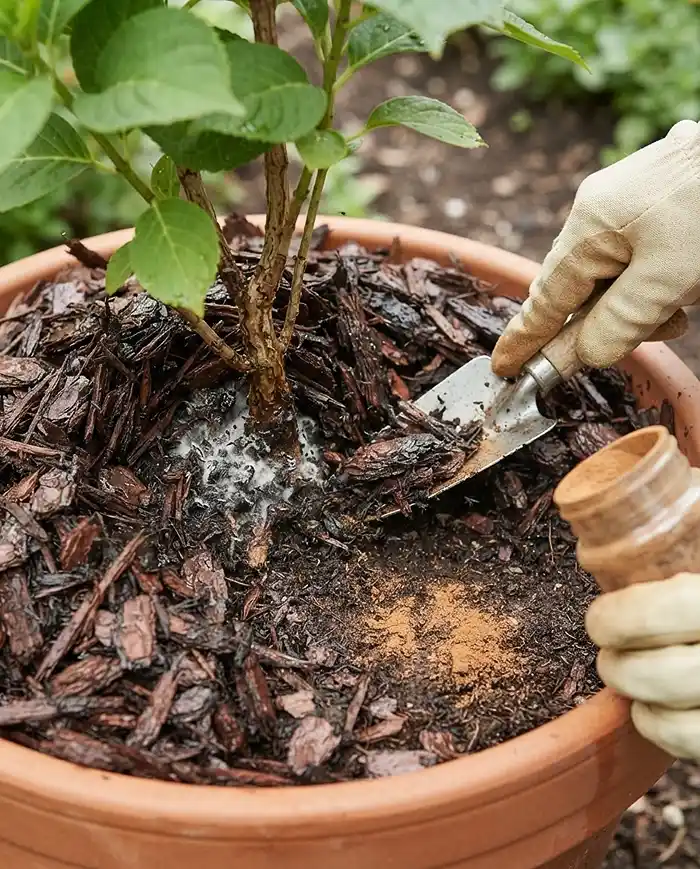
Quick Answer: A mulch layer applied too thick traps excess moisture and breeds fungus gnats or white mold. Scrape off half the mulch, let the soil dry out, and dust the surface with cinnamon to kill the fungus.
Cinnamon has natural antifungal properties and won’t harm your plants, making it a go-to fix for anyone new to small space gardening who’s dealing with this for the first time.
Stem Rot from Mulch Suffocation (Volcano Mulching)
Quick Answer: Piling mulch directly against the plant’s base, known as volcano mulching, traps wetness against the stem and causes fatal crown rot. Pull the mulch back to expose the root flare immediately if you spot it.
This is one of the apartment gardening mistakes that’s completely avoidable once you know the 1-inch stem gap rule.
Frequently Asked Questions
Do indoor container plants need mulch?
Indoor plants don’t face extreme temperature swings, but a half-inch layer of inorganic mulch like fine gravel is still useful. It stops fungus gnats from laying eggs in the damp topsoil of houseplants.
Can I use fresh grass clippings as mulch in pots?
No, avoid fresh grass clippings in small containers. They mat together, block oxygen, and heat up as they decompose, which can cook potted roots and create a foul, swampy odor on your balcony.
How often do I need to replace organic mulch in a balcony pot?
Check organic mulch like bark or straw every six months. Add a fresh top-dressing in spring to replace what’s decomposed, and fully swap it out if you notice compaction or mold.
What’s the best mulch for pots on a windy balcony?
Heavier organic mulches like shredded bark or pea gravel stay put better than straw or coco coir in windy, exposed balcony spots, since lighter materials can blow off the soil surface.
Does mulch attract pests to balcony containers?
Fresh, properly sourced mulch rarely attracts pests. Problems usually come from mulch applied too thick, or from using unlabeled straw or grass clippings that carry seeds or insects into the pot.
Conclusion
Mulching potted plants is a five-minute task that saves you daily watering trips and protects roots through both heatwaves and hard freezes. As of the 2026 growing season, it’s still one of the most overlooked upgrades in small balcony garden setups.
Start with one pot this weekend. Pick a mulch that fits your plant, keep it off the stem, and watch how much less often you reach for the watering can. For more foundational setup advice, check out this guide to beginner small space gardening. For research-backed detail on mulch mechanics in containers, the UF/IFAS Extension guide on container mulching is worth a read.
Key Takeaways
- Mulching potted plants cuts summer watering frequency and insulates roots against winter freezes
- Choose organic mulch (bark, straw, coco coir) for vegetables and herbs; inorganic mulch (pebbles, gravel) for succulents
- Apply a 1 to 2-inch layer, always leaving a 1-inch gap around the stem to prevent rot
- Check soil moisture below the mulch layer before watering, not just the surface
- Refresh mulch every 6 months, with a full swap in fall before the first hard freeze