

Soil vs Hydroponic Microgreens
Compare soil vs hydroponic microgreens for flavor, cost, ease, cleanup, and yield so you can choose the best growing method at home.
Whether you’re a weekend kitchen gardener or someone seriously thinking about scaling up, choosing the right growing medium for microgreens is the single decision that affects everything — speed, flavor, cost, and how many times you’ll want to throw a tray across the room in frustration. Been there.
This guide covers everything: a side-by-side breakdown of both systems, the real nutritional differences, which growing mats are actually worth buying, and the hybrid method that most experienced growers quietly use. Let’s dig in.
Table of Contents
Understanding Microgreens and Growing Systems
What Are Microgreens, Exactly?
Microgreens are young vegetable seedlings harvested somewhere between the sprout stage and baby greens — typically 7 to 21 days after germination. We’re talking radish, broccoli, sunflower, pea shoots, arugula, and dozens of other varieties that pack a serious nutritional punch in a tiny package.
Here’s the part that genuinely blows people away: research from the USDA and University of Maryland confirmed that microgreens can contain 30 to 40 times more vitamins and bioactive compounds than their fully mature counterparts.
Red cabbage microgreens alone carry roughly six times the vitamin C of a mature cabbage head. Six times. From something you grew in a takeout container.
That’s why growers obsess over fast harvest cycles and microgreen nutrient density — you’re essentially catching the plant at its peak nutritional moment before those compounds dilute as it grows bigger.
Soil-Based Microgreens — What’s Actually in That Tray?
Here’s something that surprises a lot of beginners: most “soil” microgreen systems don’t actually use garden dirt. What growers really mean is a soilless potting mix — typically a blend of peat moss, coconut coir, and perlite or vermiculite. Each ingredient plays a role: peat retains moisture, coir adds structure, and perlite keeps drainage from becoming a swamp situation.
The real secret weapon in soil growing? Microbial life. Beneficial bacteria and fungi in organic mixes interact with roots in ways a sterile growing mat simply can’t replicate — and that biological activity directly influences flavor, antioxidant production, and plant health.
Hydroponic Microgreens — Growing Without the Mess
Hydroponic microgreen systems skip the soil entirely. Seeds are sown onto inert growing substrates — hemp mats, jute mats, biostrate pads, or coco fiber pads — and all nutrients are delivered through a water solution. The mat’s only real job is to hold the seeds and support the root structure physically.
The appeal is obvious: cleaner, faster, and incredibly scalable. If you’re working with a small apartment or hate the idea of potting mix ending up on your kitchen floor, hydroponics is genuinely attractive. (And yes, your roommates will appreciate it too.)
Quick Comparison Table
| Factor | Soil Microgreens | Hydroponic Microgreens |
|---|---|---|
| Growth speed | Moderate | 40–50% faster |
| Yield density | High | Moderate |
| Flavor | Stronger, more complex | Cleaner, milder |
| Setup cost | $30–$60 | $80–$200 |
| Maintenance | Simple, forgiving | More precise |
| Commercial scalability | Moderate | High |
| Best for beginners? | Yes | Moderate learning curve |
Practical Comparison: Soil vs Hydroponic Microgreens
Growth Speed — Does Hydroponics Really Win?
Short answer: yes, and it’s not particularly close. Hydroponic systems consistently deliver 40–50% faster growth than soil-based methods.
The reason is pretty logical once you think about it — when nutrients are dissolved directly in water at the root zone, the plant doesn’t need to spend energy searching for them through a growing medium. It’s the equivalent of having dinner delivered versus having to cook it yourself.
That speed advantage compounds over time. More harvests per month means more trays cycling through, which matters enormously if you’re selling at a farmers market or just want fresh greens every single week without a gap.
Yield and Biomass — Soil Has a Trick Up Its Sleeve
Here’s where soil fights back, and fights back well. Soil-grown microgreens consistently produce taller, denser plants with stronger, thicker stems than their hydroponic equivalents. The physical weight and structure of a good potting mix anchors roots in a way that a thin mat simply can’t.
A classic example growers report again and again is tatsoi: grown in quality potting mix, it shoots up visibly taller and more upright than the same variety on a jute mat. For anyone selling microgreens — where presentation and stem length directly affect what customers will pay — this is a meaningful difference, not just a nerdy observation.
Root Stability and Germination Success
Not all seeds play nicely with hydroponic mats. Heavy-seeded varieties like sunflower, pea shoots, and beet microgreens genuinely need the structural support that soil provides. Without it, germination becomes patchy, hull shedding gets messy, and the roots don’t anchor the way they should.
Jute mats in particular can struggle with uneven water distribution, leaving dry patches that tank germination rates across the tray. For these varieties, soil isn’t just a preference — it’s the practical choice.
Nutritional Comparison: Are Hydroponic Microgreens Less Nutritious?
This is probably the most misunderstood topic in the entire soil vs hydroponic microgreens debate, so let’s break it down properly.
Mineral Uptake — It’s More Complicated Than You Think
Both systems can deliver nitrogen (N), phosphorus (P), potassium (K), calcium, magnesium, and sulfur to the plant. The difference is how they get there.
Soil systems rely on microbial interactions to unlock and transfer nutrients from organic matter — a biological process that’s been refined by nature over millions of years. Hydroponic systems bypass that entirely with a precisely engineered nutrient solution delivered straight to the roots.
Neither is flat-out superior. The microbial complexity of soil offers trace mineral richness that’s hard to replicate artificially. But hydroponics eliminates variability entirely, so you know exactly what the plant is getting every single time.
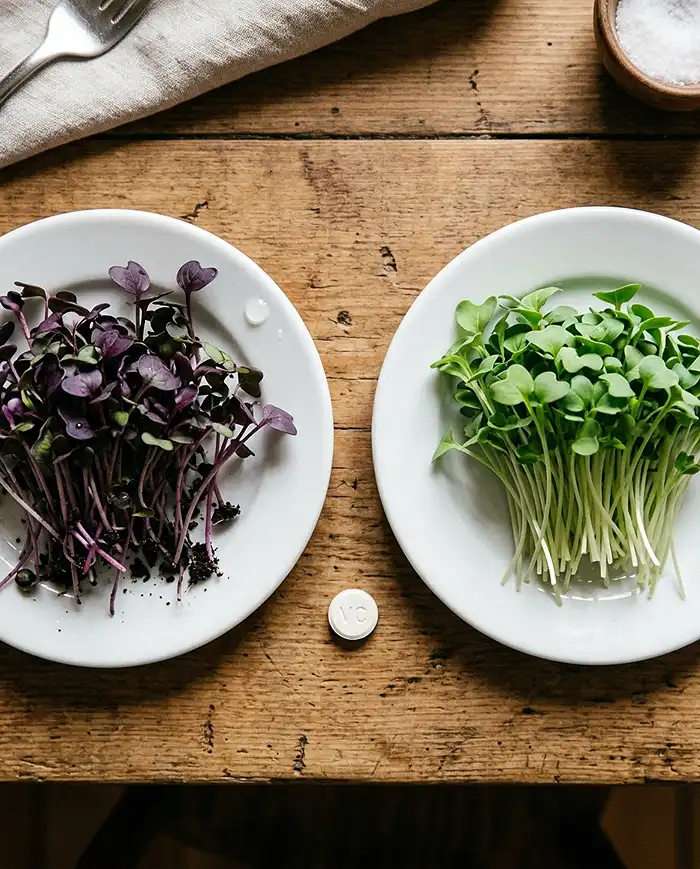
Secondary Compounds and Flavor — Soil’s Biggest Win
Here’s where soil pulls ahead in a way that’s hard to argue with. Those soil microbes stimulate the plant to produce polyphenols, antioxidants, and aromatic compounds that directly influence both flavor and nutritional value.
The mild biological stress of navigating a living soil environment triggers the plant’s natural defense mechanisms — and those defense compounds are precisely what make microgreens nutritionally powerful and taste complex.
A study published in ScienceDirect found that soil-grown microgreens carried significantly higher vitamin C concentrations than hydroponically grown equivalents. For home growers focused on both flavor and food quality, that’s a compelling reason to stick with organic potting mix.
Hydroponic Biofortification — The Commercial Advantage
Hydroponics gets a meaningful rebuttal here, though. Because the nutrient solution is fully controllable, commercial growers can intentionally engineer specific compound concentrations — boosting beta-carotene, lycopene, or vitamin C by adjusting inputs.
For functional food markets and precision nutrition applications, that’s a genuinely powerful capability that soil simply can’t offer.
Growing Medium Options for Microgreens
Best Hydroponic Growing Mats — Ranked Honestly
Not all mats are created equal, and the difference between a good mat and a cheap one shows up fast. Here’s how the main options stack up as the best growing medium for microgreens in hydroponic systems:
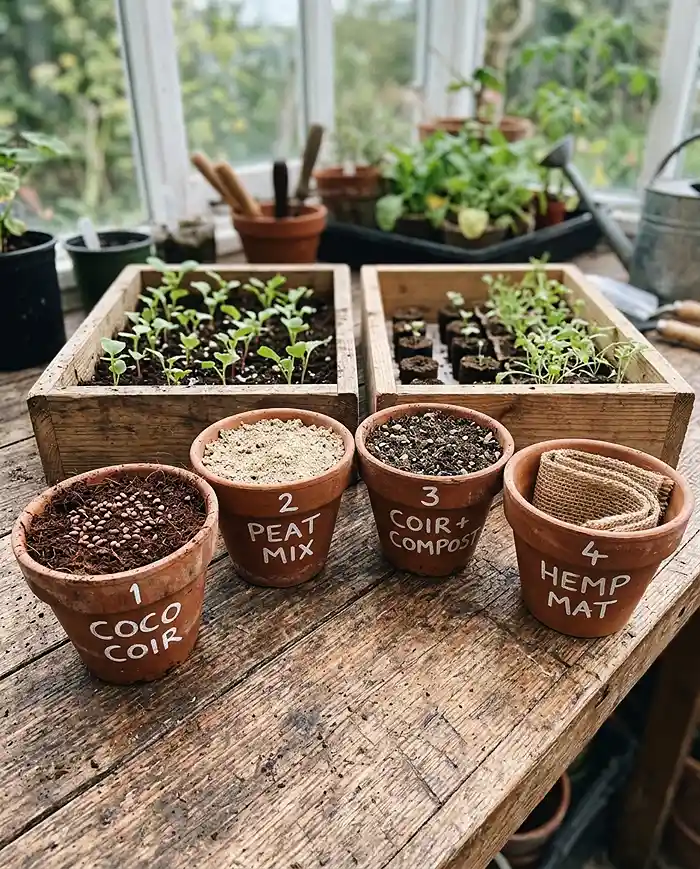
- Biostrate mats — The clear top performer. Excellent germination rates, consistent moisture retention across the whole tray surface, and clean harvesting. Widely used in commercial operations for good reason. If you’re going hydroponic, start here.
- Hemp fiber mats — Biodegradable, good airflow, and increasingly popular among eco-conscious growers. Slightly less consistent than biostrate but a solid, sustainable option for regular home use.
- Jute mats — The budget pick, and you get what you pay for. Water distribution can be uneven, which leads to dry patches and patchy germination. Fine for experimentation, frustrating for consistent production.
Best Soil and Soilless Mixes
For soil-based growing, coconut coir is the most versatile and forgiving starting point — it retains moisture well, doesn’t compact easily, and is widely available. A peat-based potting mix adds mild inherent nutrients that carry the plant through its short growth cycle without any amendments. The crowd favorite among experienced growers is a coir-and-compost blend, which combines excellent drainage with genuine microbial activity.
All three share the same core benefits: stable moisture, mild organic nutrients, and the biological richness that drives stronger flavor and higher secondary compound content.
Reusable Growing Surfaces — The Zero-Waste Option
If sustainability matters to you (and it probably should), there’s a growing category of reusable alternatives worth knowing about. Stainless steel mesh trays, food-grade silicone grow mats, and commercial reusable grow pads are eliminating the single-use mat cycle entirely.
They cost more upfront but dramatically reduce ongoing material expenses and waste output over time — especially relevant once you’re running multiple trays a week.
Matching the System to the Microgreen Variety
Heavy Seed Varieties — Best in Soil
Sunflower, pea shoots, beet microgreens, and cilantro all belong in soil, full stop. Their seed size and weight demand the structural support of a potting medium during germination.
Soil helps with hull removal, stabilizes their roots, and supports the thick, sturdy stems these varieties are known for. Forcing them onto a thin hydroponic mat is like asking someone to build a house on a paper towel — technically possible, practically frustrating.
Small Seed Varieties — Best in Hydroponics
Broccoli, radish, arugula, mustard, and amaranth are natural hydroponic performers. Their thin, delicate roots adapt quickly to fiber substrates, germination is fast and even, and their light seed weight doesn’t need the structural support of soil. If you want the cleanest, fastest results from these varieties, a quality growing mat is the right call.
Cost Comparison: What You’re Actually Spending
Initial Setup Cost
A basic soil microgreen system is genuinely accessible — trays, potting mix, and seeds will run you $30–$60, making it the obvious entry point for anyone just getting started. A hydroponic microgreen system requires more upfront: trays, mats or pads, a nutrient solution, and often supplemental LED lighting push the startup cost to $80–$200 depending on scale and kit quality.
Ongoing Operating Costs
Soil systems require recurring potting mix purchases and some thought about disposal or composting between cycles. Hydroponic systems rack up costs through mat replacements, nutrient solution inputs, and — the sneaky one — electricity for LED lighting. That last item becomes a surprisingly significant line item once you’re running a serious indoor operation.
A windowsill soil setup drawing on natural sunlight remains the cheapest option by a meaningful margin. It’s slower, but “free light” is hard to beat on an operating cost spreadsheet.
Climate and Environment — Does Your Setup Matter?
When Soil Performs Better
Soil is the natural winner in dry climates, low-tech home setups, and situations where natural sunlight is available. Its moisture-retaining properties are a genuine advantage when ambient humidity is low, and its forgiving nature makes it ideal for anyone who doesn’t want to monitor conditions obsessively.
When Hydroponics Performs Better
Hydroponic systems thrive in humid, controlled indoor environments — commercial vertical farms, basement grow rooms, or any setup where climate management is already in place.
Their light weight makes them ideal for stacked growing systems, and the precision of a controlled nutrient solution delivers reliability that soil simply can’t match in unpredictable conditions.
The Hybrid Method: What Most Experienced Growers Actually Use
Why the 50/50 Approach Makes So Much Sense
Here’s a not-so-secret secret: most experienced microgreen growers don’t pick a side. They use a hybrid medium that combines the structural stability of soil with the moisture efficiency of hydroponic principles — and the results consistently outperform either system used in isolation.
If you’re setting up a growing system in a small apartment and want the best balance of yield, cleanliness, and flavor, this is the approach worth adopting from day one. Our detailed guide on microgreens growing systems for small apartments walks through exactly how to set this up in a compact space, including equipment lists and cost breakdowns that make the whole process genuinely beginner-friendly.
Simple 50/50 Mix Recipe — Do This Weekend
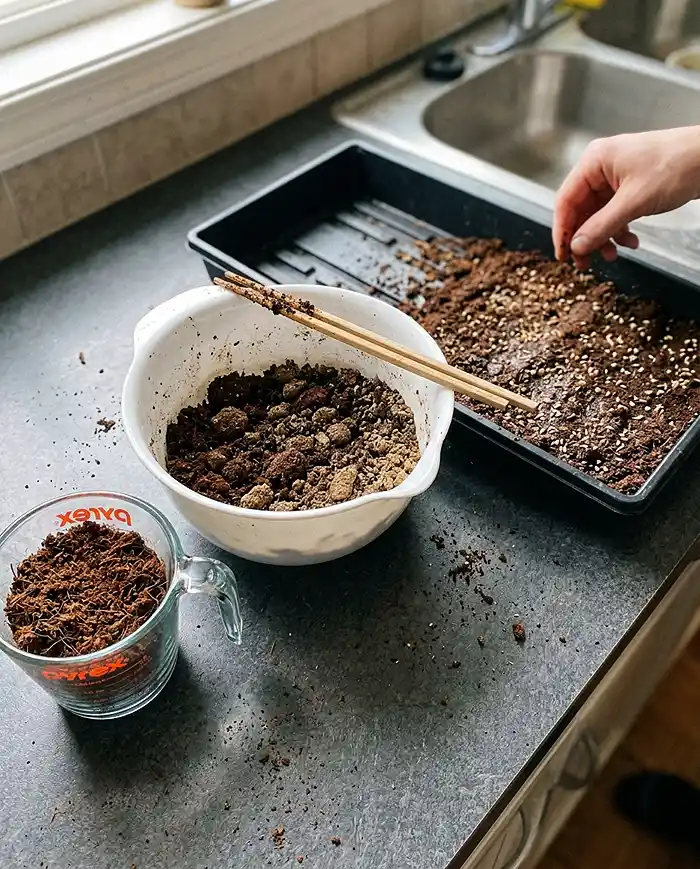
This takes about five minutes to set up and makes a noticeable difference in both germination and final yield:
- Mix equal parts organic potting soil and coconut coir in a bowl.
- Fill your tray lightly — 2–3 cm depth is plenty. Don’t pack it down.
- Sow seeds evenly across the surface with minimal overlap.
- Mist gently until the surface is just damp, then cover with a second tray or humidity dome.
The result is better drainage than pure soil, more consistent moisture than pure coir, and improved germination across a wider range of seed varieties. It’s genuinely the sweet spot.
Troubleshooting Common Microgreen Problems
Dealing With Mold
Mold is the microgreen grower’s arch-nemesis, and it strikes both systems — just for different reasons. In soil systems, it’s almost always overwatering. In hydroponic systems, it’s usually stagnant water pooling beneath mats without adequate airflow.
The fix is the same either way: run a small fan near your trays, sanitize between every grow cycle, and resist the urge to overseed. Crowded seeds cut airflow at the surface and basically roll out the welcome mat for fungal growth.
Poor Germination — What’s Going Wrong
Inconsistent germination usually traces back to three culprits: old or low-quality seeds, uneven moisture across the tray surface, or a blackout period that’s too short or too long. Always source fresh seeds from a reputable supplier, and don’t skip the moisture check during germination — the surface should be damp, not soggy.
The Blackout Period — Don’t Skip This
Stacking trays for 3–5 days after sowing is one of those simple techniques that growers discover and immediately wonder why nobody told them sooner.
The darkness and gentle downward pressure encourage deep root development, promote vertical stem growth, and produce noticeably sturdier plants at harvest. Think of it as resistance training for your seedlings — and yes, it actually works.
FAQ: Soil vs Hydroponic Microgreens
Do microgreens grow faster in hydroponics or soil?
Hydroponic systems typically grow 40–50% faster because nutrients are dissolved in water and immediately available at the root zone — no searching required.
Is soil safer than hydroponics for microgreens?
Hydroponic systems are generally considered safer for commercial production because sterile growing mats significantly reduce the risk of soil-borne pathogens. With proper tray sanitation, though, both systems can be grown safely at home.
Can hydroponic grow mats be reused?
Most commercial mats — hemp, jute, and biostrate — are single-use. Stainless steel mesh trays and food-grade silicone grow mats are durable reusable alternatives that cut long-term waste and cost significantly.
Why are my microgreens wilting?
The most common causes are underwatering, excessive ambient heat, or poor airflow. Check your watering schedule first, then assess whether your growing area is getting enough ventilation before assuming something more exotic is going wrong.
Are hydroponic microgreens as nutritious as soil-grown?
Research shows that with adequate light and a well-balanced nutrient solution, hydroponic microgreens can match the nutritional profile of soil-grown varieties. That said, soil systems tend to edge ahead on secondary compounds like polyphenols and vitamin C due to microbial activity.
Final Verdict: Soil vs Hydroponic Microgreens
After growing both systems — and watching a lot of growers switch back and forth between them — here’s the honest bottom line:
Soil microgreens are the right choice if you are:
a home grower on a tight budget, focused on flavor and nutritional complexity, growing heavy-seed varieties like sunflower and pea shoots, or working without a dedicated climate-controlled space.
Hydroponic microgreens are the right choice if you are:
running a commercial operation or vertical farm, prioritizing production speed and harvest frequency, growing small-seeded varieties like broccoli and radish, or working in a controlled indoor environment where precision matters.
And if you want the best of both worlds? Go hybrid. A soilless coconut coir blend with controlled bottom watering consistently delivers better results than either pure system — better drainage, more stable moisture, stronger germination, and a flavor profile that keeps up with the best soil-grown trays.
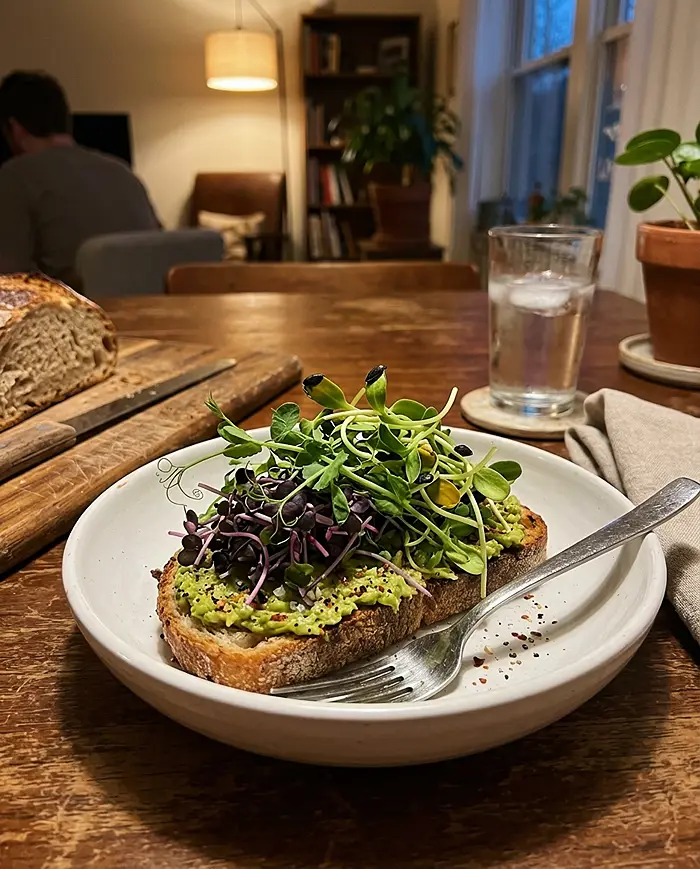
Start with one tray this weekend. In 7 to 10 days, you’ll be eating greens you grew yourself — and wondering, just like the rest of us did, why it took you this long to start.
Growing microgreens in a small apartment and not sure which system fits your setup? Drop your question in the comments — we’d genuinely love to help you figure it out.