

How to Grow Lavender in Balcony Pots
Lavender in balcony pots dies from kindness, not neglect. Here’s how lavender in apartment balcony pots thrives on gritty soil, full sun and less water. I grow six plants on a windy, south-facing balcony in zone 6b, and I killed three learning these rules.
Most potted lavenders don’t fail from lack of care. They fail from pampering: too much water, too much feed, too much shade. As of 2026, the fix is still the same. Copy a rocky Mediterranean hillside inside a pot.
Table of Contents
Matching Lavender to Your Exact Balcony Conditions (Sun, Airflow, and Species)
Before you buy anything, audit your balcony. Track direct sun on one clear day, note where the wind actually blows, and check your coldest winter night. Those three facts decide which lavender survives and where it sits.
Skip the cozy, damp corner against the interior wall. Lavender wants the opposite of cozy. If that corner suits other balcony plants, keep them there.
The Non-Negotiable 6-to-8-Hour Direct Sun Rule and Open Railing Airflow
Quick Answer: Lavender needs 6 to 8 hours of direct sun and steady airflow. Use the hottest, windiest south- or west-facing spot, away from stagnant corners. Dry leaves concentrate the oils.
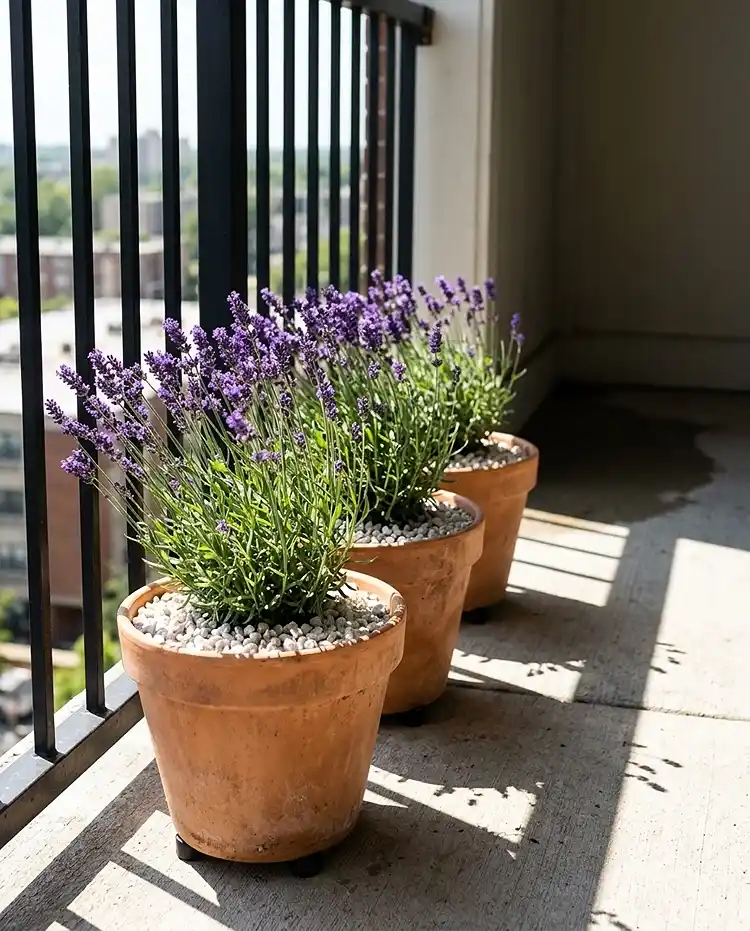
Those silvery leaf hairs exist to reflect heat and shed moisture. Stagnant, damp air defeats them. A spot along an open railing gives you wind that dries foliage after rain and morning dew.
If you only get 4 or 5 hours of sun, expect leggy stems and weak scent. No fertilizer fixes that.
Choosing the Right Species for Your Zone: English (Angustifolia) vs. Spanish (Stoechas) vs. French/Lavandin
Quick Answer: English lavender (Lavandula angustifolia) is the safest pick for freezing balconies, hardy to zone 5. Spanish types (L. stoechas) tolerate heat and humidity but must come indoors in zones colder than 8.
| Type | Cultivars | Hardiness | Watch Out For |
|---|---|---|---|
| English (L. angustifolia) | ‘Munstead’, ‘Hidcote’, dwarf ‘Thumbelina Leigh’ | Zones 5-9 | Dislikes sticky, humid summers |
| Spanish (L. stoechas) | ‘Anouk’ | Zones 8-10 | Won’t survive a freezing balcony winter |
| Lavandin (L. x intermedia) | ‘Phenomenal’ | Zones 5-9 | Grows larger; needs the full 12-inch pot |
For lavender in apartment balcony pots in cold climates, start with ‘Munstead’ or ‘Thumbelina Leigh’. Both stay compact. If your summers are humid and your winters mild, ‘Anouk’ or ‘Phenomenal’ handle the stickiness better.
Essential Prep: Breathable Terracotta Pots and the Gritty Alkaline Soil Recipe
Gather everything before you touch a plant. Here’s the full kit for one lavender:
- One unglazed terracotta pot, 10 to 12 inches wide, with a drainage hole
- Fiberglass window mesh to cover the hole
- Rubber pot feet, about ½ inch tall
- Peat-free potting mix or cactus soil
- Coarse grit: horticultural pumice, perlite, chicken grit or crushed granite
- Dolomitic garden lime to raise pH
- White pea gravel or crushed oyster shells for the top layer
Why Unglazed Terracotta and Snug Pot Sizing (10-12 Inches) Prevent Root Rot
Quick Answer: Unglazed terracotta wicks moisture out through its walls, so soil dries faster. Choose a pot only about 2 inches wider than the root ball. Oversized or glazed pots hold wet soil around woody roots and cause rot.
Real Example: In May 2019 I planted a ‘Hidcote’ in a 16-inch glazed ceramic pot with a saucer. The soil stayed wet for days. By late June the stems went gray and limp, and the roots were brown mush. It died in five weeks.
The replacement went into a 10-inch terracotta pot with no saucer. It’s still alive today.
Pro Tip: Lift each pot when the soil is bone-dry and remember how light it feels. That’s your baseline for “thirsty.”
The “Zero-Rot” 50/50 Gritty Mediterranean Soil Recipe (pH 6.7-7.5)
Quick Answer: Mix equal parts peat-free potting mix (or cactus soil) and coarse mineral grit, then add 2 tablespoons of dolomitic lime per 5-gallon bucket. This drains fast and lands at pH 6.7 to 7.5, lavender’s sweet spot.
- 2.5 gallons peat-free potting mix or cactus soil
- 2.5 gallons horticultural pumice, perlite, chicken grit or crushed granite
- 2 tablespoons dolomitic garden lime, mixed in dry before moistening
I prefer pumice because it doesn’t float to the surface after watering the way perlite does. A squeezed handful of the mix should crumble apart, never hold a clump.
Why You Must Top-Dress With White Pea Gravel or Crushed Oyster Shells (Never Bark Mulch)
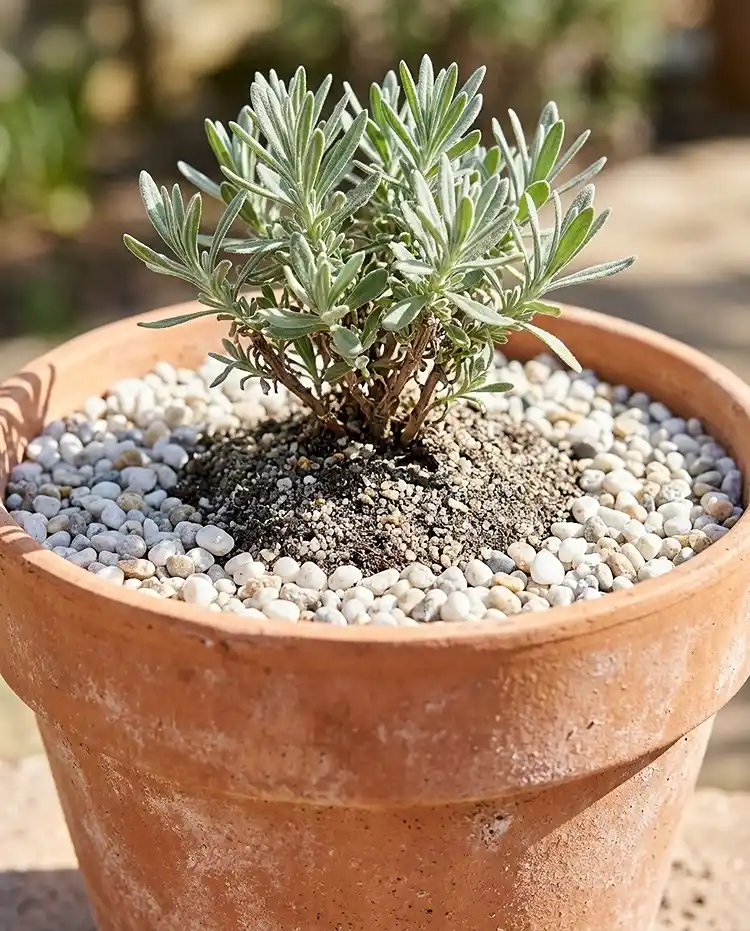
Bark mulch holds dampness against the woody stem collar, and that’s how crown rot starts. A 1-inch layer of white gravel does the reverse. It reflects solar heat upward, dries the lower leaves, and keeps the crown clear of wet organic matter.
Crushed oyster shells work too, and they leach a little trace calcium as they break down. Keep the gravel a finger-width back from the stem.
For a second opinion on drainage and soil basics, see the University of Illinois Extension lavender guide.
Step-by-Step Guide to Planting and Establishing Balcony Lavender
Work in this order: set up drainage, prep the roots, plant the crown high, then taper your watering. Each step stops water from lingering near the crown.
Step 1: Elevating Drainage Holes on Pot Feet and Skipping the Drip Saucer
Quick Answer: Cover the drainage hole with fiberglass window mesh, set the pot on ½-inch rubber feet, and skip the saucer. If you must use one, flip it upside down so water exits instantly.
The mesh keeps grit from washing out while letting water escape.
Pro Tip: Water over the bathtub, let the pot drain fully, then return it to the balcony. Your downstairs neighbor will thank you.
Step 2: Bare-Rooting the Nursery Peat Plug to Stop the “Wet Sponge Core” Trap
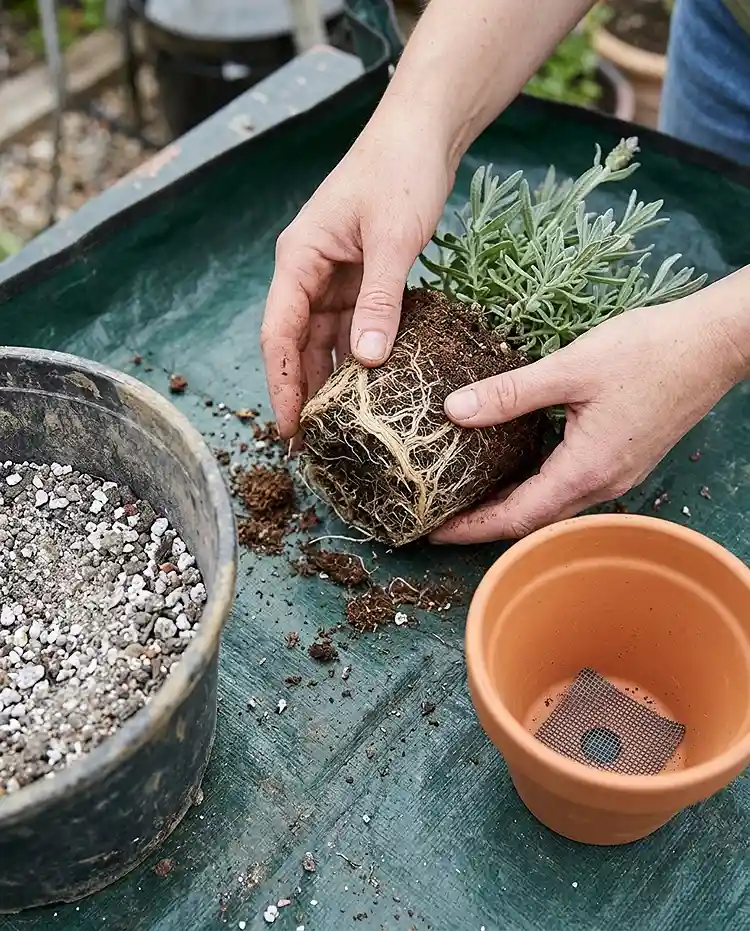
Quick Answer: Gently tease the dense nursery peat out of the center of the root ball before planting. Otherwise that core stays soggy like a wet sponge while the surrounding grit dries out.
Real Example: In April 2021 I shook roughly half the peat off a 4-inch ‘Munstead’ and planted it in the gritty mix. It’s about 20 inches wide now, four winters later.
A ‘Phenomenal’ I planted unwashed in 2020 stayed wet at the core and sulked all summer.
Step 3: “Mound Planting” the Crown 1 Inch High and Companion Pairing Rules
Set the root crown ½ to 1 inch above the pot rim’s soil line, then build a gentle mound around it. Irrigation water now runs outward toward the pot wall instead of pooling at the crown.
Companions must love dry feet too, so keep thirsty plants like those in a balcony rose garden elsewhere. Give lavender’s partners their own pots, or a trough at least 20 inches long:
- Rosemary
- Thyme
- Oregano
- Santolina
Step 4: The Two-Week Establishment Watering Taper
| Timing | Watering |
|---|---|
| Planting day | One deep soak until water runs from the holes |
| Week 1 | Water only when the top inch is dry, about every 3-4 days |
| Week 2 | Water every 4-5 days |
| Week 3 onward | Switch to the full dry-down method below |
By week three the roots should anchor into the grit and the plant shifts into drought-tolerant mode.
Mastering Ongoing Care: The Weight-Test Watering Method, Pruning, and Winterizing
Lavender runs on a simple yearly rhythm: water rarely, feed almost never, prune twice, and keep winter rain off the roots.
The “Full Dry-Down” Lift Test and Why You Should Almost Never Fertilize Lavender
Quick Answer: Water only when the pot feels feather-light when tilted and the soil is bone-dry 3 inches down. That’s typically every 5 to 10 days, even in summer. Skip rich fertilizer, which grows floppy, scentless stems.
Nitrogen-heavy feed pushes soft green growth that flops open and winter-kills. University extension guidance says unfertilized potting mix is best, since added fertilizer reduces blooms.
Never water on a fixed schedule alongside thirsty flowers. Lavender isn’t a petunia.
The “Two-Cut Pruning Rule” (Post-Bloom Shear + Early Spring Shaping) Above Green Needles
Quick Answer: Prune twice a year. After bloom, shear the green dome back by one-third. In early spring, shape lightly. Always stop 1 inch above bare brown wood, because old wood rarely resprouts.
- Cut flower spikes just as the bottom buds open
- In late summer, shear back one-third of the green growth
- In early spring, tidy only what winter damaged
- In zones 5-7, tuck pots under the overhang so cold rain can’t waterlog dormant roots
Real Example: In October 2020 I got ambitious and cut a ‘Hidcote’ down to 4 inches of bare brown wood. It never grew back. Now I count green needles before every snip.

Common Problems & Solutions
Four problems cause nearly every drooping, blackened or split-open lavender. Each one traces back to water, air or age.
Drooping Gray Stems: How to Tell Overwatering Root Rot Apart From True Thirst
Quick Answer: Overwatered lavender wilts exactly like thirsty lavender, because rotted roots can’t drink. Check pot weight and the lower stem bark first. If the pot is heavy and the bark is mushy, it’s rot, not thirst.
- Unpot the plant onto dry newspaper for 24 hours
- Trim any brown, mushy roots
- Repot in a mix with 50% pumice, in clean terracotta
- Hold off watering for several days
Blackening Lower Leaves and Mushy Stems in Humid or Shady Balcony Corners
Botrytis gray mold and crown rot strike when damp foliage sits in still air. Thin crossing interior twigs for airflow, replace any bark mulch with white gravel, and move the pot to the sunniest outer railing edge.
Woody, Split-Open Center Bushes With Green Leaves Only at the Tips
Once the wood turns thick, brown and bark-like, it won’t sprout new buds if cut back hard. Gradually shape the green outer cushion instead.
Better yet, take 3-inch heel cuttings in August and start a fresh young plant.
Spittlebugs (White Frothy Foam on Stems) and Rosemary Beetles
That white “cuckoo spit” hides a harmless meadow spittlebug nymph. Rinse it off with a jet of water from a spray bottle. No pesticide needed.
Rosemary beetles are metallic green and purple. Pick them off by hand in the morning.
lavender in balcony pots FAQs
Why does my potted lavender keep dying within a month of bringing it home?
The classic fatal trio is heavy peat-rich potting soil, a water-catching saucer, and watering on a schedule alongside thirsty flowers. Repotting immediately into a 50/50 potting-mix-and-pumice blend in terracotta solves most early deaths.
Can potted English lavender stay outside on a freezing balcony all winter?
Yes. Compact English cultivars like Munstead and Hidcote, plus Phenomenal, survive to zone 5 (-20°F / -28.9°C) in frost-proof pots. Keep them under an overhang so rain and snow can’t waterlog roots. Spanish and French types (zones 8-10) must come indoors.
How often should I water lavender in a 10-inch terracotta pot on a sunny balcony?
In spring and autumn, water once every 7 to 10 days. During summer heatwaves above 85°F (29.4°C), water deeply every 4 to 6 days. Always wait until the top 3 inches of soil are completely dry.
When is the best stage to cut balcony lavender flowers for drying and sachets?
Harvest in the morning after dew evaporates, when one-third to one-half of the florets on the spike have opened. Snip just above the first pair of full leaves, then hang small bundles upside down in a dark, dry closet.
Key Takeaways
- Lavender in balcony pots needs 6 to 8 hours of direct sun, open airflow and a spot far from damp corners.
- Choose English lavender (‘Munstead’, ‘Hidcote’) for freezing winters; keep Spanish types indoors below zone 8.
- Use unglazed 10 to 12 inch terracotta and a 50/50 potting mix and grit blend with 2 tablespoons of dolomitic lime.
- Plant the crown high, bare-root the peat plug, top-dress with gravel, and skip the saucer.
- Water only after a full dry-down, almost never fertilize, and never cut into bare brown wood.