
Compost Tea for Container Vegetables
Your tomatoes look exhausted in their pots by mid-July. Compost tea for container vegetables can revive them, and it’s simple organic vegetable gardening.
I’m a former community-garden coordinator who now grows on a sunny rooftop terrace in zone 7a. My setup: eight fabric pots (5 to 15 gallons) and two 20-inch planters, all baking in about eight hours of sun.
Table of Contents
The Magic of Compost Tea for Container Vegetables
Short Answer: Compost tea is a liquid brew of finished compost that feeds container plants with soluble nutrients and living microbes. Potting mix starts nearly sterile and runs out of both fast. A regular dose of tea refills the biology, so potted vegetables grow steadier and yield more.
Here’s the problem. Every watering rinses nutrients out the drainage holes. By midsummer, a 10-gallon pot of tomatoes is running on fumes.
Research on disease control is mixed, so I treat tea as a soil booster, not a cure. It works best alongside a light organic container fertilizer. The tea feeds the biology, and the fertilizer feeds the plant.
New to pots? Start with this container vegetable gardening primer for beginners, then come back and brew your first batch.
Understanding Aerated vs. Non-Aerated Compost Tea
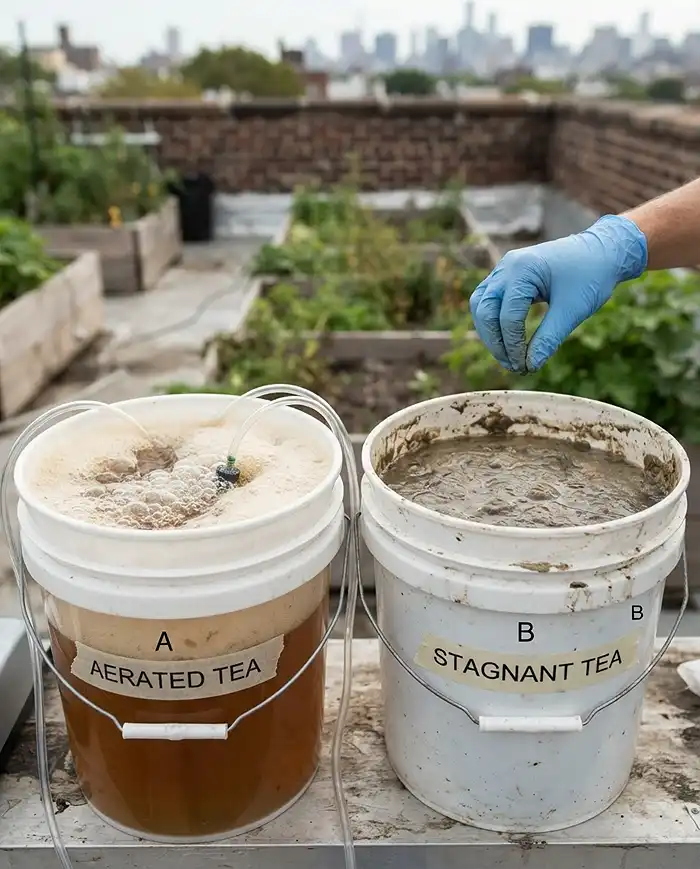
Short Answer: Aerated tea is brewed with an air pump, which keeps oxygen-loving microbes alive. Non-aerated tea is just compost soaking in a bucket, and it can turn foul quickly. For potted vegetables, always choose the aerated version, because roots in small containers can’t recover from a bad batch.
The Benefits of Actively Aerated Compost Tea (AACT)
Short Answer: Actively aerated compost tea [AACT, brewed with constant bubbling] multiplies aerobic [oxygen-loving] bacteria and fungi. These microbes help break organic matter into forms roots can absorb. In a pot with limited soil, that extra biology helps plants get more from every watering.
The air pump does the heavy lifting. Constant bubbles keep oxygen high, so the helpful microbes outcompete the smelly ones.
The Dangers of Anaerobic (Non-Aerated) “Stinky” Tea
Short Answer: Non-aerated tea goes anaerobic [oxygen-starved] within a day or two. The microbes that take over produce sulfur compounds and can harm roots. If your bucket smells like a swamp or a sewer, don’t pour it on your plants.
What happened to me: In July 2023, I steeped compost in a bucket for three days with no pump. I poured it on ‘Sungold’ cherry tomatoes in 10-gallon pots.
Within a week, I’d lost about 14 yellowed leaves. I bought a basic aquarium pump, rebrewed, and the plants recovered. They still gave me roughly 3 pounds of fruit by September.
Essential Gear and Ingredients for Brewing
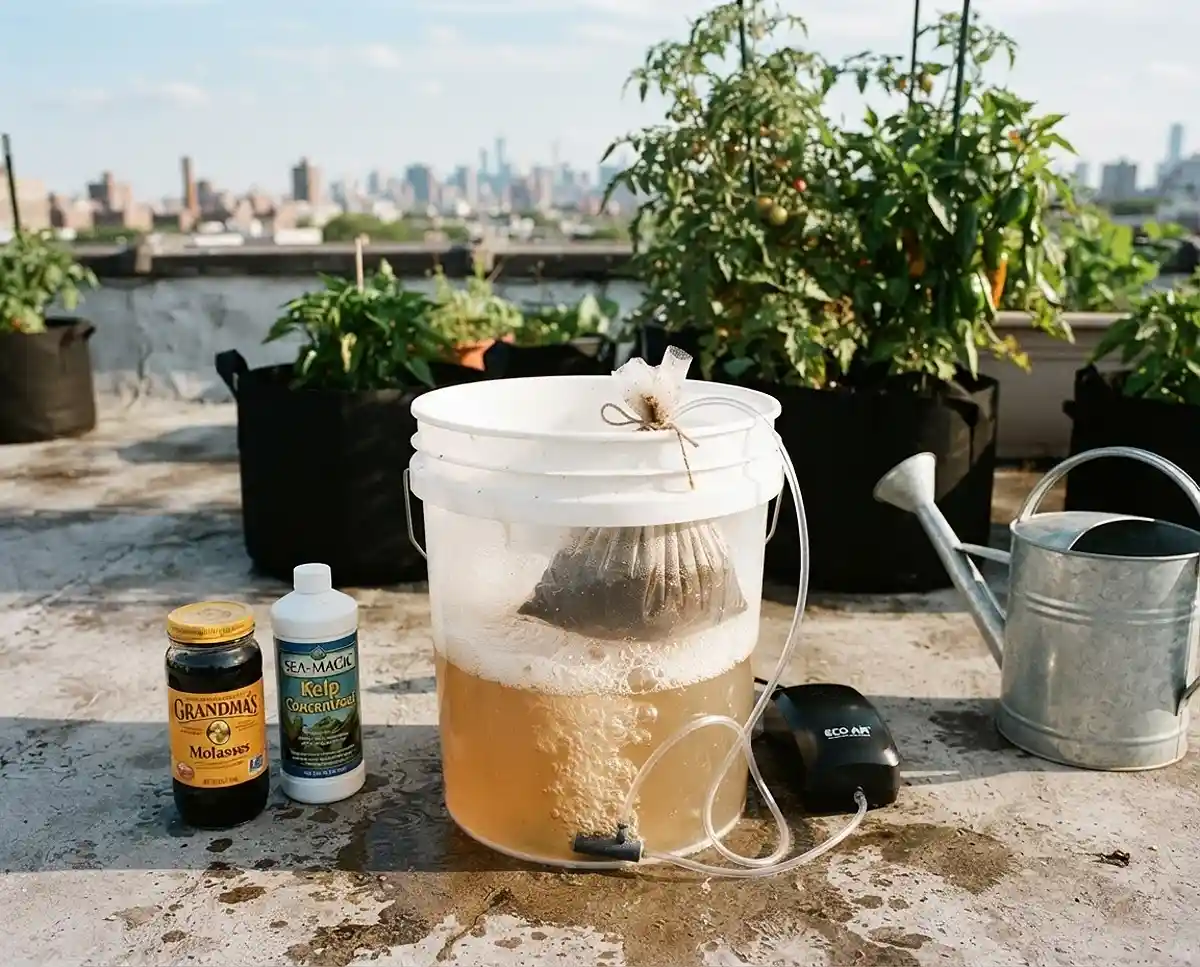
Short Answer: A beginner brewing station needs a 5-gallon bucket, an aquarium air pump with airstones, a fine mesh bag, quality compost or worm castings, and unsulfured molasses. Everything fits in one balcony storage bin. Skip fancy brewers until you’ve made a few batches.
- 5-gallon food-grade bucket
- Aquarium air pump (rated for a 20-gallon tank) with two airstones
- Fine-mesh nylon brew bag or paint-strainer bag
- 2 to 3 cups of mature compost or worm castings
- Unsulfured molasses and liquid kelp
Short on space? These beginner small-space gardening tips help you carve out a brewing corner.
| Ingredient | Amount per 5 gallons | Its job |
|---|---|---|
| Mature compost or castings | 2 to 3 cups | Source of microbes |
| Unsulfured molasses | 2 tablespoons | Feeds bacteria |
| Liquid kelp | 1 tablespoon | Supports fungi |
| Dechlorinated water | 5 gallons | Keeps microbes alive |
Selecting High-Quality Compost and Worm Castings
Short Answer: Use mature, earthy-smelling compost or worm castings. Your tea is only as good as what goes in the bag. Avoid fresh manure and half-finished piles, which can carry pathogens. Local compost or your own bin is usually livelier than bagged products.
Squeeze a handful. It should smell like forest soil and crumble easily. If it smells sour or ammonia-sharp, keep composting it.
Air Pumps, Brew Bags, and Dechlorinated Water
Short Answer: Choose an aquarium pump rated for a 20-gallon tank, two airstones, and a fine-mesh nylon bag. Pair them with dechlorinated water. This setup makes vigorous, rolling bubbles that keep the whole bucket oxygenated and the compost solids contained.
The bag matters more than you’d think. Loose compost clogs sprayers and leaves grit on your leaves.
Microbial Food Sources: Unsulfured Molasses and Kelp
Short Answer: Unsulfured molasses feeds bacteria so they multiply fast, while liquid kelp supports beneficial fungi. Use 2 tablespoons of molasses and 1 tablespoon of kelp per 5 gallons. More isn’t better. Extra sugar burns through oxygen and tips the brew toward stink.
Step-by-Step Guide to Brewing Compost Tea at Home
Short Answer: Brewing takes three steps: dechlorinate your water for 24 hours, load the compost bag and start the airstones, then add molasses and brew for 24 to 48 hours. Plan ahead, because the water needs a full day before the real brewing starts.
Step 1: Dechlorinating Your Tap Water
Short Answer: Fill your bucket with 5 gallons of tap water and run the air pump for 24 hours. Bubbling lets chlorine escape, so it won’t kill your microbes. If your city uses chloramine, which doesn’t bubble off, use rainwater or a dechlorinating product.
Step 2: Assembling the Brew Bag and Aeration System
Short Answer: Put 2 to 3 cups of compost in the mesh bag and tie it shut. Drop it in the bucket and set the airstones near the bottom. You want vigorous, rolling bubbles across the whole surface, not a few lazy streams.
Step 3: Adding Molasses and the 24 to 48-Hour Brew Cycle
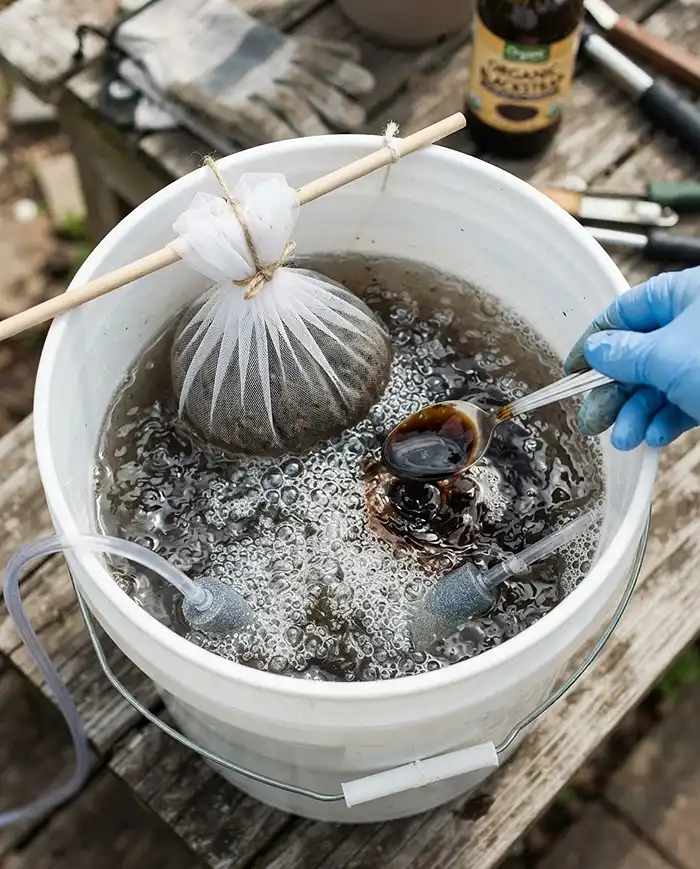
Short Answer: Stir in 2 tablespoons of unsulfured molasses and brew at room temperature (about 65 to 75°F) for 24 to 48 hours. The tea is ready when it smells earthy and slightly sweet. Squeeze the bag, then use the tea right away.
Cover the bucket with a screen or a loose lid. Keep it out of direct sun, which heats the water and drains oxygen.
How to Apply Compost Tea to Potted Vegetables
Short Answer: Dilute finished tea with water and pour it on the soil as a root drench [pouring liquid directly onto the potting mix]. You can also strain it and spray the leaves. Soil drenching is the simplest, most reliable method for container vegetables.
Root Drenching: Dilution Ratios and Timing
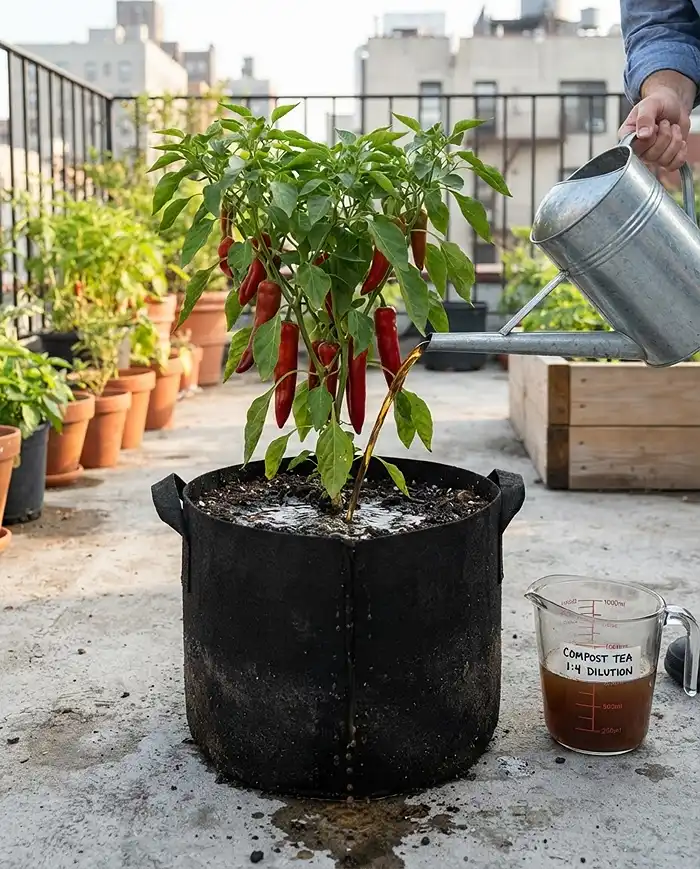
Short Answer: Mix one part tea with four parts water (a 1:4 ratio). Pour it slowly over the soil until it drains from the bottom holes. Water the pot lightly first, and apply in the morning or evening to protect roots from heat.
What happened to me: In spring 2024, I drenched ‘Jimmy Nardello’ peppers in 5-gallon pots every two weeks from transplant. The year before, each plant gave me about 11 peppers. That season, I counted 17 per plant.
Tomatoes and peppers are heavy feeders, so they respond best. Leafy greens need less.
Foliar Feeding: Spraying Leaves for Disease Resistance
Short Answer: Foliar feeding [spraying tea onto leaves] means straining the tea through fine mesh and misting leaf tops and undersides. The microbes may help crowd out mildew spores, though research is mixed. Spray in early morning, and never spray in blazing midday sun.
What happened to me: In summer 2025, powdery mildew hit my ‘Black Beauty’ zucchini in a 15-gallon pot. Tea sprays slowed it a little, but pruning three crowded leaves and improving airflow did most of the work.
For safety, I stop spraying edible leaves two weeks before harvest. I always wash produce and my hands.
Seasonal and Regional Feeding Schedules
Short Answer: Feed every two weeks during early vegetative growth, then weekly once plants set heavy fruit in midsummer. Cut back in cool fall weather when growth slows. Your frost dates set the calendar, so adjust the timing to your own zone.
As of 2026, my last spring frost in zone 7a lands in mid-April and my first fall frost arrives around late October. Balcony growers in colder spots can use this balcony gardening guide for beginners to plan timing.
Feeding Rhythms: Spring Growth vs. Peak Summer Fruiting
Short Answer: Early growth needs gentle, biweekly tea to build roots and leaves. Peak fruiting needs weekly tea because plants drink more and flush nutrients faster. Taper off as nights cool in autumn. Use the table below as a starting point.
| Stage | Typical timing (zone 7a) | Frequency |
|---|---|---|
| Transplant and early growth | Late April to June | Every 2 weeks |
| Flowering and heavy fruiting | July to August | Weekly |
| Late-season slowdown | September to frost | Every 2 to 3 weeks |
Common Problems & Solutions
Short Answer: Most compost tea problems come from low oxygen or too much sugar. Smelly tea, weak bubbles, and a slimy bucket all point to the same fix: more air and less molasses. When in doubt, dump the batch and start fresh.
Foul, Swampy Smells Ruining the Brew
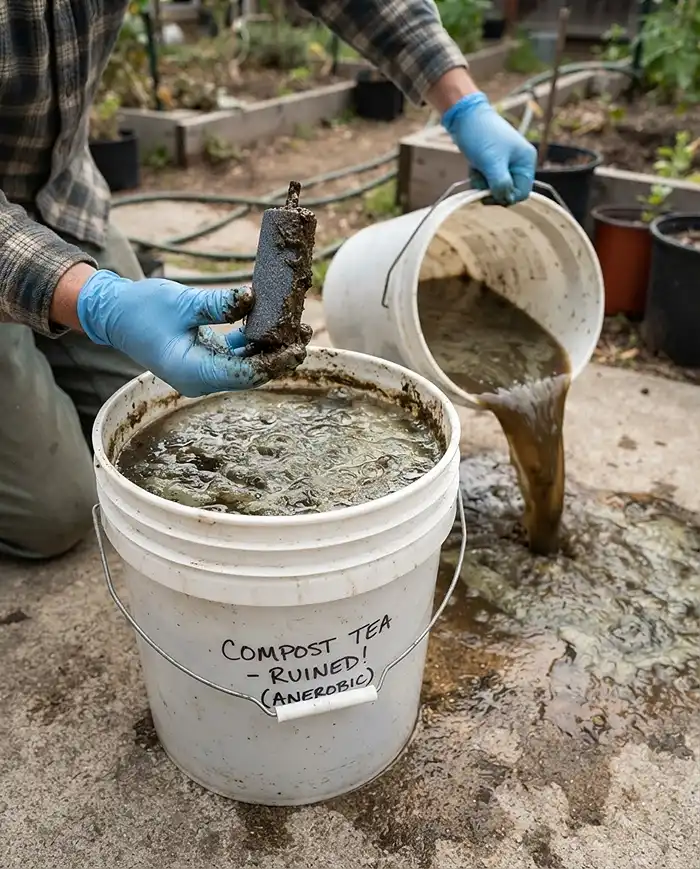
Short Answer: A putrid, sewage-like smell means the brew went anaerobic. The usual causes are weak airflow or too much molasses. Don’t use that batch. Pour it out on bare ground away from your plants, then clean the bucket and start again.
- Check that the pump is running and the airstones aren’t clogged
- Measure molasses carefully, no more than 2 tablespoons per 5 gallons
- Scrub the bucket with hot water before every batch
Frothy Foam and Scum on Top of the Bucket
Short Answer: A thick, frothy head of foam during brewing is a good sign. It means microbes are reproducing and proteins are breaking down. A healthy tea foams, then settles. Only worry if the foam smells rotten.
The first time I saw it, I panicked and almost dumped a perfect batch. Now I just give it a sniff and move on.
Frequently Asked Questions
Can compost tea burn my container vegetables?
Properly brewed and diluted compost tea is very gentle, so nutrient burn is unlikely. Burn usually comes from synthetic fertilizers or concentrated salts. Still, dilute it at 1:4 and never use a batch that smells sour or rotten.
How long does brewed compost tea last before it goes bad?
Use it within 4 to 6 hours of turning off the air pump. Without bubbles, the microbes use up the oxygen and the tea turns anaerobic. Pour out any leftovers instead of storing them.
Can I use commercial bagged compost to make tea?
You can, but results vary. Many bagged composts are heat-sterilized and contain few living microbes. Fresh worm castings or homemade compost usually make a livelier tea.
How often should I put compost tea on tomatoes in pots?
Apply it every two weeks during early growth, then weekly once the plants set heavy fruit. Taper off to every two or three weeks as nights cool in fall. Water the pot lightly before drenching.
Should compost tea go on the soil or on the leaves?
Soil drenching is the simplest and most reliable method for container vegetables. Foliar sprays are optional and mostly target leaf surfaces. If you spray, do it in the morning and wash edible leaves before eating them.
Is compost tea safe to use on vegetables I plan to eat?
It can be, if you use mature compost, clean equipment, and fresh batches. Keep tea off the parts you’ll eat when possible, wash produce well, and wash your hands after brewing. Skip foliar sprays on salad greens close to harvest.
Quick Recap
- Brew with an air pump, and never use stagnant, smelly tea.
- Dechlorinate water for 24 hours, then brew 2 to 3 cups of compost for 24 to 48 hours.
- Dilute 1:4 and drench the soil, weekly at peak fruiting.
- Use finished tea within 4 to 6 hours of stopping the pump.
- Make compost tea for container vegetables part of your routine, alongside a light container fertilizer.