
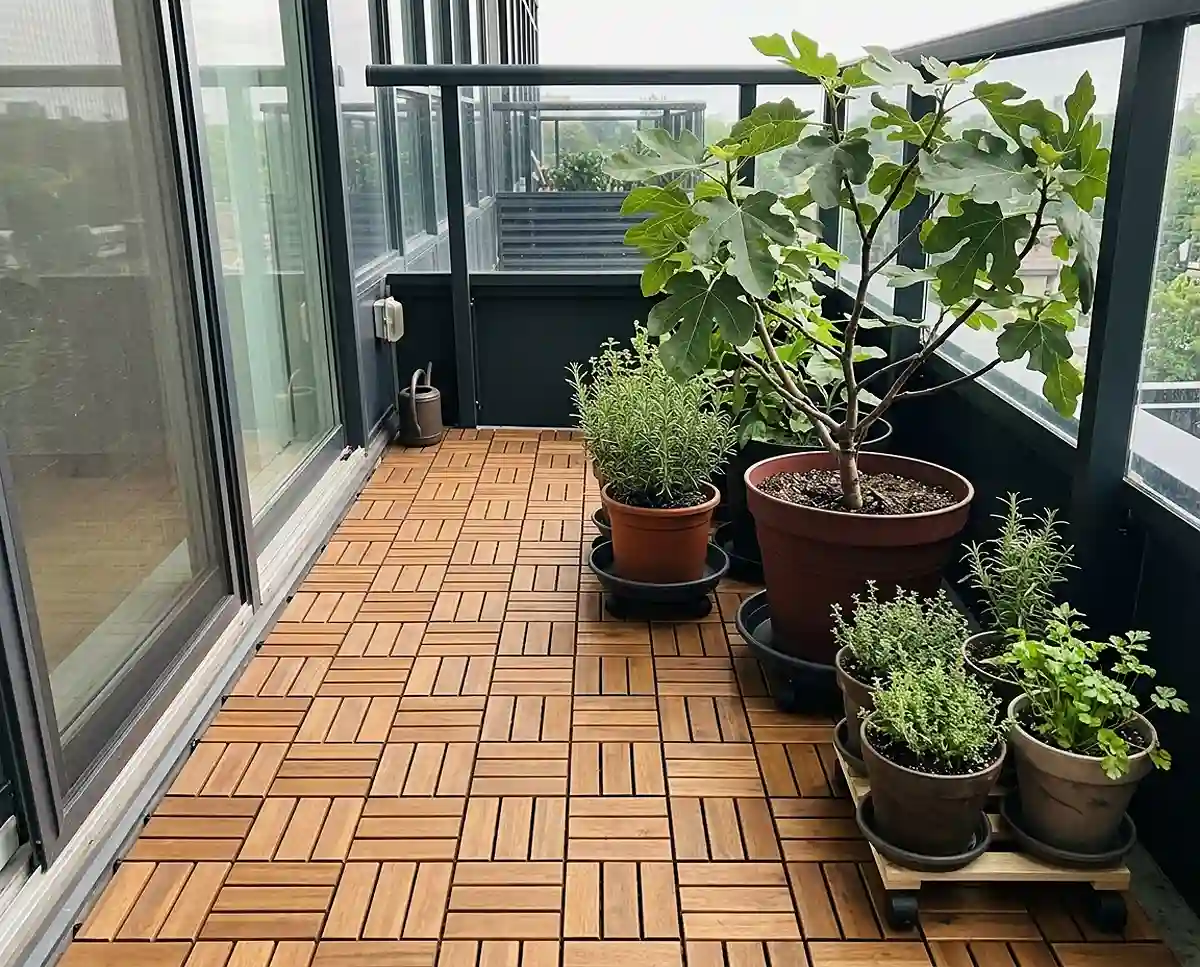
Balcony Planters Leaking Downstairs?
Balcony planters leaking downstairs? Here’s how to stop muddy drips and fix your balcony drainage without plugging holes or rotting roots. I learned this after a neighbor knocked on my door holding a brown-spotted towel.
I grow tomatoes, herbs, and figs on a north-facing balcony in zone 6b. Everything below comes from three summers and two winters out there, and still works as of the 2026 season.
Table of Contents
Why Balcony Planters Leak Downstairs (And Why Plugging Holes Backfires)
Every healthy pot does one thing: it lets gravity pull excess water out the bottom. On slatted wood, perforated metal, or concrete balconies, that water has nowhere to go except through the gaps. Even solid slabs slope toward the edge, so runoff drips off the railing line.
The tempting fix is plugging the holes. Don’t. A sealed pot becomes a bathtub, and roots run out of oxygen. Anaerobic bacteria (microbes that thrive without air) start rotting them. The plant wilts despite soaked soil, tricking you into watering more.
Real Example: My first summer, I sealed a 12-inch pot’s holes with silicone to protect the floor. My ‘Sungold’ tomato yellowed in nine days, and the roots smelled sour when I pulled it.
A gravel layer in the bottom doesn’t help either. Water pools above the coarse layer and pushes the soggy zone closer to the roots. The University of Illinois Extension explains why drainage layers in pots backfire.
The Hydrophobic Soil Channeling Effect vs. True Soil Saturation
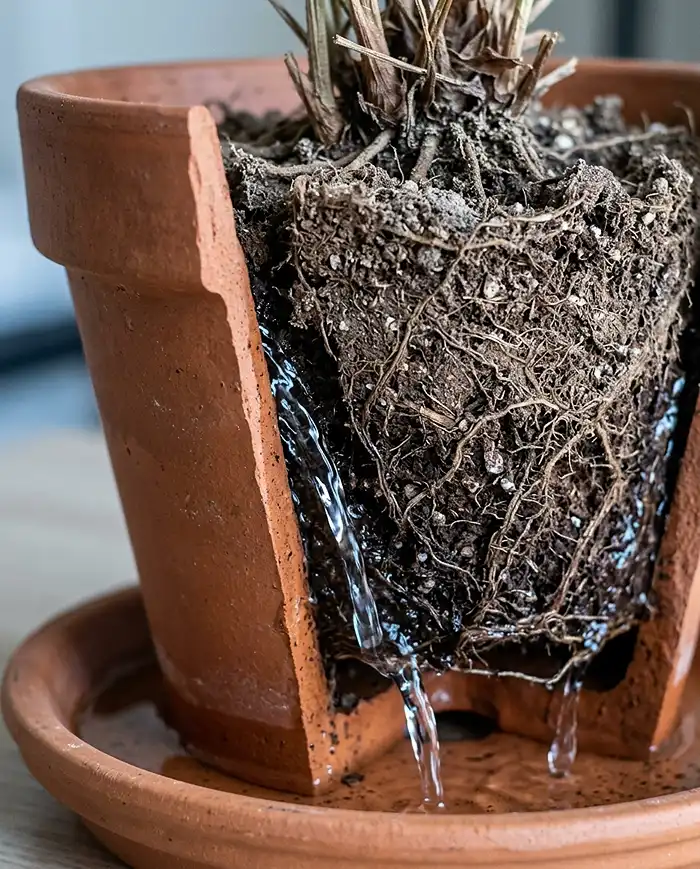
Peat-based potting mix shrinks away from the pot wall when it dries, and the dry peat turns water-repellent (hydrophobic). Pour water on top and most of it races down that gap and out the bottom. In my tests, roughly 80% ran straight through a bone-dry 12-inch pot.
True saturation looks different. Moist soil swells, closes the gap, and holds water. Keeping soil evenly moist is half your containment plan.
Evaluating Your Balcony Decking, Scupper Drains, and HOA Rules
Start with a bucket test. Pour a gallon of water on the floor and watch where it travels. Note the slope and any scuppers (small drain openings along the edge). Then mark these drip zones:
- Railing ledges where boxes sit directly over the edge
- Slatted floorboards with gaps wider than 1/4 inch
- Scupper openings, which you should never block
Check your lease or HOA rules before changing anything. The building owns the balcony drainage system, so keep it clear. For more renter-safe ideas, see these renter-friendly balcony planter solutions.
Essential Containment Gear, Hardware, and Soil Amendments
Zero-drip gardening comes down to three jobs: catch what drains, filter what leaves, and hold more water in the soil. That’s the heart of no mess balcony gardening.
Deep-Lip Heavy-Duty Saucers, Plant Caddies with Reservoirs, and Pot Feet
Quick Answer: The best containment is a vinyl saucer at least 3 inches deep and 2 inches wider than the pot, with pot feet inside it. The feet lift the root ball above standing water, so roots never sit wet.
| Gear | Best For | Watch Out For |
|---|---|---|
| 3-inch deep vinyl saucer | Pots 10 to 16 inches wide | Still overflows in heavy rain |
| Wheeled caddy with reservoir | Heavy 14 to 18 inch planters | Wheels can mark soft decking |
Real Example: Last June, my 14-inch ‘Chicago Hardy’ fig sat in a flat 1-inch saucer. Two storms later, it overflowed onto the unit below. A 3-inch saucer with pot feet fixed it.
Sub-Irrigated Self-Watering Planters and Capillary Wick Systems
Self-watering planters sit the soil above a sealed reservoir. A wick or soil column pulls water upward as roots need it, so there’s no open bottom drain to leak.
The weak spot is the overflow spout, a small hole just above the maximum water line. In a downpour, it dribbles. Plug it with a rubber stopper before storms, or run a tube into a jug.
For over-the-railing boxes, the Lechuza Balconera has a sealed reservoir and is built for railings.
Sponge-Like Soil Amendments: Coco Coir, Vermiculite, and Wool Pellets
Soil that holds water means fewer drips. This is the mix I use in every 12-inch pot. It makes about 2.5 gallons:
- 6 quarts peat-free potting mix
- 2 quarts rehydrated coco coir
- 1 quart coarse vermiculite
- 1 quart composted bark fines
- 1 cup sheep wool pellets
Rehydrate the coir in warm water until it fluffs, then squeeze it until it stops dripping. Mix everything damp, and don’t pack it down, since wool pellets swell. Rinse the bark fines first to reduce tannin leaching.
Step-by-Step Guide to Leak-Proofing Your Balcony Pots
Retrofitting a leaky pot takes about 20 minutes. Four steps cover the hardware. The fifth is the watering routine in the next section. Do all five, and your balcony drainage becomes a closed loop.
Step 1: Installing Mesh Screens and Landscape Fabric to Stop Muddy Washout
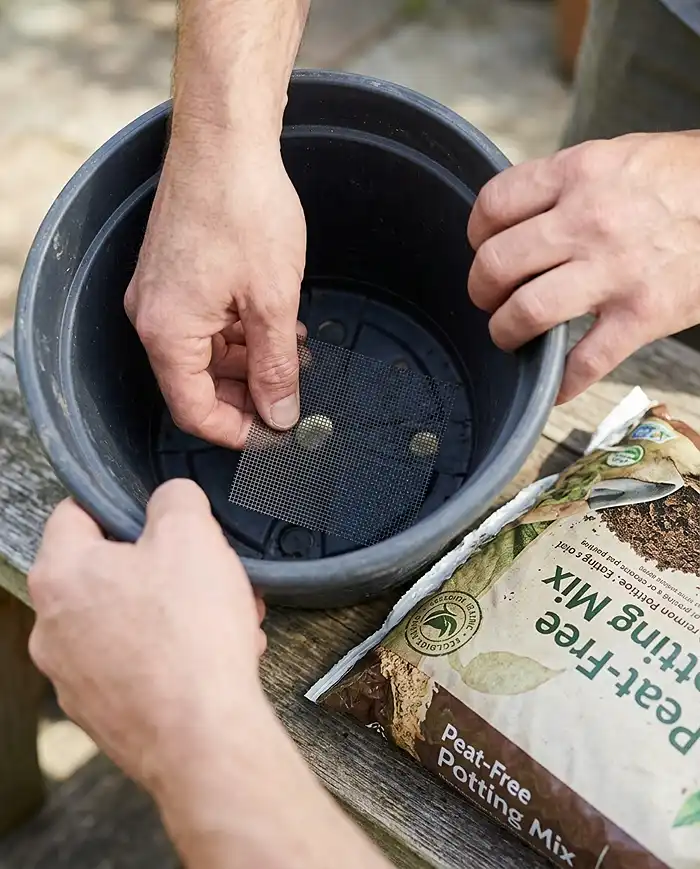
Quick Answer: Cover each drainage hole with fiberglass window screen or non-woven geotextile fabric, then add soil directly on top. The screen traps fine soil while water passes. Skip gravel, which creates a perched water table (a soggy layer above coarse material).
- Cut a square 2 inches larger than each hole.
- Lay it flat inside the pot so it fully covers the hole.
- Add potting mix directly on top, with no gravel layer.
- Water slowly and check that the saucer collects clear water, not mud.
Step 2: The “Pebble Tray + Riser” Setup for Healthy Air-Pruned Roots
Fill a wide, deep saucer with LECA clay pebbles (lightweight expanded clay balls), then set the pot on rubber pot feet above them. Keep water at least a half-inch below the pot’s base. Excess water then collects safely instead of wicking back into the roots.
Slotted plastic pots work well here. Roots stop at the slots when they meet air (air pruning), which builds denser root balls.
Step 3: Modifying Hanging Baskets and Coco-Lined Railing Troughs
Coco-fiber liners are porous, so wind carries water over the edge. Here’s the hack:
- Slide a plastic nursery liner inside the coco liner.
- Poke three or four 1/4-inch holes in the plastic bottom.
- Clip a drip catcher under hanging baskets.
- For railing troughs, slide a fitted pan under the liner and hide it behind the front lip.
Step 4: Installing Balcony Floor Mats, Duckboard Tiles, and Gutter Diverters
Interlocking deck tiles with drainage channels underneath keep spills from falling through slats. Point the channels toward the scupper, and never cover it. Silicone utility mats under pots catch splashes on solid floors. A vinyl gutter diverter along the low edge can guide runoff to the scupper, with landlord approval.
Browse more options in this guide to balcony planter solutions for renters.
Mastering No-Drip Watering Techniques and Seasonal Adjustments
Perfect gear still fails if you flood it. Precision watering gives plants a full drink with almost no runoff.
Bottom-Watering, Ice-Cube Slow Drip, and Blumat Ceramic Cones
- Bottom-watering: Pour 1 cup at a time into the saucer and wait 20 minutes. Plants pull water up by capillary action (water rising through soil).
- Ice cubes: Set 3 cubes on the soil of pots 6 inches or smaller. They melt slowly, so soil absorbs the water.
- Blumat ceramic cones: Bury the porous cone and connect it by tube to a water bottle. It releases moisture only as the soil dries.
The Two-Stage “Pulse Watering” Method and Seasonal Volume Chart
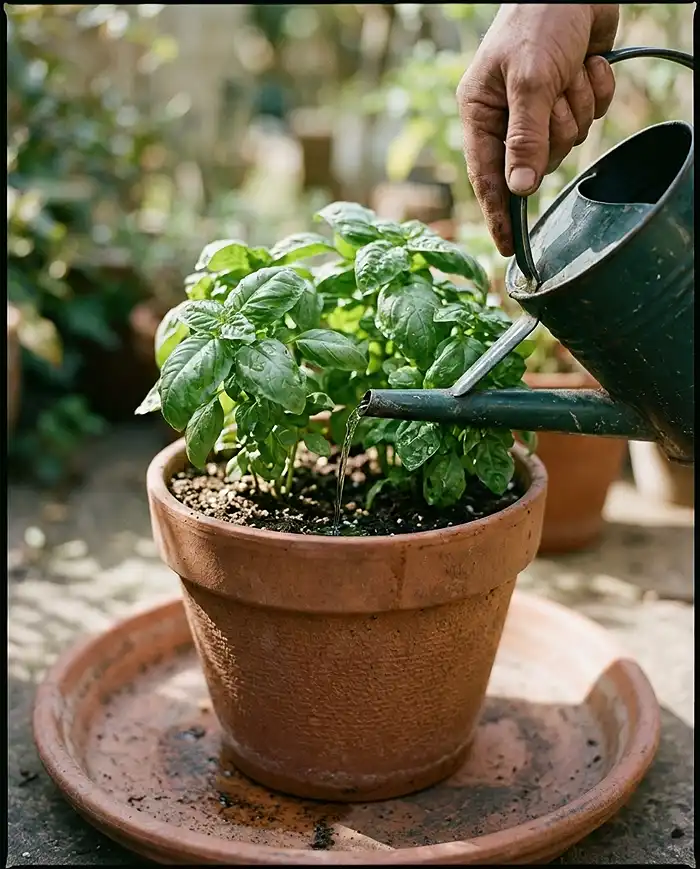
Apply about one quarter of the total water first. Wait 10 minutes while dry soil swells and the wall gap closes. Then give the main soak slowly. Pulsing my ‘Genovese’ basil last August kept its saucer nearly dry.
Use this chart as a starting point for moderately dry soil, then adjust with the finger test (push a finger 2 inches into the soil).
| Pot Size | Soil Volume | Summer (hot, windy) | Spring/Fall |
|---|---|---|---|
| 8 inch | About 1.5 gal | 1.5 cups | 1 cup |
| 10 inch | About 2.5 gal | 2.5 cups | 1.5 to 2 cups |
| 12 inch | 3.5 to 4 gal | 3 to 4 cups | 2 to 3 cups |
| 14 inch | About 6 gal | 5 to 6 cups | 3 to 4 cups |
| 16 inch | About 9 gal | 7 to 8 cups | 5 to 6 cups |
Managing Heavy Rainstorms and Winter Freeze-Thaw Overflow by Zone
Before a torrential summer storm, pull saucers off or tip them out, and slide pots against the wall under any overhang. In freezing weather, ice expands, so frozen saucers can crack ceramic pots and freeze root balls solid.
| Zone | Action | Timing |
|---|---|---|
| 3 to 4 | Remove saucers, shelter ceramic pots | Early October |
| 5 to 6 | Empty saucers, shelter ceramic pots | Before the first hard freeze (28°F) |
| 7 | Empty saucers before cold snaps | Whenever lows fall below 25°F |
Common Problems & Solutions
Once you add saucers and trays, a new set of problems shows up. Standing water, stains, and salt crusts are the big three.
Standing Water in Saucers Causing Root Rot and Mosquito Breeding
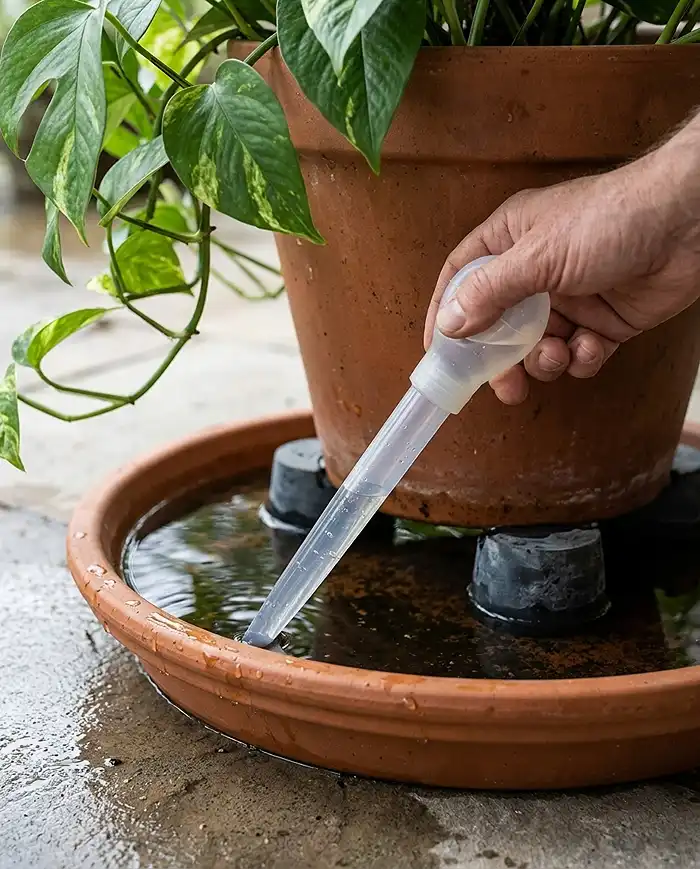
Overflowing trays cause root rot and breed mosquitoes. Empty them within an hour of watering. A large turkey baster clears a saucer in about 10 seconds. A battery-powered siphon pump handles bigger caddies.
For deep reservoirs you can’t empty daily, sprinkle Mosquito Bits (Bt israelensis, a bacteria that kills mosquito larvae) following the label rate.
Brown Tannin and Rust Stains on Balcony Concrete and Neighbor Ceilings
Bark and many fertilizers leach dark, tannin-rich water (brown liquid from plant material). Iron-based feeds and rusty metal saucers add orange stains. Both mark concrete and neighbor ceilings. Here’s how to handle them:
- Use pot feet to keep pots off the floor.
- Seal bare concrete with clear acrylic sealer (get landlord approval).
- Scrub existing stains with oxygen-bleach (sodium percarbonate) and a stiff brush, then rinse into a bucket.
Fertilizer Salt Buildup When You Can’t Flush Pots Outdoors
White crusting on the soil or rim, plus brown leaf tips, signals salt buildup. Outdoor flushing would drip downstairs, so carry pots to the bathtub twice a year, in spring and late summer.
Run water slowly through the soil, using about twice the pot’s volume, and let it drain fully. Then switch to gentle worm-casting tea to keep salts from returning.
Frequently Asked Questions
Here are the questions urban gardeners ask most about drips and neighbors.
Can I use planters without drainage holes on my balcony to stop leaks?
Don’t plant directly into a pot without holes, because roots sit in stagnant water and rot. Keep the plant in a plastic nursery pot with holes, nested inside a solid decorative outer pot. Lift the inner pot out to drain after watering, and the outer pot catches the drips.
How do I rehydrate bone-dry balcony soil without water pouring straight through?
Submerge the root ball in a bucket or deep saucer of water mixed with two drops of pure castile soap, a wetting agent. Leave it for about 30 minutes, until air bubbles stop rising. Then let it drain fully before returning it to its saucer.
What is the cleanest way to water hanging plants on an apartment balcony?
Clip snap-on clear plastic drip catchers to the bottom of hanging baskets, or switch to self-watering hanging pots. The simplest option is taking the basket down onto a floor towel and bottom-soaking it. Let it drip 10 minutes before rehanging.
How much water should I give a 12-inch pot so it doesn’t overflow the saucer?
A standard 12-inch container holds roughly 3.5 to 4 gallons of soil. When moderately dry, it absorbs about 3 to 4 cups (24 to 32 oz) of water per watering without overflowing a standard saucer. Use the pulse method: a small dose first, then the main soak.
Key Takeaways
- Fixing balcony planters leaking downstairs means catching and filtering water, never plugging drainage holes.
- Use 3-inch deep saucers, pot feet, and mesh screens over holes. Skip the gravel.
- Pre-moisten dry soil and pulse-water to cut runoff in the first place.
- Empty saucers before storms and hard freezes, and treat standing water with Bt Mosquito Bits.
- Flush fertilizer salts in the bathtub twice a year.