
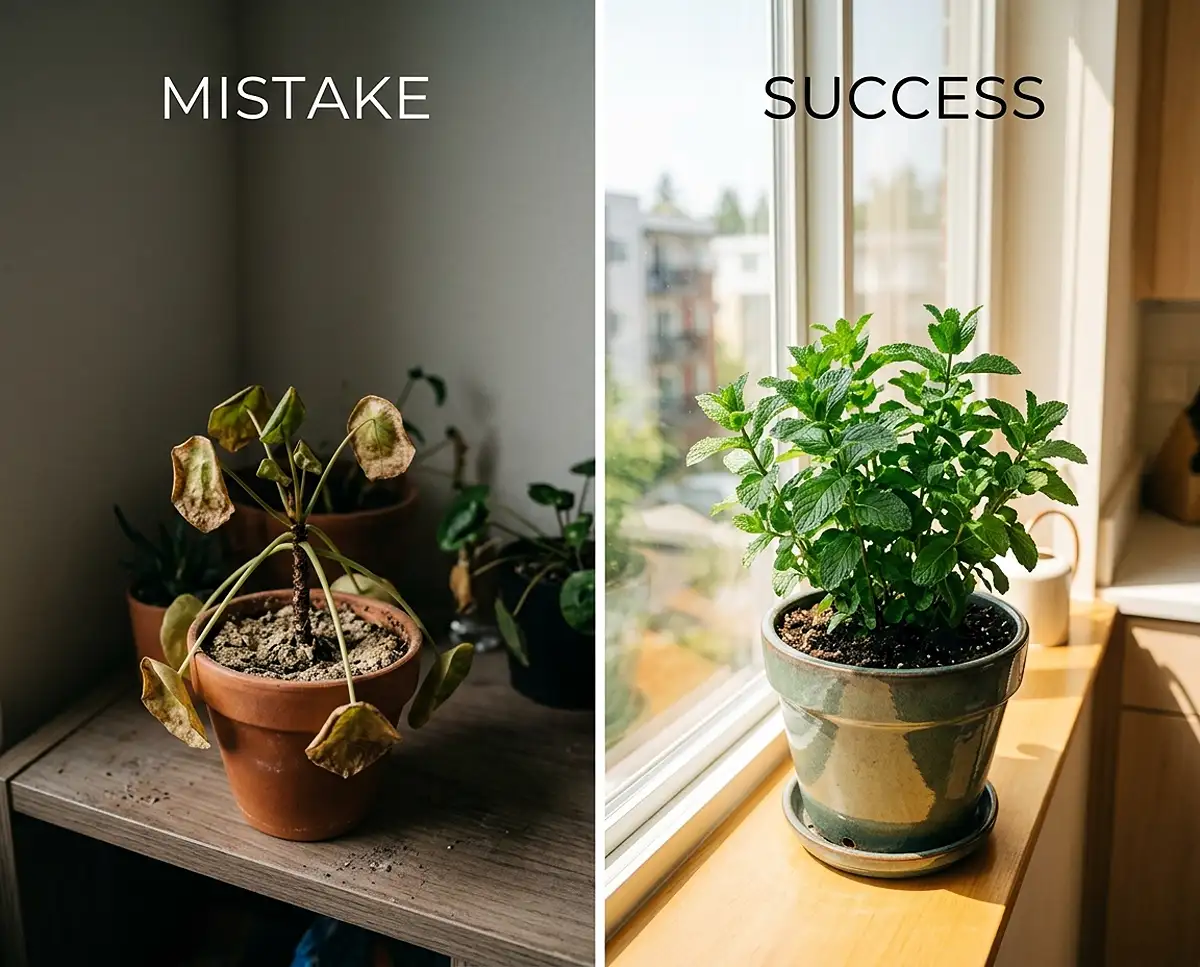
Apartment Gardening Mistakes for Beginners
Apartment gardening mistakes for beginners are more common than you might think—and they kill more plants than pests ever will. I’ve killed a fiddle leaf fig, two basil plants, and one very expensive olive tree learning this the hard way on my Zone 6b, north-facing balcony.
The good news: almost every apartment gardening failure traces back to the same handful of errors. Fix these, and your small space gardening setup goes from a plant graveyard to something that actually produces.
Table of Contents
Why Apartment Gardening Fails Differently Than Traditional Gardening
Ground soil acts as a buffer. It holds extra water, regulates temperature, and lets roots wander for nutrients. Containers have none of that. A pot dries out or floods in hours, not days.
Add limited light from windows or a shaded balcony, plus poor airflow between stacked plants, and you get failure points beginners never see coming until leaves start dropping.
Mistake #1: Choosing the Wrong Plants for Your Actual Light Conditions
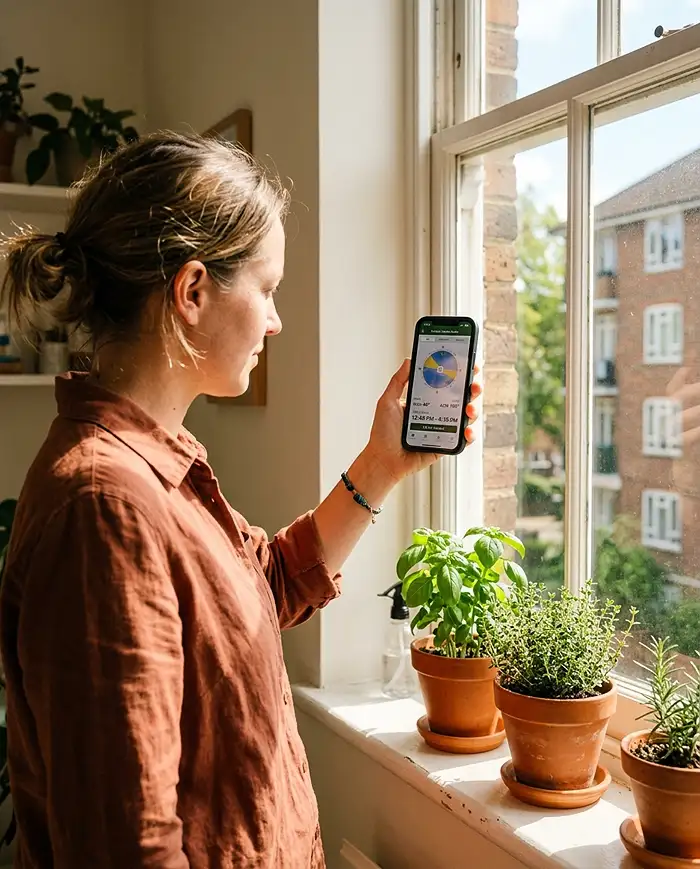
Quick Answer: Most apartment dwellers overestimate their light by one full category, and it’s the single biggest reason for urban gardening failure. A window that feels bright to your eyes may only deliver 2-3 hours of direct sun.
Here’s how light categories actually break down:
- Low light: No direct sun, bright enough to read without a lamp. Suits pothos, ZZ plants, snake plants.
- Medium light: 2-4 hours of direct sun, usually east-facing. Suits herbs like mint and parsley.
- High light: 6+ hours direct sun, typically south or west-facing. Suits tomatoes, peppers, most flowering annuals.
Real Example: My first apartment tomato attempt was on an east-facing sill I swore was “full sun.” It got three hours of direct light. The plant stretched a foot tall with barely any stem thickness and never set fruit.
Pro Tip: Track actual sun hours with your phone camera for one full day before buying a single plant — memory lies, timestamps don’t.
Mistake #2: Overwatering Out of Anxiety or Habit
Why More Water Isn’t Better in Containers
New gardeners water on a schedule because it feels responsible. But container soil volume is tiny compared to a garden bed, and most pots drain slower than people expect.
Water on top of already-moist soil pushes out oxygen, and roots suffocate before they rot. By the time leaves yellow, damage is often already done.
Check moisture before you water, every time — not because you watered yesterday, but because today’s soil tells the real story.
The Weight and Finger Test for Proper Watering Timing
Quick Answer: Lift the pot to gauge weight, or push a finger 2 inches into the soil. If it’s dry at that depth, water; if it’s still moist, wait another day or two.
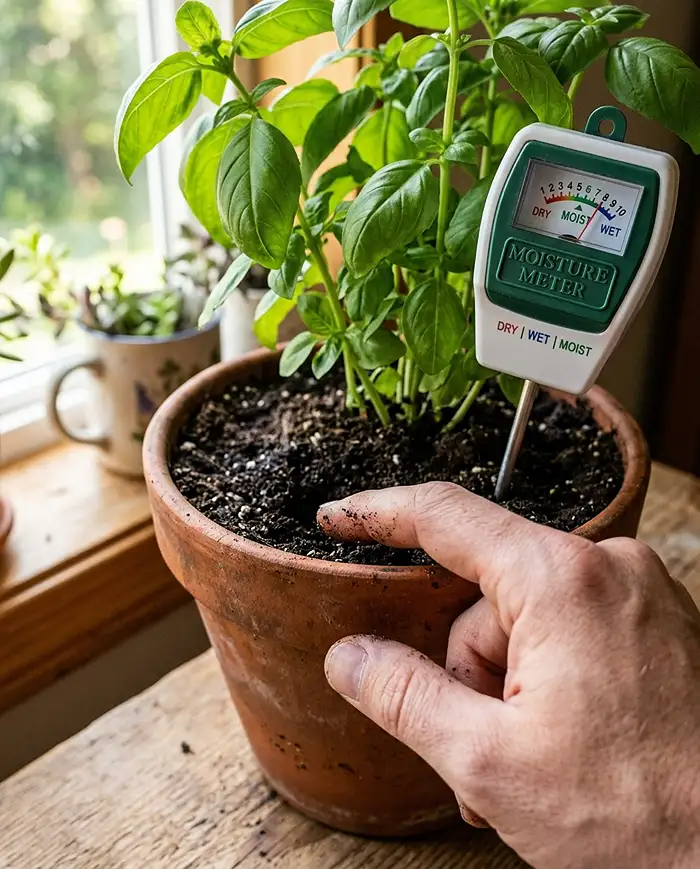
Both methods work better than any fixed schedule:
- Lift the pot right after watering to learn its “full” weight, then compare later
- Insert a finger to the second knuckle — clean and dry means water now
- A cheap moisture meter (around $8-12) removes the guesswork entirely
Real Example: I lost a rosemary plant to root rot my first spring because I watered every Sunday regardless of soil condition. Rosemary wants to dry out almost completely between waterings — a fixed schedule was its death sentence.
Mistake #3: Using the Wrong Soil or Reusing Garden Dirt
Quick Answer: Regular garden soil compacts hard in a container, choking roots and draining poorly. Always use a quality potting mix with perlite or vermiculite for container growing.
Garden soil is built for open ground where roots and worms keep it loose. Trapped in a pot, it packs down within weeks, turning nearly solid after a few waterings.
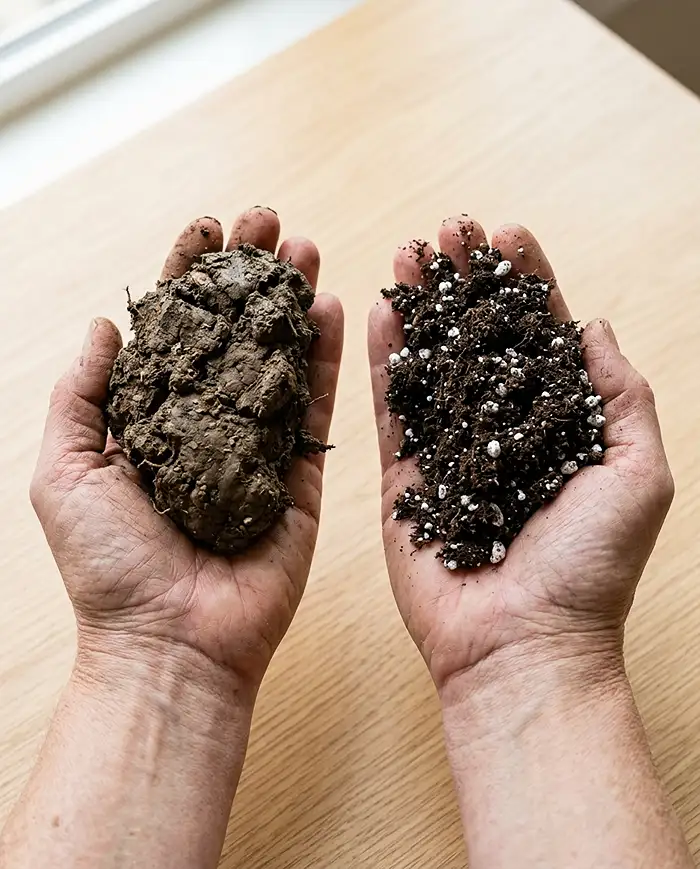
A good potting mix stays light and airy because it’s built from peat, coco coir, bark, and perlite instead of dense mineral soil. The University of Maryland Extension’s growing media guide breaks down exactly why this matters for root health.
Pro Tip: If a bag feels heavy and gritty rather than light and fluffy, put it back — that’s a sign it’s cut with topsoil.
Mistake #4: Ignoring Drainage Holes and Pot Sizing
Skipping Drainage Leads to Root Rot
Drainage holes let excess water escape instead of pooling at the bottom of the pot. Without them, roots sit in standing water and rot within days, even if you’re watering correctly otherwise.
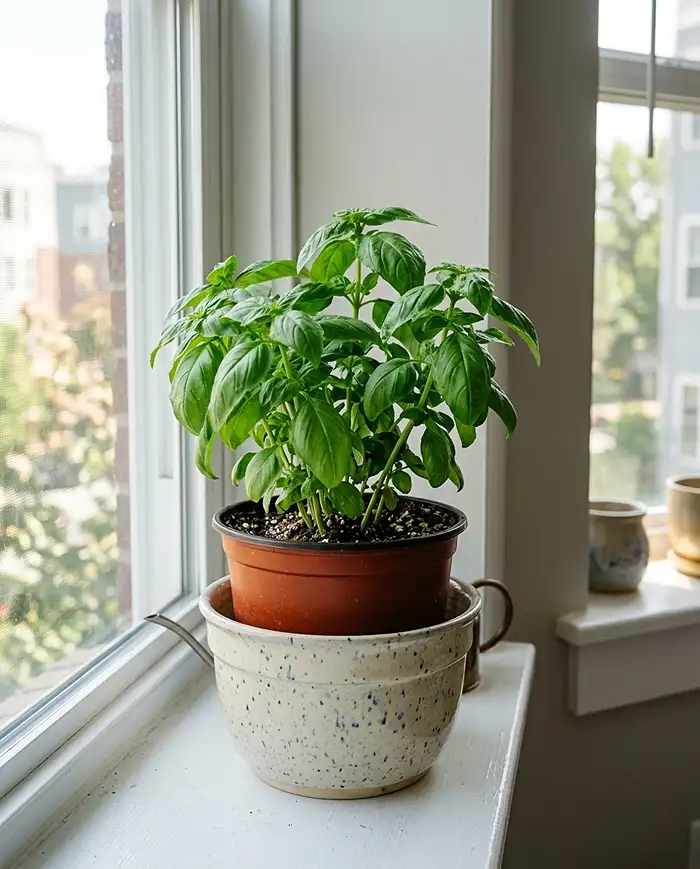
Love a decorative pot with no holes? Keep the plant in its plastic nursery pot and set that inside the decorative one as a liner — best of both looks.
Just remember to pour out any water that collects in the outer pot after watering, since it still acts as a hidden reservoir.
Choosing Pots Too Small for Root Growth
Quick Answer: Undersized pots root-bind plants, stunting growth and forcing constant watering since there’s no soil volume left to hold moisture.
| Plant Type | Minimum Pot Size | Watch Out For |
|---|---|---|
| Herbs (basil, thyme) | 6-8 inch diameter | Circling roots at the surface |
| Tomatoes, peppers | 5-gallon container | Undersized pots stunt fruiting |
| Leafy greens, lettuce | 8-10 inch, 6 inch deep | Shallow roots dry out fast |
| Dwarf citrus, small shrubs | 14-16 inch diameter | Repot every 2-3 years |
Real Example: I kept a Genovese basil in a 4-inch nursery pot for two months because “it looked fine.” It bolted early and tasted bitter — the roots simply ran out of room to support real growth.
Mistake #5: Overcrowding Plants in Limited Space
Quick Answer: Packing pots together restricts airflow, which invites fungal disease and pests, while plants compete for the same light, water, and nutrients.
Small space gardening tempts everyone to squeeze in “just one more” pot. But plants touching leaves trap humidity between them, which is exactly what powdery mildew and spider mites love.
Leave a few inches of breathing room between containers, even if it means fewer plants than your balcony could technically fit.
Pro Tip: If leaves from two different pots are touching, they’re too close — prune back or rearrange before disease shows up.
Mistake #6: Neglecting Fertilization in Container Gardens
Quick Answer: Container plants exhaust available nutrients within weeks since watering constantly flushes them out. A consistent feeding schedule prevents the pale, stunted look of nutrient deficiency.
Garden beds get slow nutrient replenishment from surrounding soil and organic matter. Containers get nothing extra — whatever’s in that bag of potting mix is all there is, and watering washes it away fast.
- Feed with a balanced liquid fertilizer every 2-4 weeks during active growing season
- Cut back or stop entirely in winter when growth slows
- Diluted fish emulsion or a 20-20-20 liquid feed both work well for beginners
Real Example: My container peppers went pale and stopped setting fruit by midsummer one year. Two weeks of regular fertilizing brought the green back and restarted flowering.
Mistake #7: Skipping Pest Prevention Until It’s Too Late
Quick Answer: Balcony and indoor conditions still attract aphids, spider mites, and fungus gnats — often riding in on new nursery plants. Weekly inspection catches problems while they’re still manageable.
Apartment growers assume height or indoor placement protects them from pests. It doesn’t. Aphids arrive on new plants, spider mites thrive in dry heated apartments, and fungus gnats love overwatered soil.
- Check the undersides of leaves weekly for sticky residue or tiny webbing
- Quarantine new plants for a week before placing them near your others
- Treat early outbreaks with insecticidal soap or diluted neem oil, reapplied every 5-7 days
Pro Tip: Yellow sticky traps cost a few dollars and catch fungus gnats before you even notice a problem exists.
Mistake #8: Not Accounting for Seasonal Light and Temperature Shifts
The sun’s angle changes drastically between June and December, and a windowsill that got six hours of light in summer might get two by winter. Radiator heat also dries out both soil and air fast.
Rotate plants closer to windows as daylight shortens, cut back watering frequency as growth slows, and pause fertilizing until spring pushes new growth again.
As of the 2026 growing season, more apartment gardeners are adding small grow lights to bridge these seasonal gaps — worth considering if your space runs consistently dim.
Materials and Tools Every Apartment Gardener Should Start With
Quick Answer: A handful of basics prevents most beginner mistakes before they happen. Skip the fancy gadgets and start with these essentials.
- Quality potting mix with perlite or vermiculite already blended in
- Pots with actual drainage holes, sized to the mature plant
- A cheap moisture meter, or commit to the finger test habit
- Balanced liquid fertilizer for regular feeding
- Small pruning snips for deadheading and pest damage removal
- Saucers to catch runoff without staining floors or furniture
For a full rundown of what to buy before your first purchase, check out this apartment gardening for beginners guide.
Step-by-Step: Setting Up Your First Apartment Container Correctly
Step 1 – Match Plant to Light and Space
Before buying anything, spend a day tracking your window or balcony’s actual direct sun hours. Match that number to a plant suited for it, not the plant you wish would work.
Step 2 – Prep the Right Pot and Soil
Pick a container with drainage holes sized for the plant’s mature root system, then fill it with a quality potting mix. Skip garden soil entirely, no matter how much you have on hand.
Step 3 – Establish a Watering and Feeding Routine
Set a daily check-in habit using the finger test instead of a rigid calendar. Add liquid fertilizer every 2-4 weeks once the plant is actively growing.
Want more layout ideas once your basics are dialed in? This apartment balcony garden ideas roundup is a good next stop.
Regional and Seasonal Considerations for Indoor/Balcony Growing
Your USDA zone still matters for balcony growing, but indoor heating and cooling change the equation compared to an in-ground bed. A zone 6b apartment with forced-air heat can feel more like zone 9 humidity-wise indoors during winter.
Dry heated air pulls moisture from both soil and leaves faster than outdoor conditions would. A pebble tray or small humidifier near sensitive plants like ferns can offset this without overwatering the roots.
Common Problems & Solutions
Yellowing Leaves Despite Regular Care
Quick Answer: Yellowing usually means overwatering or nitrogen deficiency. Check soil moisture first — soggy soil points to overwatering, while dry soil with pale new growth points to a feeding gap.
Leggy, Stretched Growth Toward the Window
Quick Answer: Stretching toward light means insufficient overall light levels. Rotate the pot a quarter turn weekly, or add a small LED grow light if the space stays consistently dim.
Pests Appearing Seemingly Out of Nowhere
Quick Answer: New plants and open windows are the two most common entry points for pests. Quarantine new purchases and treat early signs with diluted neem oil before populations explode.
Frequently Asked Questions
What’s the most common mistake new apartment gardeners make?
Overwatering is the top culprit. Anxious beginners water on a fixed schedule instead of checking soil moisture, and containers drain slower than expected, so roots sit wet and eventually rot.
How do I know if my apartment gets enough light for plants?
Try the shadow test: hold your hand a foot above a surface at midday. A sharp, crisp shadow means high light; a fuzzy, faint shadow means low light suited to shade-tolerant plants only.
Can I grow vegetables successfully in an apartment with no balcony?
Yes. A bright south or west-facing window can support herbs, loose-leaf lettuce, and microgreens. Fruiting vegetables like tomatoes need more direct light than most windows provide without a grow light.
How often should beginners fertilize container plants?
Every 2-4 weeks during the active growing season with a balanced liquid fertilizer works for most container plants. Cut back or pause entirely once growth slows in fall and winter.
Conclusion
Most apartment gardening mistakes come down to two things: guessing instead of checking, and treating containers like garden beds. Neither holds up.
Match plants to your real light, check soil before watering, and use proper mix and pot sizing, and you’ll skip the trial-and-error phase I went through the hard way.
Ready to build out your setup? Browse more space-saving small garden ideas for your next container project.
Key Takeaways
- Most apartment gardening mistakes for beginners trace back to overestimating light and overwatering out of habit
- Always use a proper potting mix with drainage holes — never reused garden soil or holeless decorative pots
- Size containers to the plant’s mature root system, not its current nursery pot
- Feed every 2-4 weeks in active season, and inspect weekly for early pest signs
- Adjust light, water, and feeding as seasons shift — your setup isn’t “set and forget”